
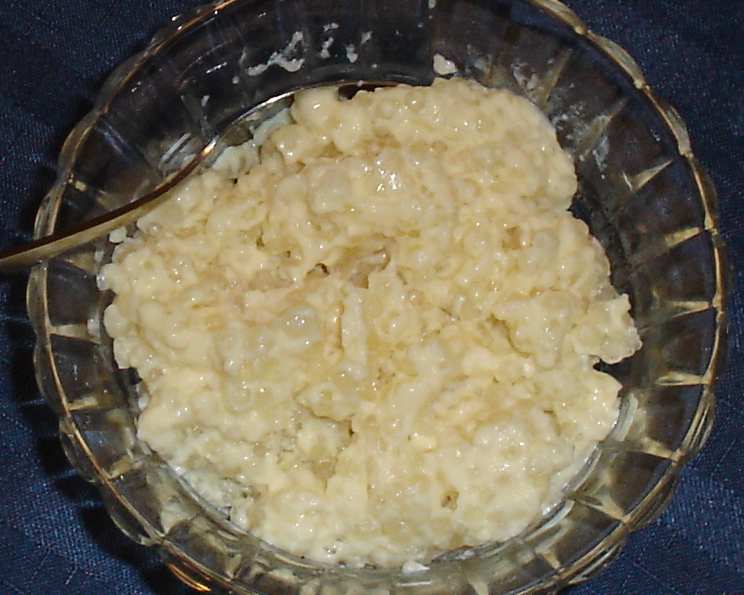
Tapioca Pudding: Easy Microwave Method
My grandmother, Nana Elsie, always had a pot of something delicious simmering on her stove. While her repertoire was vast, encompassing everything from savory stews to delicate tea cakes, it was her tapioca pudding that held a special place in my heart. The creamy texture, the gentle sweetness, and the little pearls that seemed to burst with flavor – it was the ultimate comfort food. I remember sitting at her kitchen table, the warm sunlight streaming through the window, feeling utterly content with a bowl of her homemade tapioca pudding. Now, with this easy microwave method, I can recreate that same magic, bringing a taste of Nana Elsie’s kitchen to my own.
Recipe Overview
- Prep Time: 5 minutes + Overnight Soak
- Cook Time: 12 minutes
- Total Time: 17 minutes + Overnight Soak
- Servings: 8
- Yield: 8 servings
- Dietary Type: Can be made Gluten-Free
Ingredients
- ½ cup small pearl old-fashioned tapioca
- 1 cup milk
- 3 cups milk
- ⅔ cup maple syrup (or other sweetener to taste)
- 2 eggs, beaten
- 2 teaspoons vanilla extract
- Optional: 6 oz (½ cup) semisweet chocolate chips (for chocolate tapioca)
Equipment Needed
- 2-quart microwave-safe glass bowl or measuring cup
- Whisk
- Individual serving dishes or a serving bowl
Instructions
- Begin by placing the tapioca pearls in a bowl and adding 1 cup of milk. Cover the bowl and refrigerate it overnight. This soaking process is crucial for softening the tapioca and achieving the desired creamy texture. Don’t skip this step!
- The next day, pour the remaining 3 cups of milk into a 2-quart microwave-safe glass bowl or measuring cup. A glass bowl is recommended to prevent hotspots.
- Add the soaked tapioca mixture and the maple syrup (or other sweetener) to the milk in the bowl. Using a whisk, thoroughly combine all the ingredients, ensuring there are no lumps of tapioca clinging to the bottom.
- Place the bowl in the microwave and cook on high for 6 minutes. Keep a close eye on the mixture; you don’t want it to boil over.
- Remove the bowl from the microwave and whisk vigorously. This step is essential for breaking up any clumps and ensuring a smooth consistency.
- Return the bowl to the microwave and cook on high for another 2 minutes. Again, watch carefully to prevent boiling over.
- Remove the bowl and whisk thoroughly.
- Microwave on high for 2 more minutes. Do not let it boil over.
- Now, gently add the beaten eggs to the tapioca mixture. Whisk continuously and vigorously as you pour them in to prevent the eggs from scrambling.
- Return the bowl to the microwave and cook on high for 2 minutes.
- Remove the bowl and whisk thoroughly, ensuring the eggs are fully incorporated.
- Microwave on high for 2 more minutes. The mixture should be thickening at this point.
- Remove the bowl from the microwave and stir in the vanilla extract. If you’re making chocolate tapioca, add the semisweet chocolate chips at this stage and whisk until they are melted and completely blended into the pudding.
- Pour the tapioca pudding into individual serving dishes or a larger serving bowl.
- Cover the pudding with plastic wrap, pressing it directly onto the surface to prevent a skin from forming.
- Refrigerate the pudding for at least 2 hours, or until it is completely chilled. The pudding will thicken further as it cools.
Expert Tips & Tricks
- Preventing Boiling Over: Microwaves vary in power, so it’s essential to keep a close eye on the pudding while it’s cooking. If it starts to bubble too vigorously, pause the microwave and let it settle before resuming.
- Achieving a Smooth Texture: The key to a smooth tapioca pudding is thorough whisking. Don’t skimp on this step! Whisk vigorously after each microwave interval to break up any clumps and ensure a creamy consistency.
- Sweetener Options: While this recipe calls for maple syrup, you can easily substitute it with other sweeteners like granulated sugar, brown sugar, honey, or even a sugar substitute. Adjust the amount to your liking.
- Milk Alternatives: For a dairy-free version, use almond milk, soy milk, or coconut milk instead of regular milk. Keep in mind that these substitutions may slightly alter the flavor and texture of the pudding.
- Flavor Enhancements: Add a pinch of cinnamon, nutmeg, or cardamom for a warm and aromatic twist. A tablespoon of coffee liqueur can also add a delightful depth of flavor.
Serving & Storage Suggestions
Serve the chilled tapioca pudding plain or with your favorite toppings. Fresh berries, whipped cream, a sprinkle of cinnamon, or a drizzle of chocolate syrup are all excellent choices.
Leftover tapioca pudding should be stored in an airtight container in the refrigerator. It will keep for up to 3-4 days. Due to the nature of the tapioca and milk, it does not freeze well, as the texture will change significantly upon thawing.
Nutritional Information
(Estimated, based on recipe with maple syrup and whole milk. Values will vary based on specific ingredients.)
| Nutrient | Amount per Serving | % Daily Value |
|---|---|---|
| Calories | 220 kcal | 11% |
| Total Fat | 6g | 8% |
| Saturated Fat | 3g | 15% |
| Cholesterol | 75mg | 25% |
| Sodium | 80mg | 3% |
| Total Carbohydrate | 35g | 12% |
| Dietary Fiber | 0g | 0% |
| Sugars | 20g | N/A |
| Protein | 6g | 12% |
Variations & Substitutions
- Chocolate Chip Cookie Dough Tapioca: Add ¼ cup of mini chocolate chips and ¼ cup of crumbled gluten-free chocolate chip cookies after cooking.
- Coconut Tapioca Pudding: Substitute coconut milk for the regular milk. Add a tablespoon of shredded coconut after cooking for extra flavor and texture.
- Spiced Apple Tapioca Pudding: Stir in ½ cup of diced cooked apples and ½ teaspoon of cinnamon after cooking.
- Vegan Tapioca Pudding: Substitute the milk with almond milk or soy milk and use a vegan egg replacer. Maple syrup is already a vegan-friendly sweetener.
- Reduced Sugar Tapioca Pudding: Use a sugar substitute that is appropriate for baking. Start with half the amount of the maple syrup called for and adjust to taste.
FAQs (Frequently Asked Questions)
Q: Can I use quick-cooking tapioca instead of small pearl tapioca?
A: No, quick-cooking tapioca won’t work in this recipe. Small pearl tapioca requires the overnight soaking to achieve the right consistency.
Q: Why do I need to soak the tapioca overnight?
A: Soaking allows the tapioca pearls to absorb the milk and soften, resulting in a smoother, creamier pudding.
Q: Can I use a different sweetener instead of maple syrup?
A: Yes, you can use any sweetener you prefer, such as granulated sugar, brown sugar, honey, or a sugar substitute. Adjust the amount to your liking.
Q: My pudding is too thin. How can I thicken it?
A: If your pudding is too thin, microwave it for another minute or two, whisking in between intervals, until it reaches your desired consistency.
Q: Can I make this recipe ahead of time?
A: Absolutely! Tapioca pudding is best served chilled and can be made a day or two in advance. Store it in an airtight container in the refrigerator.
Final Thoughts
This easy microwave tapioca pudding recipe is a simple yet satisfying dessert that brings back memories of simpler times. It’s incredibly versatile, allowing you to customize it with your favorite flavors and toppings. So, go ahead and give it a try. I hope it brings as much joy to your table as it did to Nana Elsie’s and mine. Share your creations and feedback – I’d love to hear how you made it your own! Consider pairing it with a warm cup of tea or coffee for the perfect cozy treat.