
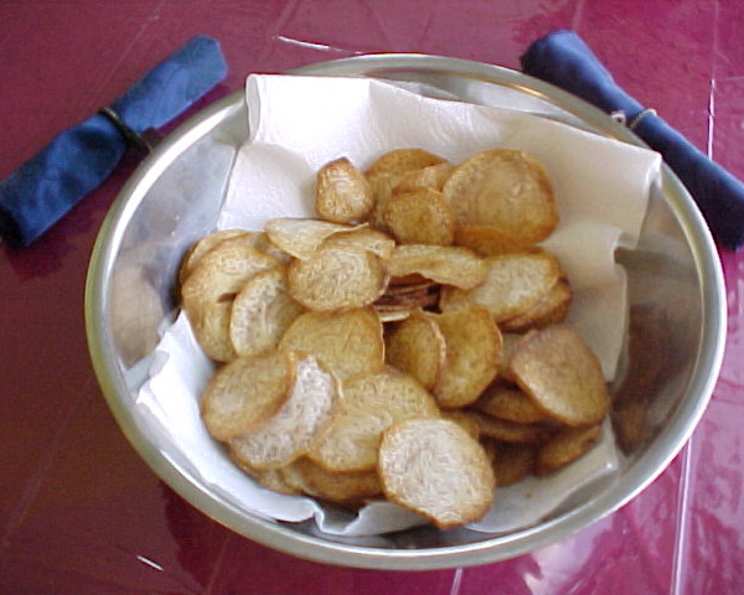
Crispy, Golden Taro Chips: A Taste of the Tropics
The first time I tasted taro chips, I was wandering through a vibrant farmers market on the North Shore of Oahu. The air was thick with the scent of plumeria and grilled pineapple. A local vendor, his face tanned and lined from years in the sun, offered me a sample of his homemade chips. They were unlike anything I’d ever tasted – subtly sweet, undeniably nutty, and with a satisfying crunch that kept me coming back for more. I immediately bought a bag (and then another!). These aren’t your average potato chips; they offer a taste of the islands with every bite.
Recipe Overview
- Prep Time: 10 minutes
- Cook Time: 6-8 minutes per batch
- Total Time: 25-30 minutes
- Servings: 8
- Yield: Approximately 4 cups of chips
- Dietary Type: Vegan, Gluten-Free, Dairy-Free
Ingredients
- 2-3 taro root, about 2 inches in diameter
- 3-4 cups vegetable oil, for deep frying (canola or peanut oil work well)
- Salt, to taste
Equipment Needed
- Deep fryer or large, heavy-bottomed pot
- Mandoline or sharp knife
- Slotted spoon or spider
- Paper towels
- Large bowl
Instructions
-
Prepare the Taro: Begin by thoroughly washing and scrubbing the taro root to remove any dirt or debris. Use a vegetable peeler to peel the skin off the taro.
-
Slice the Taro: Using a mandoline or a very sharp knife, carefully slice the taro into thin, even slices, about 1/16 to 1/8 inch thick – a bit thicker than a potato chip. Consistency is key for even cooking. If you’re using a knife, take your time to ensure uniform thickness.
-
Prepare for Frying: Place the sliced taro in a large bowl and cover with cold water. This helps to remove excess starch, resulting in crispier chips. Let them soak for at least 15 minutes, then drain and pat them completely dry with paper towels. Moisture is the enemy of crispness when frying!
-
Heat the Oil: Pour the vegetable oil into a deep fryer or a large, heavy-bottomed pot. Heat the oil to 350°F (175°C). Use a candy thermometer to ensure accurate temperature control. Maintaining the correct temperature is crucial for achieving perfectly cooked chips. If you don’t have a thermometer, test the oil by dropping a single taro slice into the oil; it should sizzle immediately and float to the top within a few seconds.
-
Fry in Batches: Carefully add the taro slices to the hot oil in small batches, ensuring not to overcrowd the fryer. Overcrowding will lower the oil temperature and result in soggy chips. Fry for about 2 minutes per batch, or until the taro chips are lightly golden brown and crispy. Keep an eye on them, as they can burn quickly.
-
Drain and Season: Use a slotted spoon or spider to remove the fried taro chips from the oil and transfer them to a plate or baking sheet lined with paper towels to drain excess oil. Immediately sprinkle generously with salt.
-
Cool and Serve: Allow the taro chips to cool completely before serving. This will allow them to crisp up even further. Serve immediately and enjoy!
Expert Tips & Tricks
- Uniform Slices: Achieving thin, even slices is crucial for even cooking and ultimate crispiness. A mandoline is highly recommended for this.
- Starch Removal: Soaking the taro slices in cold water helps to remove excess starch, preventing them from sticking together and ensuring a crispier result. Don’t skip this step!
- Oil Temperature: Maintaining a consistent oil temperature of 350°F (175°C) is vital. Too low, and the chips will be soggy; too high, and they’ll burn before they cook through.
- Don’t Overcrowd: Fry the taro slices in small batches to prevent the oil temperature from dropping.
- Double Fry: For extra crispy chips, you can double fry them. Fry them once at a slightly lower temperature (325°F) for a few minutes, then remove and let cool slightly. Increase the oil temperature to 350°F and fry them again for a minute or two until golden brown.
- Flavor Infusion: For a more complex flavor, try infusing your oil with herbs or spices. Add a few sprigs of rosemary or thyme to the oil while it’s heating up, or a pinch of chili flakes for a spicy kick. Remember to remove the herbs before frying the taro.
Serving & Storage Suggestions
Serve your freshly made taro chips immediately for the best crispness. They make a fantastic snack on their own or a delicious accompaniment to sandwiches, burgers, or dips. Try serving them with a spicy aioli, guacamole, or a creamy sour cream dip.
To store leftover taro chips, allow them to cool completely and then transfer them to an airtight container. They will stay relatively crisp for up to 2-3 days at room temperature. However, they are best enjoyed fresh. Reheating is not recommended as they will likely become soggy.
Nutritional Information
Here is an approximate nutritional breakdown per serving (based on estimated values and may vary):
| Nutrient | Amount per Serving | % Daily Value |
|---|---|---|
| Calories | 300 kcal | 15% |
| Total Fat | 20g | 31% |
| Saturated Fat | 3g | 15% |
| Cholesterol | 0mg | 0% |
| Sodium | 100mg | 4% |
| Total Carbohydrate | 30g | 10% |
| Dietary Fiber | 2g | 8% |
| Sugars | 1g | 2% |
| Protein | 2g | 4% |
Variations & Substitutions
- Sweet and Spicy: Sprinkle the taro chips with a mixture of brown sugar and chili powder immediately after frying for a sweet and spicy flavor.
- Garlic Parmesan: Toss the warm taro chips with grated Parmesan cheese and garlic powder.
- Seaweed Seasoning: Sprinkle with furikake, a Japanese seaweed seasoning, for a savory and umami-rich flavor.
- Different Oils: Experiment with different oils for frying. Coconut oil will impart a subtle coconut flavor, while avocado oil has a neutral flavor and high smoke point.
- Baked Taro Chips: For a healthier alternative, you can bake the taro chips. Toss the sliced taro with a tablespoon of oil and spread them in a single layer on a baking sheet. Bake at 350°F (175°C) for about 15-20 minutes, flipping halfway through, until golden brown and crispy. Note that baked chips will not be as crispy as fried chips.
- Herbed Taro Chips: Sprinkle with dried herbs like rosemary, thyme, or oregano immediately after frying.
FAQs (Frequently Asked Questions)
Q: Why are my taro chips soggy?
A: Soggy chips are usually caused by overcrowding the fryer, using oil that isn’t hot enough, or not drying the taro slices thoroughly before frying. Make sure to fry in small batches and maintain the oil temperature at 350°F.
Q: Can I use a different type of oil?
A: Yes, you can use other oils with a high smoke point, such as canola oil, peanut oil, or avocado oil. Avoid using olive oil, as it has a lower smoke point and will burn.
Q: How do I know when the taro chips are done?
A: The taro chips are done when they are lightly golden brown and crispy. They will also float to the top of the oil. Be careful not to overcook them, as they can burn quickly.
Q: Can I make these ahead of time?
A: Taro chips are best enjoyed fresh. However, you can prepare the taro slices ahead of time and store them in cold water in the refrigerator for a few hours. Make sure to dry them thoroughly before frying.
Q: Are taro chips healthier than potato chips?
A: Taro chips offer a different nutritional profile than potato chips. They are a good source of fiber and certain vitamins and minerals. However, like any fried snack, they should be consumed in moderation. Baking the chips is a healthier alternative to frying.
Final Thoughts
Now it’s your turn to bring a taste of the islands to your kitchen! These crispy, golden taro chips are surprisingly easy to make and offer a delightful alternative to traditional potato chips. Don’t be afraid to experiment with different seasonings and flavor combinations to create your own signature version. Share your creations with friends and family, and let them experience the unique and delicious flavor of taro. Aloha, and happy cooking!