
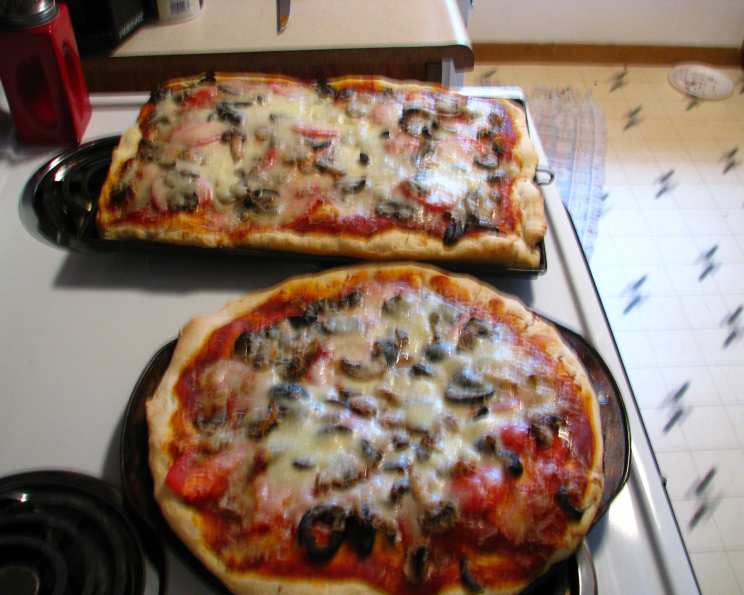
Taste of Home Homemade Pizza Crust
I remember the first time I ever made pizza from scratch. My grandmother, a woman who could coax flavor out of anything, guided me. I was maybe ten years old, all elbows and enthusiasm, and she patiently showed me the magic of yeast, the satisfying stretch of a well-kneaded dough, and the sheer joy of creating something warm and comforting from simple ingredients. The smell of that baking pizza – yeasty, tomatoey, and utterly irresistible – is forever etched in my memory. To this day, nothing beats the satisfaction of pulling a homemade pizza, crafted with love, out of the oven.
Recipe Overview
- Prep Time: 30 minutes
- Cook Time: 25-30 minutes
- Total Time: 1 hour 15 minutes (including rising time)
- Servings: 15
- Yield: 1 large pizza
- Dietary Type: Vegetarian (easily adaptable to vegan)
Ingredients
- 1 (1/4 ounce) package active dry yeast
- 1 teaspoon sugar
- 1 1/4 cups warm water
- 1/4 cup olive oil
- 1 teaspoon salt
- 1 3/4 cups wheat flour
- 1 3/4 cups white flour
- 1 (10 ounce) can tomato sauce
- Shredded cheese (mozzarella, provolone, or your favorite blend)
- Diced black olives
- Mushroom slices
- Tomato slices
Ingredient Notes:
- For a vegan option, substitute the shredded cheese with a plant-based cheese alternative.
- Feel free to experiment with different types of flour for a unique flavor profile. Spelt or rye flour can be added in small quantities.
- The warm water should be comfortably warm to the touch, but not hot, to activate the yeast properly.
Equipment Needed
- Large mixing bowl
- Measuring cups and spoons
- Floured surface (board or countertop)
- Greased pizza pan (12-14 inch)
- Clean kitchen towel
- Oven
Instructions
- In a large bowl, dissolve the active dry yeast and sugar in the warm water. Let the mixture stand for 5 minutes. This allows the yeast to activate and create the bubbles necessary for a light and airy crust. If the mixture doesn’t bubble, your yeast may be old and you’ll need to start over with fresh yeast.
- Add the olive oil and salt to the yeast mixture. Stir well to combine.
- Gradually add the wheat flour and white flour, one cup at a time, to the wet ingredients. Stir until a soft dough forms. The dough should be slightly sticky but not overly so.
- Turn the dough out onto a lightly floured board or countertop. Knead the dough until it is smooth and elastic, about 2-3 minutes. This develops the gluten, giving the pizza crust its chewy texture. If the dough is too sticky, add a little more flour, one tablespoon at a time, until it becomes manageable.
- Place the kneaded dough in a greased bowl, turning it once to coat the entire surface. This prevents the dough from drying out during the rising process.
- Cover the bowl with a clean kitchen towel and let it rise in a warm place until the size nearly doubles, about 45 minutes. A warm place could be near a preheating oven (but not on the oven!), or in a microwave (turned off) with a cup of hot water.
- Once the dough has risen, press it into a greased pizza pan. Use your fingertips to evenly distribute the dough across the pan, creating a slightly raised edge for the crust.
- Spread the tomato sauce evenly over the pizza crust, leaving a small border for the crust.
- Add any desired toppings, such as diced black olives, mushroom slices, and tomato slices. Get creative with your toppings! Roasted vegetables, cooked meats, or even a drizzle of pesto can add unique flavors.
- Cover the pizza with your shredded cheese of choice. Ensure the cheese is evenly distributed to create a melted, gooey topping.
- Bake in a preheated oven at 400 degrees F (200 degrees C) for 25-30 minutes, or until the crust is lightly browned and the cheese is melted and bubbly.
- Remove from oven, let cool slightly, slice, and enjoy!
Expert Tips & Tricks
- For a crispier crust: Par-bake the crust for 10 minutes before adding the toppings. This will prevent the crust from becoming soggy.
- To make ahead: The dough can be made ahead of time and stored in the refrigerator for up to 24 hours. Just punch down the dough before refrigerating, and let it come to room temperature before shaping and baking.
- Flavor boost: Add a pinch of garlic powder, onion powder, or dried Italian herbs to the dough for extra flavor.
- Prevent sticking: Ensure your pizza pan is well-greased, or use parchment paper to line the pan.
- Even baking: Rotate the pizza halfway through baking to ensure even browning.
Serving & Storage Suggestions
Serve your homemade pizza immediately after baking for the best flavor and texture. It’s delicious on its own or with a side salad.
Leftover pizza can be stored in the refrigerator for up to 3 days. Place the slices in an airtight container or wrap them tightly in plastic wrap.
To reheat, you can use the oven, microwave, or skillet. For the oven, preheat to 350 degrees F (175 degrees C) and bake for 5-10 minutes. For the microwave, heat for 30-60 seconds. For the skillet, heat over medium heat for a few minutes per side, until warmed through.
Freezing leftover pizza is also an option. Wrap individual slices tightly in plastic wrap and then place them in a freezer bag. Frozen pizza can be stored for up to 2 months. Thaw completely before reheating.
Nutritional Information
Note: Nutritional information is an estimate and may vary based on specific ingredients and portion sizes.
| Nutrient | Amount per Serving | % Daily Value |
|---|---|---|
| Calories | 141 kcal | 7% |
| Total Fat | 4.1g | 6% |
| Saturated Fat | 0.6g | 3% |
| Cholesterol | 0mg | 0% |
| Sodium | 257mg | 11% |
| Total Carbohydrate | 23.1g | 8% |
| Dietary Fiber | 2.5g | 9% |
| Sugars | 1.2g | 2% |
| Protein | 3.9g | 8% |
Variations & Substitutions
- Gluten-free crust: Substitute the wheat and white flour with a gluten-free flour blend designed for baking. You may need to adjust the amount of liquid depending on the specific blend you use.
- Whole wheat crust: Use all whole wheat flour for a more nutritious and nutty-flavored crust. You may need to add a little more water as whole wheat flour tends to absorb more liquid.
- Different toppings: Experiment with different sauces, cheeses, vegetables, meats, and herbs to create your own signature pizza. Consider seasonal ingredients for a fresh and flavorful twist.
- Spicy pizza: Add a pinch of red pepper flakes to the dough or tomato sauce for a spicy kick.
- Sweet pizza: Spread a thin layer of Nutella or fruit preserves on the crust, top with fresh fruit, and bake for a delicious dessert pizza.
FAQs (Frequently Asked Questions)
Q: Why isn’t my dough rising?
A: Several factors can prevent dough from rising. Make sure your yeast is fresh and active. Also, ensure the water is warm, not hot, as excessive heat can kill the yeast. Finally, the room temperature needs to be warm enough for the yeast to thrive.
Q: Can I use a stand mixer to make the dough?
A: Yes, you can use a stand mixer with a dough hook attachment. Combine the ingredients as directed, then knead on low speed for 5-7 minutes, or until the dough is smooth and elastic.
Q: How do I prevent my pizza crust from getting soggy?
A: Par-baking the crust for 10 minutes before adding the toppings can help prevent a soggy crust. Also, avoid overloading the pizza with too many toppings, especially those with high moisture content.
Q: Can I freeze the pizza dough?
A: Yes, you can freeze the pizza dough after it has risen. Punch down the dough, wrap it tightly in plastic wrap, and then place it in a freezer bag. Thaw completely before shaping and baking.
Q: What’s the best type of cheese for pizza?
A: Mozzarella is a classic choice for pizza, but you can also use provolone, cheddar, or a blend of cheeses. Experiment with different cheeses to find your favorite flavor combination.
Final Thoughts
Homemade pizza is more than just a meal; it’s an experience. It’s about gathering around the kitchen, kneading dough, and creating something delicious together. This recipe is a perfect starting point for your pizza-making adventures. So, gather your ingredients, preheat your oven, and get ready to enjoy a taste of home. Don’t hesitate to experiment with different toppings and flavors to create your own signature pizza. And most importantly, share your creations with loved ones and savor the joy of homemade goodness.