
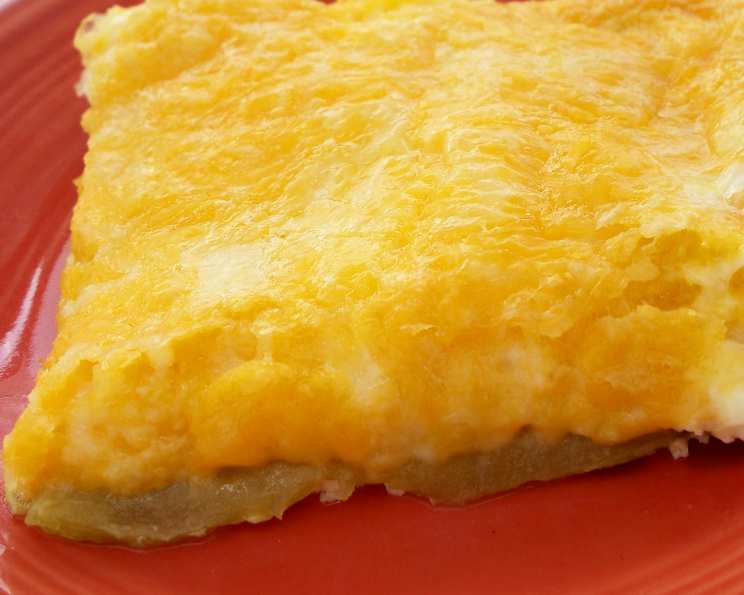
Tasty Chile Relleno Bake
The aroma alone transports me back to my abuela’s kitchen in Santa Fe. The comforting scent of roasted green chiles mingling with melted cheese, it’s a culinary hug. I can almost hear her humming a traditional song as she assembled a similar dish, her hands moving with the practiced grace of generations. While her recipe was a closely guarded family secret, this Chile Relleno Bake captures the essence of that warmth and flavor, making it a regular fixture on my table.
Recipe Overview
- Prep Time: 15 minutes
- Cook Time: 30 minutes
- Total Time: 45 minutes
- Servings: 6
- Yield: 1 9×9 inch pan
- Dietary Type: Gluten-Free
Ingredients
- 1 (7 ounce) can whole green chilies
- ½ lb Monterey Jack cheese, grated
- ¼ lb Cheddar cheese, grated
- ¾ cup milk
- 2 tablespoons flour
- ¼ teaspoon salt
- 2 eggs, beaten
Equipment Needed
- 9×9 inch baking pan
- Mixing bowl
- Grater
- Whisk or fork
Instructions
-
Begin by preheating your oven to 350 degrees Fahrenheit (175 degrees Celsius). While the oven is heating, grease a 9×9 inch baking pan thoroughly. This will prevent the bake from sticking and make it easier to serve.
-
Open the can of whole green chilies and gently remove each chili. Carefully tear each chili so that it lies relatively flat. This creates a consistent layer in the pan, ensuring even distribution of flavor and texture. Spread the flattened chilies evenly across the bottom of the greased baking pan, creating a base layer.
-
In a separate bowl, combine the grated Monterey Jack cheese and Cheddar cheese. Sprinkle the combined cheeses evenly over the layer of green chilies in the baking pan. Make sure the cheese covers the entire surface, as this will create a delicious, melty topping.
-
In a mixing bowl, whisk together the remaining ingredients: milk, flour, salt, and beaten eggs. Whisk until the mixture is smooth and free of any lumps of flour. This creates the custard-like base that holds the entire bake together.
-
Gently pour the milk and egg mixture evenly over the layer of cheese in the baking pan. Ensure that the mixture covers all of the cheese and chilies, penetrating into all the nooks and crannies. This will help the bake set properly and prevent it from drying out.
-
Carefully transfer the baking pan to the preheated oven and bake for 30 minutes. Check for doneness by inserting a knife into the center of the bake. If the knife comes out clean, the bake is ready. If not, continue baking for a few more minutes until the knife comes out clean. The top should be lightly golden brown, and the cheese should be melted and bubbly.
-
Remove the Chile Relleno Bake from the oven and let it cool slightly before serving. This allows the bake to set further, making it easier to cut and serve.
Expert Tips & Tricks
-
Roasting the Chilies: For a deeper, smokier flavor, roast fresh poblano peppers instead of using canned green chilies. Roast them under the broiler until the skin is blackened, then place them in a bowl covered with plastic wrap to steam. Once cooled, peel off the skin, remove the seeds, and proceed with the recipe.
-
Cheese Blend: Feel free to experiment with different cheese blends. Pepper jack cheese adds a spicy kick, while Oaxaca cheese offers a mild, stringy texture.
-
Preventing Soggy Bottom: To prevent a soggy bottom, you can lightly toast the torn chilies in a dry skillet before arranging them in the pan. This will help to remove excess moisture.
-
Make-Ahead Tip: The Chile Relleno Bake can be assembled ahead of time and stored in the refrigerator for up to 24 hours before baking. This makes it a great option for entertaining. Just add a few minutes to the baking time if baking from cold.
-
Adjusting for Altitude: If you’re baking at a high altitude, you may need to slightly increase the baking time. Keep a close eye on the bake and check for doneness frequently.
Serving & Storage Suggestions
Serve the Chile Relleno Bake warm, either as a main course or as a side dish. It pairs perfectly with a dollop of sour cream or Greek yogurt, a sprinkle of chopped cilantro, and a side of Mexican rice and refried beans.
Leftovers can be stored in an airtight container in the refrigerator for up to 3 days. To reheat, you can microwave individual portions or bake the entire bake in a preheated oven at 350 degrees Fahrenheit (175 degrees Celsius) until warmed through. It’s not recommended to freeze this dish due to the texture changes in the cheese and custard.
Nutritional Information
| Nutrient | Amount per Serving | % Daily Value |
|---|---|---|
| Calories | 284.3 kcal | N/A |
| Calories from Fat | 185 g | 65% |
| Total Fat | 20.6 g | 31% |
| Saturated Fat | 12.4 g | 62% |
| Cholesterol | 128.4 mg | 42% |
| Sodium | 458.1 mg | 19% |
| Total Carbohydrate | 7.2 g | 2% |
| Dietary Fiber | 0.6 g | 2% |
| Sugars | 2.1 g | N/A |
| Protein | 18 g | 36% |
Variations & Substitutions
-
Spicy Version: Add a pinch of cayenne pepper or a diced jalapeño to the milk and egg mixture for a spicier kick. You could also use pepper jack cheese.
-
Vegetarian Option: While already vegetarian, you can add other vegetables like corn, zucchini, or bell peppers to the cheese layer for added flavor and nutrients.
-
Dairy-Free Version: Substitute the milk with unsweetened almond milk or another plant-based milk alternative. Use a dairy-free cheese alternative for the Monterey Jack and Cheddar. Be mindful that these may not melt the same way as traditional cheeses.
-
Low-Carb Version: While the base recipe is already relatively low in carbs, you can omit the flour or substitute it with a low-carb alternative like almond flour or coconut flour.
-
Mexican Chorizo Addition: Brown and crumble some Mexican chorizo and add it to the cheese layer for a meaty and flavorful twist.
FAQs (Frequently Asked Questions)
Q: Can I use fresh chilies instead of canned?
A: Absolutely! Freshly roasted and peeled poblano peppers will add a delicious smoky flavor to the dish.
Q: Can I make this ahead of time?
A: Yes, you can assemble the bake ahead of time and store it in the refrigerator for up to 24 hours before baking.
Q: How do I prevent the bake from being watery?
A: Make sure to drain the canned chilies well and consider lightly toasting them in a dry skillet before assembling the bake.
Q: What if I don’t have a 9×9 inch pan?
A: You can use a slightly larger or smaller pan, but you may need to adjust the baking time accordingly.
Q: Can I freeze this dish?
A: While you can freeze it, the texture of the cheese and custard may change upon thawing, so it’s best enjoyed fresh.
Final Thoughts
This Chile Relleno Bake is more than just a recipe; it’s a celebration of simple ingredients transformed into a comforting and satisfying meal. I hope this recipe inspires you to create your own memories in the kitchen, perhaps even sparking a new tradition in your family. Don’t be afraid to experiment with different variations and substitutions to make it your own. And most importantly, enjoy the process of cooking and sharing this delicious dish with those you love. Please, share your feedback!