
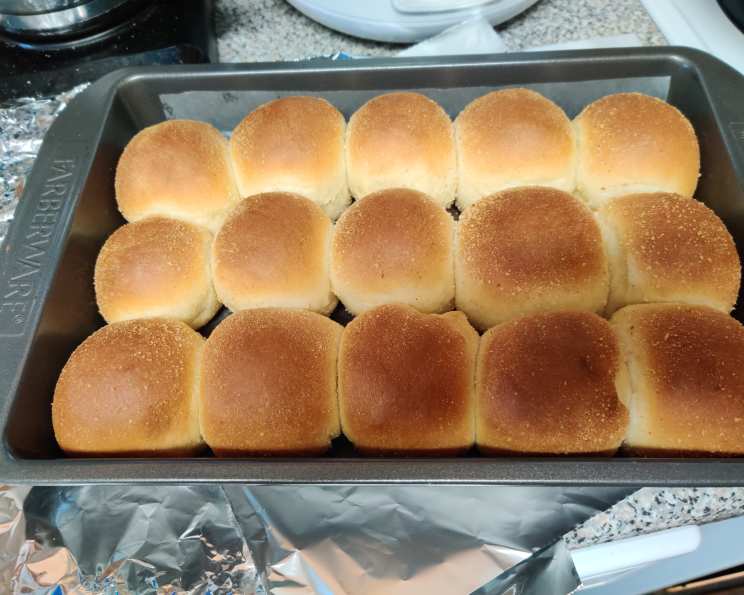
The Irresistible Charm of Homemade Pandesal: A Taste of Filipino Mornings
The smell of pandesal baking is the olfactory embodiment of my childhood weekends. I can vividly recall waking up to that warm, subtly sweet aroma wafting from our kitchen, a beacon calling me to join the family for breakfast. My Lola (grandmother) would already be bustling about, a small mountain of freshly baked pandesal nestled in a woven basket, ready to be slathered with butter, dipped in coffee, or simply devoured plain, each bite a perfect balance of soft crumb and slightly salty exterior. It’s a taste of home, a taste of comfort, a taste of pure Filipino joy.
Recipe Overview
- Prep Time: 30 minutes
- Cook Time: 15-20 minutes
- Total Time: 2 hours 20 minutes (including rising time)
- Yields: 24-36 rolls
- Serves: 6-12
- Dietary Type: Not specified, but easily adaptable (see variations)
Ingredients
- 1 cup lukewarm water
- 1/2 cup vegetable oil
- 2 eggs (room temperature)
- 1 teaspoon salt
- 1/2 cup sugar
- 4 3/4 cups bread flour (bread machine flour suggested)
- 1 tablespoon fast-rising yeast (bread machine yeast suggested)
- Breadcrumbs (for coating)
Equipment Needed
- Large mixing bowl (or bread machine)
- Measuring cups and spoons
- Greased bowl for rising
- Lightly floured surface
- Knife or dough cutter
- Greased baking sheet
- Clean kitchen towel
Instructions
-
Activate the Yeast (Optional but Recommended): In a small bowl, combine the lukewarm water and fast-rising yeast. Stir gently and let it stand for 5 minutes. This step helps ensure your yeast is active and will result in a lighter, fluffier pandesal. If you’re using a bread machine, you can skip this step and add all the ingredients directly into the machine.
-
Combine the Wet Ingredients: In a large mixing bowl, whisk together the vegetable oil, eggs (make sure they are at room temperature for better incorporation), salt, and sugar.
-
Add the Yeast Mixture and Flour: If you activated the yeast, pour the yeast mixture into the bowl with the wet ingredients. Gradually add the bread flour, mixing until a shaggy dough forms.
-
Knead the Dough: Turn the dough out onto a lightly floured surface and knead for 8-10 minutes, or until the dough is smooth and elastic. If using a stand mixer with a dough hook, knead on medium speed for 6-8 minutes. The dough should be slightly tacky but not sticky.
-
First Rise: Place the dough in a greased bowl, turning to coat all sides. Cover the bowl with a clean kitchen towel and let it rise in a warm place for 1.5-2 hours, or until doubled in size. Patience is key here! A good rise is crucial for that soft, airy texture.
-
Punch Down the Dough: Once the dough has doubled, gently punch it down to release the air. Turn the dough out onto a lightly floured board.
-
Divide and Shape: Divide the dough into 24-36 equal parts, depending on the desired size of your pandesal. Shape each portion into an oval or a log.
-
Coat in Breadcrumbs: Lightly roll each oval or log in breadcrumbs, ensuring it’s evenly coated. The breadcrumbs provide a delightful textural contrast and a slightly rustic appearance.
-
Second Rise: Place the breadcrumb-coated rolls on a greased baking sheet, leaving some space between each roll to allow for expansion. Cover the baking sheet with a clean kitchen towel and let the rolls rise in a warm, draft-free place for 2-4 hours, or until they are light and doubled in size. This second rise is essential for achieving that signature light and fluffy pandesal texture. For best results, you can let the dough rise in the refrigerator overnight; this slow fermentation will enhance the flavor.
-
Bake: Preheat your oven to 375°F (190°C). Bake the pandesal for 15-20 minutes, or until golden brown. Keep a close eye on them, as baking times may vary depending on your oven. The bottoms should sound hollow when tapped.
-
Cool and Enjoy: Remove the pandesal from the oven and let them cool slightly on the baking sheet before transferring them to a wire rack to cool completely (or partially, if you can’t resist!). Enjoy warm with your favorite fillings or dips.
Expert Tips & Tricks
- Temperature is Key: Lukewarm water (around 105-115°F or 40-46°C) is crucial for activating the yeast. Too hot, and you’ll kill the yeast; too cold, and it won’t activate properly.
- Flour Power: Using bread flour, especially bread machine flour, is highly recommended as it has a higher gluten content, which will result in a chewier, more structured pandesal.
- Overnight Rise: For a deeper, more complex flavor, try letting the dough rise in the refrigerator overnight after the first rise.
- Breadcrumb Prep: For a finer breadcrumb coating, pulse dry bread in a food processor until finely ground.
- Even Baking: Rotate the baking sheet halfway through baking to ensure even browning.
Serving & Storage Suggestions
Pandesal is best served warm and fresh out of the oven. It’s incredibly versatile and can be enjoyed in countless ways:
- Breakfast Classic: Dip it in hot coffee or chocolate.
- Savory Snack: Spread with butter, cheese (like Kraft Singles, a Filipino favorite), or peanut butter.
- Mini Sandwiches: Fill with your favorite meats, cheeses, or spreads.
- Side Dish: Serve alongside soups, stews, or grilled meats.
To store leftover pandesal, place them in an airtight container at room temperature. They will stay fresh for 1-2 days. For longer storage, freeze them in a freezer-safe bag for up to 2 months. To reheat, wrap the pandesal in foil and bake in a preheated oven at 350°F (175°C) for 5-10 minutes, or until warmed through. You can also microwave them for a few seconds, but be careful not to overcook them, as they can become tough.
Nutritional Information
(Estimated values per roll, based on 30 rolls yield)
| Nutrient | Amount per Serving | % Daily Value |
|---|---|---|
| Calories | 150 kcal | 8% |
| Total Fat | 6g | 9% |
| Saturated Fat | 1g | 5% |
| Cholesterol | 20mg | 7% |
| Sodium | 140mg | 6% |
| Total Carbohydrate | 28g | 9% |
| Dietary Fiber | 1g | 4% |
| Sugars | 5g | |
| Protein | 4g | 8% |
Variations & Substitutions
- Dairy-Free Pandesal: Substitute the eggs with flax eggs (1 tablespoon ground flaxseed mixed with 3 tablespoons water, let sit for 5 minutes) and use plant-based milk instead of water.
- Sweet Pandesal (Pan de Coco): Add shredded coconut to the dough and sprinkle some on top before baking. You can also add a bit more sugar to the dough for extra sweetness.
- Ube Pandesal: Incorporate ube (purple yam) extract or powder into the dough for a vibrant color and unique flavor.
- Whole Wheat Pandesal: Replace some of the bread flour with whole wheat flour for a healthier version. Start with replacing 1 cup and adjust from there, as whole wheat flour can make the bread denser.
- Cheese Pandesal: Add small cubes of cheese (like cheddar or quickmelt) to the center of each roll before baking.
FAQs (Frequently Asked Questions)
Q: Why are my pandesal rolls dense and not fluffy?
A: This could be due to several factors: the yeast may not have been active, the dough may not have risen enough, or you may have added too much flour. Make sure your yeast is fresh, give the dough ample time to rise in a warm place, and avoid over-kneading or adding too much flour.
Q: Can I make the dough ahead of time and bake it later?
A: Yes, you can prepare the dough up to the shaping stage, then refrigerate it overnight. Let the rolls come to room temperature for about 30 minutes before baking.
Q: What type of breadcrumbs should I use?
A: You can use plain breadcrumbs, Japanese panko breadcrumbs (for a crispier coating), or even crushed crackers.
Q: Can I freeze the pandesal after baking?
A: Absolutely! Let the pandesal cool completely, then wrap them individually in plastic wrap and place them in a freezer-safe bag. They can be stored in the freezer for up to 2 months.
Q: How do I prevent the pandesal from drying out?
A: Store the pandesal in an airtight container. You can also add a slice of bread to the container to help absorb moisture and keep the rolls soft.
Final Thoughts
Pandesal is more than just bread; it’s a cultural icon, a symbol of Filipino hospitality, and a taste of home. Whether you’re a seasoned baker or a kitchen novice, I encourage you to try this recipe and experience the joy of making your own pandesal. Share your creations with friends and family, and don’t be afraid to experiment with different variations. The possibilities are endless! And if you have your own secret ingredient or technique, please share it in the comments below. Happy baking!