
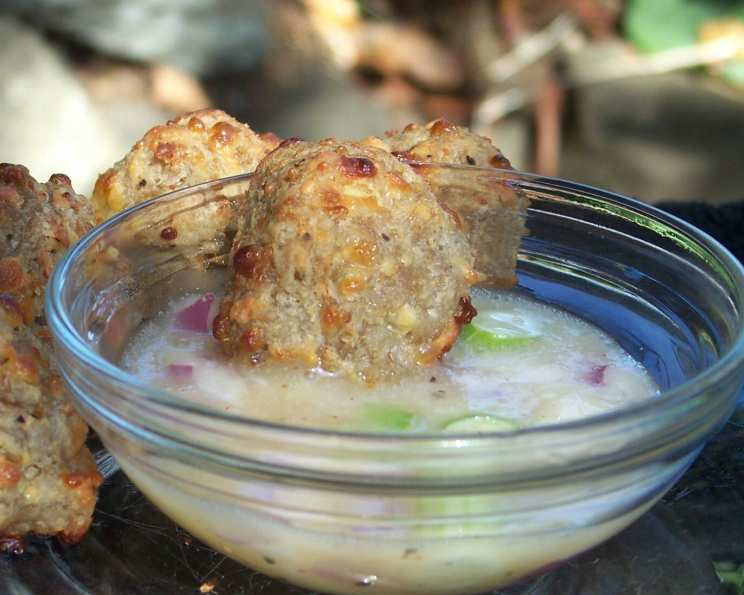
Tasty Turkey Appetizer Balls: A Savory Bite of Comfort
I still remember the aroma that filled my grandmother’s kitchen every Thanksgiving. While the turkey roasted to perfection, she always had a few “chef’s surprises” tucked up her sleeve. One year, it was these delightful little turkey balls – savory, cheesy, and utterly addictive. They were the perfect pre-dinner snack, keeping us all content while the main event was underway. To this day, the smell of them baking instantly transports me back to those cozy holiday gatherings, filled with laughter and the warmth of family.
Recipe Overview
- Prep Time: 10 minutes
- Cook Time: 12-15 minutes
- Total Time: 22-25 minutes
- Yields: 25 balls
- Dietary Type: Gluten-Conscious (can be made gluten-free with GF Bisquick)
Ingredients
- 1 lb ground turkey
- 2 cups Bisquick
- 1/2 cup shredded mozzarella cheese
- 3/4 cup shredded sharp cheddar cheese
Equipment Needed
- Large mixing bowl
- Cookie sheet
- Parchment paper (optional)
Instructions
-
Start by preheating your oven to 400°F (200°C). This is crucial for achieving that perfect golden-brown color and ensuring the turkey is cooked through.
-
In a large mixing bowl, combine the ground turkey, Bisquick, shredded mozzarella cheese, and shredded sharp cheddar cheese.
-
Now, for the fun part! Get your hands in there and mix everything together really well. Using your hands is truly the best way to knead the ingredients and ensure the Bisquick is evenly distributed throughout the mixture. Don’t be afraid to get a little messy! The mixture will be somewhat crumbly at first, but keep working it until it starts to come together like a dough.
-
Once the mixture is well combined, begin rolling it into balls approximately 1-inch in diameter. These don’t have to be perfectly round; a rustic look is perfectly acceptable.
-
Place the 1-inch turkey balls onto a cookie sheet. For easy cleanup, you can line the cookie sheet with parchment paper. This also helps prevent the balls from sticking.
-
Carefully place the cookie sheet into the preheated oven and bake for 12-15 minutes, or until the turkey balls are golden brown and cooked through. To ensure they’re done, you can cut one open and check that the turkey is no longer pink inside. An internal temperature of 165°F (74°C) is ideal.
-
Remove from the oven and serve your tasty turkey balls almost immediately while they are hot. The cheese will be wonderfully melted and the flavors at their peak.
Expert Tips & Tricks
- Don’t overmix: Overmixing can lead to tough turkey balls. Mix just until the ingredients are combined.
- Cheese variations: Feel free to experiment with different types of cheese. Pepper jack for a kick, Gruyere for a nutty flavor, or even a sprinkle of Parmesan on top before baking can add interesting dimensions.
- Make ahead: These can be assembled ahead of time and stored in the refrigerator for up to 24 hours before baking. Just add a few minutes to the baking time if they’re cold.
- Freezing: For longer storage, freeze the unbaked balls on a cookie sheet. Once frozen solid, transfer them to a freezer bag. Bake from frozen, adding about 5-7 minutes to the baking time.
- Flavor boost: Add a pinch of garlic powder, onion powder, or Italian seasoning to the mixture for an extra layer of flavor.
- Binding issues: If your mixture is too dry and not holding together, add a tablespoon of milk or water at a time until it reaches the desired consistency. If it’s too wet, add a little more Bisquick.
Serving & Storage Suggestions
These turkey appetizer balls are best served hot, right out of the oven. They make a fantastic addition to any party spread, tailgate gathering, or holiday buffet. They can be served on their own, or with a dipping sauce like marinara, ranch, honey mustard, or a spicy sriracha mayo.
Leftovers can be stored in an airtight container in the refrigerator for up to 3-4 days. To reheat, you can microwave them for about 30-60 seconds, or bake them in a preheated oven at 350°F (175°C) for about 5-10 minutes, until heated through. You can also freeze leftover cooked turkey balls for up to 2 months. Reheat them in the oven for the best results. It is not recommended to leave the balls at room temperature for more than 2 hours.
Nutritional Information
| Nutrient | Amount per Serving | % Daily Value |
|---|---|---|
| Calories | 88.5 kcal | N/A |
| Calories from Fat | 41 kcal | N/A |
| Total Fat | 4.6 g | 7% |
| Saturated Fat | 1.8 g | 9% |
| Cholesterol | 19.9 mg | 6% |
| Sodium | 174.7 mg | 7% |
| Total Carbohydrate | 6.2 g | 2% |
| Dietary Fiber | 0.2 g | 0% |
| Sugars | 1.2 g | N/A |
| Protein | 5.3 g | 10% |
Note: Nutritional information is an estimate and may vary based on specific ingredients and portion sizes.
Variations & Substitutions
- Gluten-Free: Use gluten-free Bisquick or a similar gluten-free baking mix to make these turkey balls gluten-free.
- Spice it up: Add a pinch of red pepper flakes, a dash of hot sauce, or some finely chopped jalapenos to the mixture for a spicy kick.
- Herbaceous: Incorporate fresh herbs like chopped parsley, chives, or thyme for a burst of flavor.
- Italian Style: Mix in some Italian seasoning, garlic powder, and Parmesan cheese for an Italian-inspired twist. Serve with marinara sauce.
- Breakfast Balls: Add a scrambled egg, crumbled bacon, and a touch of maple syrup to the mixture for a breakfast-inspired version.
- Vegetarian Option: Substitute the ground turkey with plant-based ground “meat” for a vegetarian alternative.
FAQs (Frequently Asked Questions)
Q: Can I use a different type of ground meat?
A: Absolutely! While this recipe calls for ground turkey, you can easily substitute it with ground chicken, ground beef, or even ground sausage for a different flavor profile.
Q: Can I make these ahead of time and freeze them?
A: Yes, these turkey balls freeze beautifully! Simply prepare them as directed, then freeze them on a baking sheet before transferring them to a freezer bag for longer storage. Bake from frozen, adding a few extra minutes to the cooking time.
Q: What kind of dipping sauce goes well with these?
A: The possibilities are endless! Marinara sauce, ranch dressing, honey mustard, BBQ sauce, or even a simple sour cream dip are all great options.
Q: Can I add vegetables to the mixture?
A: Of course! Finely chopped vegetables like onions, bell peppers, or zucchini can add extra flavor and nutrients to the turkey balls. Just make sure to squeeze out any excess moisture before adding them to the mixture.
Q: My turkey balls are dry. What did I do wrong?
A: Overbaking or overmixing can lead to dry turkey balls. Make sure to bake them for the recommended time and mix the ingredients just until combined. Adding a little extra moisture, like a tablespoon of milk or water, can also help.
Final Thoughts
I encourage you to try this recipe for Tasty Turkey Appetizer Balls. They are incredibly versatile and can be adapted to suit your taste preferences. Whether you’re looking for a crowd-pleasing appetizer for your next party or a quick and easy snack, these turkey balls are sure to be a hit. Don’t hesitate to experiment with different cheeses, spices, and dipping sauces to create your own unique version. And please, share your feedback – I’d love to hear how they turned out! Consider serving them alongside a refreshing cranberry salsa or a crisp green salad for a well-rounded appetizer spread. Happy cooking!