
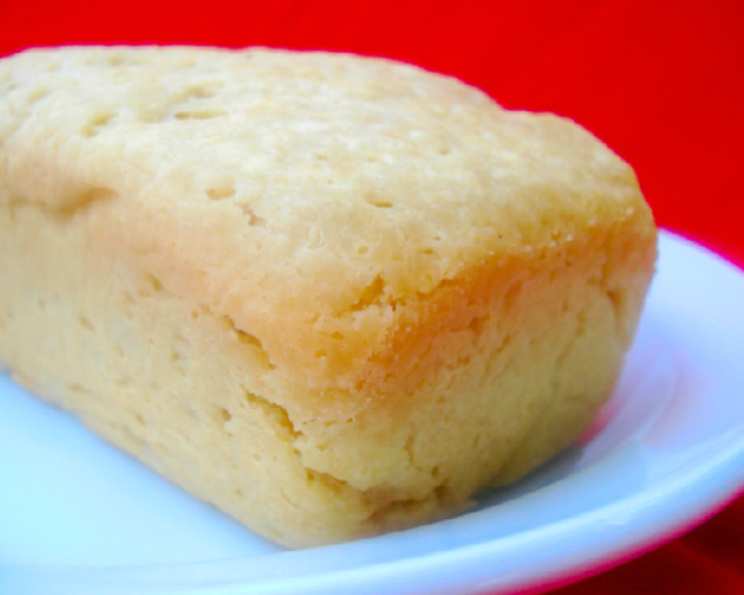
Ted’s Special Mini Loaves: Bread Machine Magic
The scent of freshly baked bread is, without a doubt, one of the most comforting aromas in the world. I remember visiting my grandmother’s house as a child and being instantly enveloped in that warm, yeasty fragrance. It wasn’t just the smell; it was the promise of something delicious and the feeling of being utterly cared for. She always baked her loaves by hand, a laborious process I admired but rarely attempted. That is, until I discovered Ted’s Special Mini Loaves. The ease of the bread machine, combined with a few simple ingredients, delivers a loaf that rivals my grandmother’s, both in flavor and in creating that same sense of home.
Recipe Overview
- Prep Time: 15 minutes
- Cook Time: 35 minutes
- Total Time: 1 hour 50 minutes (includes dough cycle and rising time)
- Servings: 4
- Yield: 4 Mini Loaves
- Dietary Type: Vegetarian
Ingredients
- 4 cups flour (all-purpose or bread flour)
- 2 tablespoons sugar
- 1 teaspoon salt
- 1 1/2 teaspoons yeast (active dry or instant)
- 1 1/2 cups whipping cream
- 1/4 cup water
- 2 tablespoons butter, melted (for brushing)
Equipment Needed
- Bread Machine
- Measuring cups and spoons
- 4 Mini Loaf Pans
- Pastry brush
- Clean kitchen towel
Instructions
-
Begin by adding all the dry ingredients to the bread machine pan in the following order: flour, sugar, salt, and yeast. It’s important to add the ingredients in this order to prevent the yeast from prematurely activating.
-
Next, add all the wet ingredients: whipping cream and water. Pour them evenly over the dry ingredients.
-
Secure the bread machine pan into the machine. Set the machine for a 2-pound loaf size and select the dough cycle only. This cycle will handle the kneading and the first rise, taking the guesswork out of the process.
-
Once the dough cycle is completed, carefully remove the dough from the bread machine pan. Lightly flour a clean work surface.
-
Divide the dough into 4 equal portions. Gently shape each portion into a ball.
-
Prepare 4 mini loaf pans by thoroughly buttering the insides. This will prevent the loaves from sticking and give them a beautifully golden crust.
-
Place one dough ball into each of the prepared mini loaf pans.
-
Using a pastry brush, generously paint the tops of the dough balls with melted butter. This will add flavor and help create a soft, golden crust.
-
Cover the loaf pans with a clean kitchen towel and allow the dough to rise in a warm place until it has approximately doubled in size. This usually takes about 30-60 minutes, depending on the temperature of your kitchen.
-
Preheat your oven to 375°F (190°C). Make sure the oven is fully preheated before baking.
-
Once the dough has risen, place the loaf pans in the preheated oven and bake for 35 minutes, or until the loaves are golden brown and sound hollow when tapped on the bottom.
-
Remove the mini loaves from the oven and let them cool in the pans for a few minutes before transferring them to a wire rack to cool completely. This prevents the bottoms from becoming soggy.
Expert Tips & Tricks
- For an extra rich flavor, consider using heavy cream instead of whipping cream.
- If you want a slightly sweeter loaf, add an extra tablespoon of sugar.
- If your kitchen is cold, you can speed up the rising process by placing the dough in a slightly warmed oven (turned off, of course!).
- To prevent the crust from getting too dark, tent the loaves with foil during the last 10-15 minutes of baking.
- If you find that your bread machine tends to dry out the dough, add an extra tablespoon or two of water. Conversely, if the dough seems too wet, add a tablespoon of flour at a time until it reaches the desired consistency.
- Ted suggests placing the dough balls in a buttered 2lb bread tin for a larger loaf. You can also butter the top, cover with a cloth, and refrigerate overnight, allowing an hour at room temperature for the final rise before baking.
- These also make wonderful buns – simply size them accordingly!
Serving & Storage Suggestions
These mini loaves are delicious served warm with butter, jam, or honey. They also make excellent sandwich bread or can be used for toast. Leftover bread can be stored at room temperature in an airtight container for up to 2 days, or in the refrigerator for up to 5 days. For longer storage, wrap the loaves tightly in plastic wrap and freeze for up to 3 months. To reheat, thaw the loaves completely and warm them in a 350°F (175°C) oven for 5-10 minutes.
Nutritional Information
(Estimated per mini loaf; values may vary based on specific ingredients used)
| Nutrient | Amount per Serving | % Daily Value |
|---|---|---|
| Calories | 843 kcal | N/A |
| Total Fat | 40g | 61% |
| Saturated Fat | 24g | 122% |
| Cholesterol | 138mg | 45% |
| Sodium | 660mg | 27% |
| Total Carbohydrate | 105g | 34% |
| Dietary Fiber | 4g | 14% |
| Sugars | 7g | N/A |
| Protein | 15g | 30% |
Variations & Substitutions
- Dairy-Free: While this recipe hinges on the richness of whipping cream, you could experiment with full-fat coconut cream for a dairy-free alternative. Be aware that the flavor and texture will change significantly.
- Whole Wheat: Substitute up to half of the all-purpose flour with whole wheat flour for a nuttier flavor and added fiber.
- Herb Bread: Add 1-2 tablespoons of chopped fresh herbs, such as rosemary, thyme, or oregano, to the dry ingredients for an herb-infused loaf.
- Garlic Bread: Mix 1-2 teaspoons of garlic powder into the dry ingredients and brush the baked loaves with garlic-infused butter.
- Sweet Bread: Add raisins, chopped nuts, or dried cranberries for a sweeter loaf.
FAQs (Frequently Asked Questions)
Q: Can I use instant yeast instead of active dry yeast?
A: Yes, you can use instant yeast. Simply add it to the dry ingredients along with the flour, sugar, and salt. No proofing is required.
Q: My bread machine doesn’t have a 2-pound loaf setting. What should I do?
A: Choose the closest loaf size setting to 2 pounds. If your machine only has a 1-pound setting, you may need to reduce the recipe proportionally.
Q: The crust of my bread is getting too dark. What can I do?
A: Tent the loaves with foil during the last 10-15 minutes of baking to prevent the crust from burning.
Q: Why is my bread dense and not rising properly?
A: Ensure that your yeast is fresh and active. Also, make sure you are measuring the ingredients accurately, especially the flour. Over-measuring flour can result in a dense loaf.
Q: Can I knead the dough by hand instead of using a bread machine?
A: Yes, you can knead the dough by hand. Knead for 8-10 minutes until the dough is smooth and elastic. Allow it to rise in a warm place for 1-1.5 hours before shaping and baking.
Final Thoughts
Ted’s Special Mini Loaves are more than just bread; they’re a taste of comfort and a connection to simple pleasures. Whether you’re a seasoned baker or a novice in the kitchen, this recipe is a guaranteed success, thanks to the convenience of the bread machine. I encourage you to try this recipe and experience the joy of baking your own homemade bread. Share your creations with friends and family, and don’t hesitate to experiment with variations to make it your own. Happy baking!