
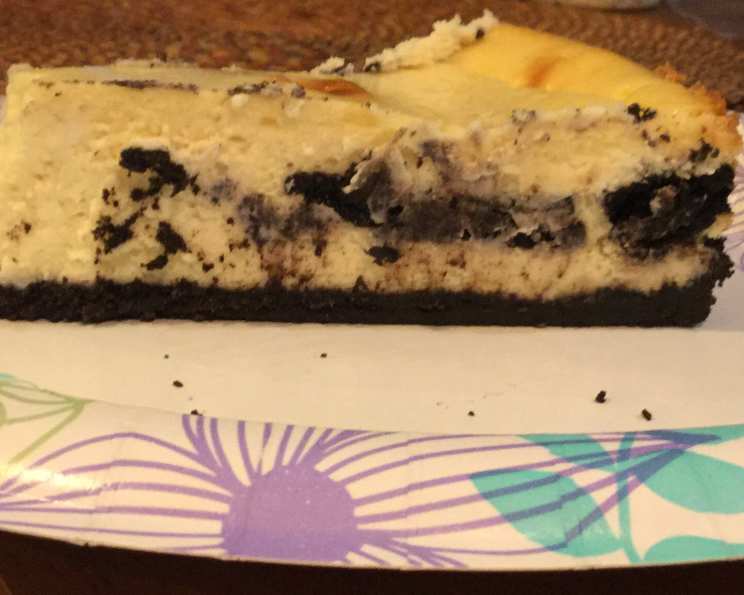
Teenager’s Dream Oreo Cheesecake
I can almost smell the sugary scent of chocolate sandwich cookies and creamy cheesecake filling just thinking about this recipe. This dessert isn’t just a cheesecake; it’s a time machine that transports me back to my teenage years, sneaking slices from the fridge late at night with my best friend, fueled by secrets and laughter. It was our cheesecake, a symbol of comfort, indulgence, and the unwavering bond of friendship. Every bite is a reminder of those carefree days and the simple joys of shared moments.
Recipe Overview
- Prep Time: 25 minutes
- Cook Time: 1 hour 20 minutes
- Total Time: 5 hours 45 minutes (includes chilling time)
- Servings: 12-16
- Yield: 1 cheesecake
- Dietary Type: Not Gluten-Free
Ingredients
- 1 (1 1/4 lb) package chocolate sandwich style cookies (like Oreos)
- 1/3 cup butter, melted
- 4 (8 ounce) packages cream cheese, softened
- 1 cup sugar
- 1/3 cup whipping cream
- 6 large eggs
- 2 tablespoons all-purpose flour
- 2 teaspoons vanilla extract
Equipment Needed
- Food processor
- 9-inch cheesecake pan with removable bottom
- Mixer (stand or hand mixer)
- Measuring cups and spoons
- Mixing bowls
- Cooling rack
- Oven
Instructions
- Preheat your oven to 300 degrees F (150 degrees C).
- Prepare the crust. In a food processor, whirl half of the chocolate sandwich cookies (including the creamy filling!) until they form fine crumbs. This usually takes about 30-60 seconds.
- In a small bowl, mix the cookie crumbs with the melted butter until well combined. The mixture should resemble wet sand.
- Scoop the crumb mixture into the bottom of a 9-inch cheesecake pan with a removable bottom. Press the crumbs evenly over the bottom of the pan and about 1/2 inch up the sides to create a slight lip.
- Chill the crust in the refrigerator for about 20 minutes to help it firm up. This will prevent it from crumbling when you add the filling.
- While the crust is chilling, prepare the cheesecake filling. In a large bowl, using a mixer at medium speed, beat together the softened cream cheese, sugar, and whipping cream until smooth and creamy. Be sure to scrape down the sides of the bowl to ensure everything is well incorporated.
- Add the eggs one at a time, beating well after each addition. This helps prevent the eggs from curdling.
- Add the flour and vanilla extract and beat again until just blended. Do not overmix, as this can lead to a tough cheesecake.
- Pour half of the cream cheese mixture into the chilled crust.
- Break the remaining chocolate sandwich cookies in half and scatter them evenly over the cream cheese mixture, overlapping the cookies if necessary to use them all.
- Pour the remaining cream cheese mixture over the cookie layer, ensuring the cookies are mostly covered.
- Bake the cheesecake in the preheated oven for approximately 1 hour and 20 minutes, or until the top is golden brown and the cheesecake jiggles only slightly in the center when gently shaken.
- Remove the cheesecake from the oven and let it cool on a wire rack.
- Once the cheesecake is completely cool, cover it loosely and chill in the refrigerator for at least 4 hours, or preferably overnight, to allow it to set completely.
- Before serving, run a thin knife between the cake and the pan sides to loosen it. Then, carefully remove the rim of the cheesecake pan.
Expert Tips & Tricks
- Prevent Cracking: To prevent the cheesecake from cracking during baking, place a pan of hot water on the rack below the cheesecake. The steam helps to keep the oven moist and prevents the cheesecake from drying out and cracking.
- Room Temperature Ingredients: Make sure your cream cheese is fully softened. This helps to avoid lumps in your cheesecake filling. Similarly, use room temperature eggs for a smoother batter.
- Even Cookie Distribution: Press the halved cookies gently into the first layer of filling to help them stay in place and prevent them from all floating to the top.
- Doneness Test: The cheesecake is done when the edges are set but the center still has a slight jiggle. It will continue to set as it cools. Avoid overbaking, as this can lead to a dry, cracked cheesecake.
- If you whirl the cream cheese mixture in a food processor, the filling will be thin enough to allow the cookies to float to the top. If prepared with a mixer, filling will keep the cookies in place.
Serving & Storage Suggestions
For an elegant presentation, slice the cheesecake with a warm, wet knife for clean cuts. You can garnish it with a dusting of cocoa powder, chocolate shavings, or a few fresh berries. A dollop of whipped cream or a scoop of vanilla ice cream is always a welcome addition.
Store leftover cheesecake in an airtight container in the refrigerator. It will keep for up to 5 days. For longer storage, you can freeze the cheesecake. Wrap it tightly in plastic wrap and then in foil, and it will keep in the freezer for up to 2 months. Thaw it overnight in the refrigerator before serving.
Nutritional Information
| Nutrient | Amount per Serving | % Daily Value |
|---|---|---|
| Calories | 655 kcal | – |
| Calories from Fat | 406 g | 62% |
| Total Fat | 45.2 g | 69% |
| Saturated Fat | 23.2 g | 115% |
| Cholesterol | 198.9 mg | 66% |
| Sodium | 564 mg | 23% |
| Total Carbohydrate | 54.5 g | 18% |
| Dietary Fiber | 1.4 g | 5% |
| Sugars | 38.6 g | – |
| Protein | 10.6 g | 21% |
Note: Nutritional information is an estimate and may vary based on specific ingredients and portion sizes.
Variations & Substitutions
- Gluten-Free: Substitute the regular chocolate sandwich cookies with gluten-free chocolate sandwich cookies and use a gluten-free all-purpose flour blend in the filling.
- Lower Sugar: Reduce the amount of sugar in the filling by 1/4 cup or substitute with a sugar alternative. Note that this may affect the texture and flavor of the cheesecake.
- Chocolate Lover’s Dream: Add 1/4 cup of cocoa powder to the cream cheese mixture for an extra chocolatey flavor. You could also drizzle melted chocolate over the top of the finished cheesecake.
- Seasonal Variation: In the fall, add a teaspoon of pumpkin pie spice to the cream cheese filling for a seasonal twist. You could also swirl in some pumpkin puree.
FAQs (Frequently Asked Questions)
Q: Can I make this cheesecake ahead of time?
A: Absolutely! In fact, cheesecake tastes even better after it has had a chance to chill in the refrigerator for at least 4 hours, or even overnight. This allows the flavors to meld together and the texture to set properly.
Q: My cheesecake cracked. What did I do wrong?
A: Cheesecake cracking can be caused by a number of factors, including overbaking, baking at too high a temperature, or sudden temperature changes. Try using the water bath method mentioned in the tips to help prevent cracking.
Q: Can I use a different size pan?
A: While a 9-inch cheesecake pan is recommended for this recipe, you can use an 8-inch pan. Keep in mind that the baking time may need to be adjusted slightly, and the cheesecake will be thicker.
Q: Can I freeze this cheesecake?
A: Yes, you can freeze the cheesecake. Wrap it tightly in plastic wrap and then in foil to prevent freezer burn. Thaw it overnight in the refrigerator before serving.
Q: Can I skip the crust chilling step?
A: While you can skip chilling the crust, chilling it helps the butter solidify, resulting in a sturdier crust that is less likely to crumble when you add the filling.
Final Thoughts
This Teenager’s Dream Oreo Cheesecake is more than just a dessert; it’s a celebration of flavors and memories. Whether you’re a seasoned baker or a novice in the kitchen, this recipe is sure to impress. Gather your ingredients, preheat your oven, and prepare to indulge in a slice of pure bliss. I hope this cheesecake becomes a beloved tradition in your own home, creating sweet moments and lasting memories for you and your loved ones. Don’t hesitate to experiment with variations and substitutions to make it your own, and most importantly, enjoy the process!