
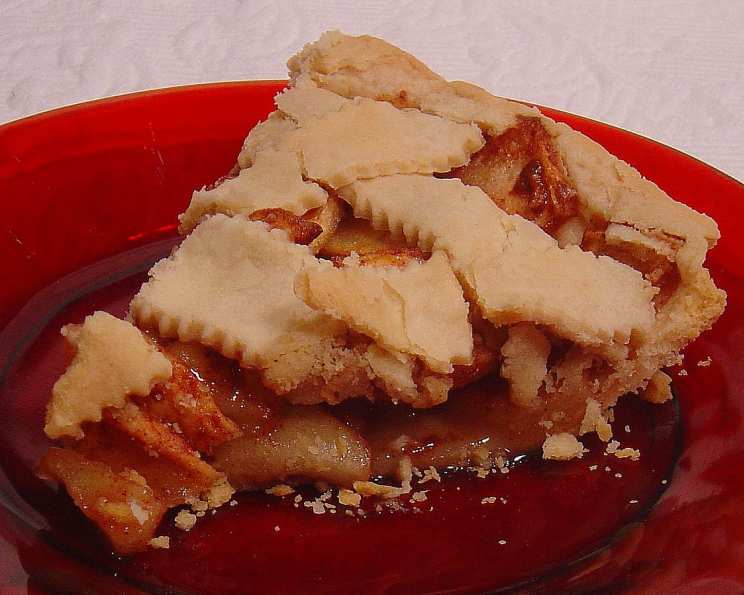
Teet Bush’s Dutch Apple Pie (Diabetic)
The scent of apples and cinnamon baking in the oven instantly transports me back to my grandmother’s kitchen. I remember standing on a rickety stool, watching her hands, gnarled with age and wisdom, deftly peel and slice apples for her famous pie. Though not this particular recipe, the warm, comforting aroma is nearly identical. Her pies were legendary, and though she’s gone now, the simple act of making an apple pie is a heartfelt tribute to those cherished memories, a way to recreate the warmth and love that always filled her home. This recipe is an adaptation I’ve made to accommodate dietary restrictions, so everyone can enjoy a slice of that cozy nostalgia.
Recipe Overview
- Prep Time: 20 minutes
- Cook Time: 60 minutes
- Total Time: 1 hour 20 minutes
- Servings: 8
- Yield: 1 pie
- Dietary Type: Diabetic-Friendly
Ingredients
- 1 quart apples, peeled and sliced (Granny Smith or Honeycrisp work well)
- 1 cup Splenda granular (or other granular sugar substitute equivalent)
- 4 tablespoons butter, cut into small pieces
- 1 teaspoon cinnamon
- 2 teaspoons flour
- 2 refrigerated pie crusts (store-bought or homemade)
Equipment Needed
- 9-inch glass pie plate
- Large mixing bowl
- Measuring cups and spoons
- Paring knife
- Cookie sheet
Instructions
-
Preheat your oven to 350 degrees Fahrenheit (175 degrees Celsius). It’s essential that your oven is properly preheated to ensure even baking and a beautifully golden crust.
-
If your pie crusts are frozen, allow them to thaw according to the package directions. Generally, this takes about 30 minutes at room temperature. Be careful not to let them get too warm, or they’ll be difficult to work with.
-
In a large mixing bowl, combine the Splenda, cinnamon, and flour. Whisk the dry ingredients together until they are evenly distributed. This ensures that the spices and sweetener are well incorporated throughout the apple filling.
-
Add the peeled and sliced apples to the bowl with the dry ingredients. Toss the apples thoroughly until they are evenly coated with the Splenda mixture. Make sure every slice gets some love!
-
Carefully unroll one of the pie crusts and gently press it into the bottom of the glass pie plate. Flute the edges of the crust to create a decorative border. You can crimp the edges with a fork or use your fingers to create a scalloped pattern.
-
Pour the apple mixture into the prepared pie crust. Distribute the apples evenly across the bottom crust.
-
Dot the top of the apple mixture with the butter. Distribute the butter pieces evenly over the apples. This will add richness and flavor to the filling.
-
Unroll the second pie crust and carefully place it over the apple filling. Seal the top crust to the bottom crust by crimping the edges together. This will help to prevent the filling from bubbling over during baking.
-
Using a sharp knife, cut several slits in the top crust to allow steam to escape during baking. This will prevent the crust from becoming soggy. You can also cut a decorative design into the top crust if you like.
-
Place the pie plate on a cookie sheet to catch any juices that may spill over during baking. This will save you from having to clean your oven later!
-
Bake for approximately one hour, or until the crust is golden brown and the filling is bubbly. Start checking the pie at around 50 minutes to prevent over-browning. If the crust starts to brown too quickly, you can loosely tent it with aluminum foil. The filling should be tender and easily pierced with a fork or knife when it is done.
-
Remove the pie from the oven and let it cool completely on a wire rack before slicing and serving. This allows the filling to set and prevents it from being too runny.
Expert Tips & Tricks
- For an extra layer of flavor, add a dash of nutmeg or allspice to the apple mixture along with the cinnamon.
- To prevent the bottom crust from becoming soggy, you can brush it with a lightly beaten egg white before adding the filling.
- If you’re short on time, you can use a pre-made graham cracker crust instead of a traditional pie crust.
- If you don’t have Splenda, you can use another sugar substitute, but be sure to adjust the amount accordingly.
- Make sure the pie crusts are cold before you start working with them, as this will make them easier to handle.
Serving & Storage Suggestions
Serve this delicious Dutch Apple Pie warm or at room temperature. It’s fantastic on its own or with a scoop of sugar-free vanilla ice cream or a dollop of whipped cream.
Leftover pie can be stored in the refrigerator for up to 3-4 days. To reheat, simply warm it in the oven at 350 degrees Fahrenheit for about 10-15 minutes, or until heated through. You can also microwave individual slices for a shorter amount of time.
For longer storage, you can freeze the baked pie for up to 2-3 months. Wrap it tightly in plastic wrap and then in aluminum foil to prevent freezer burn. Thaw the pie overnight in the refrigerator before reheating.
Nutritional Information
| Nutrient | Amount per Serving | % Daily Value |
|---|---|---|
| Calories | 248 kcal | 12% |
| Total Fat | 16.2 g | 24% |
| Saturated Fat | 7 g | 35% |
| Cholesterol | 15.3 mg | 5% |
| Sodium | 245.4 mg | 10% |
| Total Carbohydrate | 25 g | 8% |
| Dietary Fiber | 2 g | 7% |
| Sugars | 7.8 g | 31% |
| Protein | 1.7 g | 3% |
Note: Nutritional information is an estimate and may vary based on specific ingredients and brands used.
Variations & Substitutions
- Gluten-Free: Use a gluten-free pie crust for a gluten-free version of this recipe. Many grocery stores now carry pre-made gluten-free crusts, or you can make your own using a gluten-free flour blend.
- Spice it Up: Experiment with different spices like cardamom, ginger, or cloves for a unique flavor profile.
- Apple Variety: Use a mix of different apple varieties for a more complex flavor. Some good options include Braeburn, Fuji, or Gala.
- Nutty Twist: Add a handful of chopped nuts, such as pecans or walnuts, to the apple filling for a crunchy texture.
- Dairy-Free: Use a dairy-free butter substitute and ensure your pie crust is dairy-free for a completely dairy-free pie.
FAQs (Frequently Asked Questions)
Q: Can I use frozen apples in this recipe?
A: Yes, you can use frozen apples. Thaw them completely and drain off any excess liquid before using them in the recipe.
Q: How do I prevent the pie crust from burning?
A: If the crust starts to brown too quickly, you can loosely tent it with aluminum foil during the last 15-20 minutes of baking.
Q: Can I make this pie ahead of time?
A: Yes, you can make this pie a day or two ahead of time. Store it in the refrigerator and reheat it before serving.
Q: What is Splenda and can I use something else?
A: Splenda is a brand name for sucralose, a zero-calorie sugar substitute. If you prefer, you can use another granular sugar substitute that you like and adjust the amount to taste.
Q: My apple pie filling is too runny. How can I fix this?
A: Make sure to let the pie cool completely before slicing it. You can also add an extra teaspoon of flour or cornstarch to the apple mixture to help thicken the filling.
Final Thoughts
This Diabetic-Friendly Dutch Apple Pie is more than just a dessert; it’s a slice of comfort, a taste of nostalgia, and a reminder of the simple pleasures in life. I encourage you to try this recipe and share it with your loved ones. Don’t be afraid to experiment with different variations and make it your own. Baking is a journey, and every pie tells a story. Let this one tell a story of warmth, love, and deliciousness. And don’t forget to let me know how it turns out! What’s your favorite way to enjoy apple pie? I’m always looking for new ideas!