
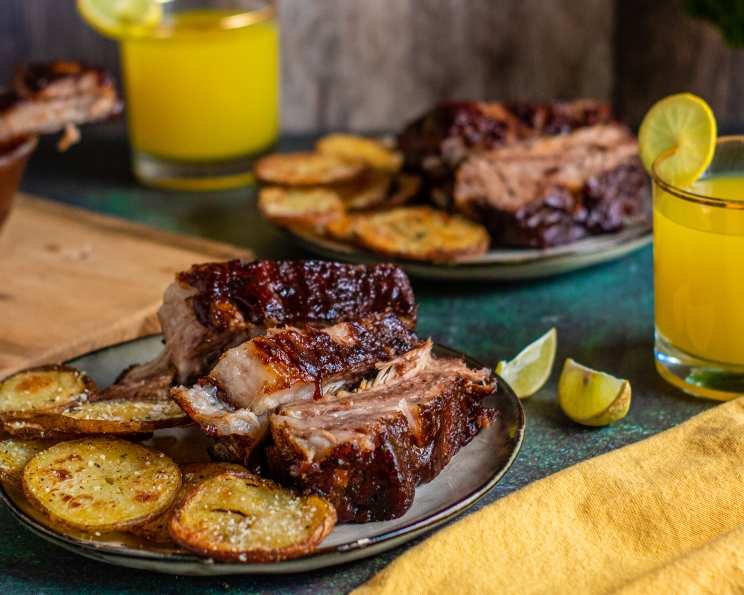
Tender, Easy Ribs: Restaurant-Quality at Home
I’ll never forget the first time I tasted truly exceptional ribs. It was at a backyard barbecue, hosted by a gruff but lovable old pitmaster named Earl. The ribs, glistening with a mahogany glaze, practically fell off the bone. One bite, and I was transported. The smoky aroma, the tender meat, the sweet and savory sauce – it was pure culinary bliss. Earl chuckled when he saw my expression, his eyes crinkling at the corners. “Secret’s in the low and slow, son,” he rasped, patting his ample belly. From that moment on, I was determined to master the art of perfect ribs. And this recipe, my friends, is as close as you can get without tending a smoker all day.
Recipe Overview
- Prep Time: 20 minutes
- Cook Time: 2 hours 30 minutes
- Total Time: 2 hours 50 minutes
- Servings: 4
- Dietary Type: Varies (see notes)
Ingredients
- 2 racks of baby-back pork ribs
- ¼ cup barbecue sauce (optional)
Rib Rub
- 2 teaspoons garlic powder
- 1 tablespoon kosher salt
- 1 tablespoon black pepper
- 1 teaspoon jalapeno seasoning salt (optional)
- 1 teaspoon cayenne
- 1-2 teaspoons cumin (comino)
- 1 tablespoon paprika
- 1 teaspoon dry mustard
- 2 teaspoons brown sugar
- 2 teaspoons Worcestershire sauce
- 2 teaspoons lime juice
- 1 teaspoon Tabasco sauce
Ingredient Notes:
- For a gluten-free version, ensure your Worcestershire sauce and barbecue sauce are certified gluten-free.
- Adjust the amount of cayenne and Tabasco sauce to your desired spice level.
- Feel free to substitute your favorite commercial rib rub if you prefer, but this homemade blend is truly special.
Equipment Needed
- Heavy-duty aluminum foil
- Rimmed baking sheet or large roasting pan
- Small bowl
- Grill (optional)
Instructions
-
Prepare the Ribs: Lay each rack of baby-back pork ribs out on a large sheet of heavy-duty aluminum foil. Make sure you have enough foil to wrap each rack completely.
-
Make the Rib Rub Paste: In a small bowl, combine all the Rib Rub ingredients: garlic powder, kosher salt, black pepper, jalapeno seasoning salt (if using), cayenne, cumin, paprika, dry mustard, brown sugar, Worcestershire sauce, lime juice, and Tabasco sauce. Mix thoroughly until a thick paste forms.
-
Rub the Ribs: Using your hands, generously rub the rib rub paste into the meat of each rack. Ensure you cover the entire surface of the ribs with a thin, even layer. Avoid leaving any gritty deposits of the rub. Work the rub into the meat for at least a minute per rack. This will help the flavors penetrate deeply and create a beautiful color. The meat should take on a rich red hue.
-
Wrap the Ribs Tightly: Wrap each rack tightly in the aluminum foil. I recommend laying the racks vertically on long vertical sheets of foil. Fold over the top and bottom of the foil, then bring the sides up so they are even. Fold over and crease the sides, then roll the seam down until it is flush against the meat. Be extremely careful to prevent the bones from puncturing the foil. If necessary, use two sheets of foil per rack to provide extra protection against leaks. All those flavorful juices need to stay inside!
-
Refrigerate (Optional): At this stage, you can refrigerate the foil-wrapped ribs until you are ready to cook them. The longer they sit, the more the flavors will meld and intensify. You can refrigerate them for as little as 30 minutes or as long as overnight. If you’re short on time, you can proceed directly to the cooking stage. This makes them perfect for a picnic or camping trip – prepare them at home and cook them later.
-
Bake the Ribs: When you are ready to cook, place all the foil-wrapped racks on a rimmed baking sheet or large roasting pan. The packets will leak a bit during cooking, and the baking sheet will prevent a messy oven. You can pile the racks on top of each other; they don’t need to be arranged in a specific order.
-
Cook Low and Slow: Bake the ribs in a preheated oven at 300°F (150°C) for 2 ½ hours. I have cooked as many as eight racks at the same time with this cooking time, but if your ribs are particularly thick, you may need to increase the cooking time slightly. For even more tender ribs, you can cook them at 250°F (120°C) for four hours.
-
Check for Doneness: After 2 ½ hours, remove one rack from the oven and carefully unwrap the foil to check for doneness. The ribs are done when the bones are loose in the meat. You should be able to easily remove a bone just by pulling it with your fingers. If the bones are still tight, re-wrap the ribs in the foil and return them to the oven for another 30 minutes, then check again. Continue checking every 30 minutes until the ribs are done.
-
Grill or Broil (Optional): Once the ribs are cooked through, carefully transfer the finished racks to a grill (if you have one). Baste each side of each rack with barbecue sauce (a slightly-sweet mesquite flavor works wonderfully with this rub). Grill them over a high flame for about 10 minutes, until they develop a good crust. Be careful not to let them stick to the grill. If you don’t have access to a grill, you can use your oven’s broiler to crisp them up. Broil for a few minutes per side, watching carefully to prevent burning.
Expert Tips & Tricks
- Don’t skimp on the rib rub. It’s the foundation of the flavor.
- Wrapping the ribs tightly in foil is crucial for trapping moisture and creating tender, fall-off-the-bone meat.
- Resist the urge to crank up the oven temperature. Low and slow cooking is key to tender ribs.
- If you’re planning a party, cook the ribs ahead of time, wrap them well, and refrigerate. Finish them on the grill just before serving.
- For even more flavor, try adding a splash of your favorite beer or apple cider vinegar to the foil packet before wrapping the ribs.
Serving & Storage Suggestions
Serve these tender, easy ribs hot off the grill or broiler. They pair perfectly with classic barbecue sides like coleslaw, potato salad, corn on the cob, and baked beans.
Leftover ribs can be stored in an airtight container in the refrigerator for up to 3-4 days. For longer storage, wrap the ribs tightly in freezer-safe wrap and freeze for up to 2-3 months.
To reheat, thaw frozen ribs overnight in the refrigerator. Reheat them in a low oven (250°F) until heated through, or microwave in short bursts until warm. You can also reheat them on the grill for a smoky flavor.
Nutritional Information
| Nutrient | Amount per Serving | % Daily Value |
|---|---|---|
| Calories | 1231.4 kcal | N/A |
| Calories from Fat | 793 g | 64% |
| Total Fat | 88.1 g | 135% |
| Saturated Fat | 31.1 g | 155% |
| Cholesterol | 369.5 mg | 123% |
| Sodium | 2249.4 mg | 93% |
| Total Carbohydrate | 6.8 g | 2% |
| Dietary Fiber | 1.4 g | 5% |
| Sugars | 2.9 g | 11% |
| Protein | 103.1 g | 206% |
Note: Nutritional information is an estimate and may vary depending on the specific ingredients used.
Variations & Substitutions
- Spicy Ribs: Increase the amount of cayenne and Tabasco sauce in the rub. You can also add a pinch of chili flakes for extra heat.
- Sweet Ribs: Add a tablespoon or two of honey or maple syrup to the rub.
- Smoked Ribs: For a true barbecue experience, smoke the ribs over low heat for several hours before finishing them in the oven or on the grill.
- Different Protein: This rub and cooking method also works well with other cuts of pork, such as pork shoulder or spare ribs. Adjust the cooking time as needed.
FAQs (Frequently Asked Questions)
Q: Can I use a different type of rub?
A: Absolutely! Feel free to use your favorite store-bought or homemade rib rub. Just be sure to adjust the amount to your taste.
Q: Can I make these ribs without a grill?
A: Yes! If you don’t have a grill, you can use your oven’s broiler to crisp up the ribs after baking. Broil for a few minutes per side, watching carefully to prevent burning.
Q: How do I know when the ribs are done?
A: The ribs are done when the bones are loose in the meat and you can easily pull them out with your fingers.
Q: Can I make these ribs ahead of time?
A: Yes! You can cook the ribs ahead of time, wrap them well, and refrigerate them for up to 2 days. Reheat them in a low oven or on the grill before serving.
Q: What side dishes go well with ribs?
A: Classic barbecue sides like coleslaw, potato salad, corn on the cob, and baked beans are all great choices.
Final Thoughts
So, there you have it – a recipe for tender, easy ribs that will rival any restaurant’s. Don’t be intimidated by the process; it’s much simpler than it looks. Gather your ingredients, fire up your oven (or grill!), and prepare to be amazed. I encourage you to try this recipe and let me know how it turns out. And if you’re feeling adventurous, try pairing these ribs with a crisp, cold glass of craft beer or a tangy vinegar-based coleslaw. Happy cooking!