
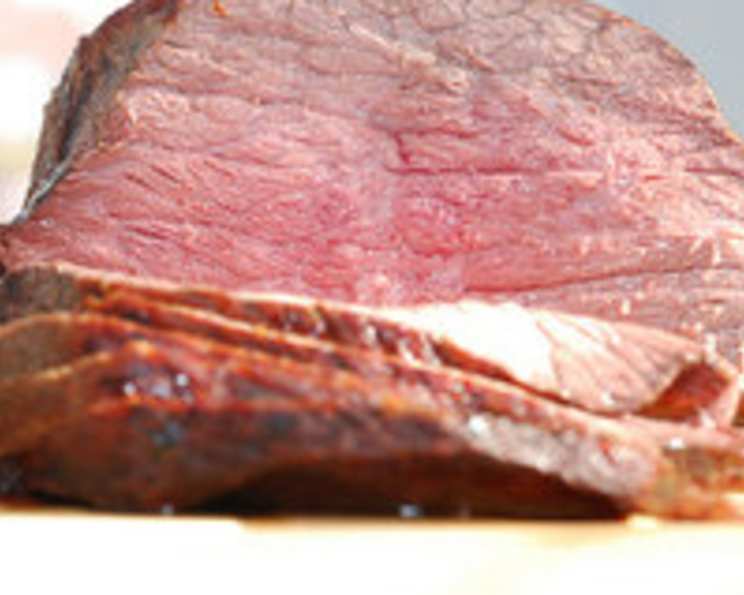
The Surprisingly Tender Eye of Round Beef Roast: An ATK Inspired Method
I remember my grandmother, a woman who could coax flavor out of anything, often lamented the humble eye of round. It was, in her words, “tough as shoe leather,” a cut best left to grinding or long, slow braises. One Thanksgiving, determined to prove her wrong (or at least, find a way to make it palatable), I stumbled upon a method that seemed almost too simple to be true. The secret? Time, salt, and a low, slow roast – a technique I’ve adapted and perfected over the years. This isn’t just a recipe; it’s a testament to the transformative power of patience and a little bit of kitchen wisdom.
Recipe Overview
- Prep Time: 24 hours, 15 minutes
- Cook Time: 1 hour 15 minutes + 30-50 minutes resting in oven + 15 minutes resting out of oven
- Total Time: 26-27 hours
- Servings: 6-8
- Yield: 1 roast
- Dietary Type: Gluten-Free, Dairy-Free
Ingredients
- Beef eye round, 3 1/2 to 4 lbs
- Kosher salt, 4 teaspoons
- Fresh ground black pepper, 2 teaspoons
- Vegetable oil
Equipment Needed
- Plastic wrap
- Shallow roasting pan
- Roasting rack
- Medium-hot skillet
- Probe thermometer with cable
Instructions
- The Salting Process (Day One): Begin by evenly distributing the kosher salt over all surfaces of the beef eye round. This crucial step is the key to tenderizing the otherwise lean cut. Think of it as a dry brine, drawing out moisture and then allowing the meat to reabsorb it, resulting in a more succulent and flavorful roast. Once thoroughly salted, tightly wrap the roast in plastic wrap.
- Refrigerate (Day One): Place the wrapped roast in the refrigerator for 18 to 24 hours. This extended rest period allows the salt to fully penetrate the meat, breaking down proteins and enhancing its tenderness.
- Preheat Oven (Day Two): When you’re approximately 2 1/2 hours before your desired serving time, preheat your oven to 225 degrees F. This low temperature is essential for slow and even cooking.
- Prepare Roasting Pan (Day Two): While the oven is preheating, prepare a shallow roasting pan by placing a roasting rack inside. This elevates the roast, allowing hot air to circulate evenly around it.
- Prepare the Roast (Day Two): Unwrap the roast and thoroughly pat it dry with paper towels. This step removes excess moisture, which will help achieve a beautiful sear. Rub vegetable oil over the entire surface of the roast, ensuring it is evenly coated.
- Season with Pepper (Day Two): Generously coat the oiled roast with 2 teaspoons of fresh ground black pepper. The pepper will add a flavorful crust during the searing process.
- Sear the Roast (Day Two): Heat a medium-hot skillet on the stovetop. Sear the roast on all sides until a dark brown crust forms, approximately 3 minutes per side. This searing step is crucial for developing rich, deep flavors and a beautiful presentation. Don’t overcrowd the pan; work in batches if necessary.
- Place on Roasting Rack (Day Two): Transfer the seared roast to the prepared roasting rack in the roasting pan.
- Insert Thermometer (Day Two): Insert the probe of a thermometer into the center of the roast, inserting it from the end. A probe thermometer with a cable is highly recommended, as it allows you to monitor the internal temperature of the roast without opening the oven door.
- Roast Uncovered (Day Two): Place the roasting pan in the preheated oven and roast uncovered for approximately 1 hour and 15 minutes, or until the internal temperature reaches 115 degrees F. Resist the temptation to open the oven door, as this will release heat and prolong the cooking time. The goal is a slow, even rise in temperature.
- Turn Off Oven and Rest (Day Two): Once the internal temperature reaches 115 degrees F, turn off the oven but do not open the door. Leave the roast in the oven for an additional 30 to 50 minutes, or until the internal temperature reaches 125 degrees F. This resting period allows the residual heat to gently finish cooking the roast, resulting in a more tender and evenly cooked final product.
- Final Rest (Day Two): Remove the roast from the oven and place it on a cutting board. Cover it loosely with foil and let it rest for 15 minutes before slicing. This final resting period allows the juices to redistribute throughout the meat, ensuring a moist and flavorful roast.
- Slice and Serve (Day Two): After the final rest, slice the roast thinly against the grain. The center should be pink and juicy.
Expert Tips & Tricks
- Salt Quality Matters: Using kosher salt is key. Its larger crystals and lack of additives make it ideal for dry brining. Table salt is too fine and can lead to an overly salty result.
- Temperature Control: Invest in a good-quality probe thermometer. It’s the best way to ensure accurate internal temperatures and avoid overcooking.
- Searing Secrets: Make sure your skillet is hot before searing the roast. This will create a beautiful crust and lock in the juices. Don’t overcrowd the pan; sear in batches if necessary.
- Don’t Peek!: Resist the temptation to open the oven door during roasting and resting. Each time you open the door, you release heat and prolong the cooking time.
- Resting is Essential: Don’t skip the resting periods. They are crucial for tenderizing the roast and ensuring even cooking.
Serving & Storage Suggestions
Serve the sliced roast immediately while it’s still warm and juicy. It pairs perfectly with roasted vegetables, mashed potatoes, or a simple salad. Leftovers can be stored in an airtight container in the refrigerator for up to 3-4 days. To reheat, gently warm the slices in a skillet with a little bit of beef broth or gravy to prevent them from drying out. Alternatively, you can thinly slice the cold roast and use it for sandwiches or salads. I don’t recommend freezing cooked eye of round as it can become dry.
Nutritional Information
| Nutrient | Amount per Serving | % Daily Value |
|---|---|---|
| Calories | 350 kcal | 18% |
| Total Fat | 15g | 23% |
| Saturated Fat | 6g | 30% |
| Cholesterol | 100mg | 33% |
| Sodium | 750mg | 31% |
| Total Carbohydrate | 0g | 0% |
| Dietary Fiber | 0g | 0% |
| Sugars | 0g | 0% |
| Protein | 50g | 100% |
Nutritional information is an estimate and may vary based on specific ingredients and cooking methods.
Variations & Substitutions
- Herb Crust: Before searing, press chopped fresh herbs, such as rosemary, thyme, and garlic, into the oiled surface of the roast for added flavor.
- Spice Rub: Experiment with different spice rubs, such as a blend of paprika, chili powder, cumin, and garlic powder, for a Southwestern twist.
- Gravy Enhancement: Use the pan drippings to create a rich and flavorful gravy. Simply deglaze the pan with red wine or beef broth and whisk in a slurry of cornstarch and water to thicken.
- Horseradish Cream Sauce: Serve the sliced roast with a dollop of homemade horseradish cream sauce for a tangy and flavorful accompaniment.
FAQs (Frequently Asked Questions)
Q: Why is it important to salt the roast a day in advance?
A: Salting the roast ahead of time allows the salt to penetrate the meat, breaking down proteins and resulting in a more tender and flavorful final product. It’s essentially a dry brining process.
Q: Can I use a different cut of beef for this recipe?
A: While this method is specifically designed for eye of round, you could try it with other lean cuts like top round or sirloin tip roast, but cooking times may vary.
Q: What if I don’t have a probe thermometer?
A: A probe thermometer is highly recommended for accurate results. If you don’t have one, use an instant-read thermometer and check the internal temperature periodically during the roasting process, but try to limit opening the oven door as much as possible.
Q: Can I skip the searing step?
A: Searing the roast adds a significant amount of flavor and creates a beautiful crust. While you can technically skip it, the final result will be less flavorful and visually appealing.
Q: How do I know when the roast is done?
A: The best way to determine doneness is to use a probe thermometer and monitor the internal temperature. Aim for 115 degrees F before turning off the oven, and 125 degrees F after the resting period in the oven for medium-rare. Remember that the temperature will continue to rise slightly during the final rest.
Final Thoughts
Don’t let the reputation of eye of round intimidate you. This recipe, inspired by the meticulous methods of America’s Test Kitchen, unlocks the hidden potential of this economical cut. The key is patience, precision, and a willingness to trust the process. So, gather your ingredients, clear your schedule, and prepare to be amazed by the surprisingly tender and flavorful results. I encourage you to try this technique, share your experiences, and let me know what you think! Pair this roast with a robust red wine and some creamy mashed potatoes for a truly satisfying meal. Enjoy!