
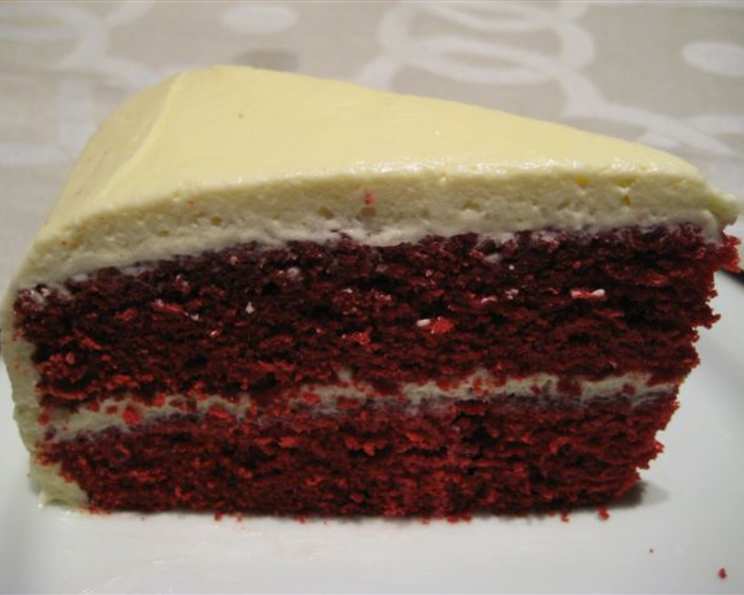
Tender Red Velvet Cake with Cream Cheese Frosting
I remember the first time I tasted Red Velvet Cake. It was at my grandmother’s house, a surprise dessert after Sunday dinner. The bright red hue caught my eye immediately, and the creamy frosting promised something special. One bite, and I was hooked. The slightly tangy cake, paired with the rich and velvety cream cheese frosting, was a revelation. That cake, and that memory, remain vibrant and delicious to this day. It’s a classic that never fails to impress, perfect for celebrations or simply a sweet treat on a cozy afternoon.
Recipe Overview
- Prep Time: 40 minutes
- Cook Time: 25 minutes
- Total Time: 1 hour 5 minutes
- Servings: 12
- Yield: One 2-layer cake
- Dietary Type: Not Gluten-Free, Not Dairy-Free
Ingredients
CAKE
- 2 1/4 cups all-purpose flour
- 1 1/2 teaspoons baking soda
- 1 pinch salt
- 1 cup buttermilk
- 1 tablespoon white vinegar
- 1 teaspoon vanilla extract
- 2 large eggs
- 2 tablespoons natural cocoa powder (very important, do NOT use Dutch-processed)
- 2 tablespoons red food coloring (one 1-ounce bottle)
- 12 tablespoons unsalted butter, softened (1 1/2 sticks)
- 1 1/2 cups granulated sugar
FROSTING
- 16 tablespoons unsalted butter, softened (2 sticks)
- 4 cups confectioners’ sugar
- 16 ounces cream cheese, cut into 8 pieces, softened
- 1 1/2 teaspoons vanilla extract
- 1 pinch salt
Equipment Needed
- Two 9-inch round cake pans
- Medium bowl
- Large measuring cup
- Small bowl
- Electric mixer
- Rubber spatula
- Cake tester or toothpick
- Cooling rack
Instructions
-
Preheat your oven to 350°F (175°C) and place the oven rack in the middle position. Even baking is crucial for this cake, so make sure your oven is properly calibrated.
-
Grease and flour two 9-inch round cake pans. This ensures the cakes release cleanly after baking. I like to use a baking spray with flour already included for convenience.
-
In a medium bowl, whisk together the all-purpose flour, baking soda, and salt. This dry mixture is the foundation of the cake’s structure.
-
In a large measuring cup, whisk together the buttermilk, white vinegar, vanilla extract, and eggs. The vinegar reacts with the buttermilk to create a tangy flavor that’s characteristic of red velvet cake.
-
In a small bowl, mix the natural cocoa powder with the red food coloring until a smooth paste forms. The natural cocoa powder is essential for achieving the correct color and rise. Dutch-processed cocoa will not work.
-
In a large bowl, using an electric mixer, beat the softened butter and granulated sugar together on medium-high speed until light and fluffy, about 2 minutes. Be sure to scrape down the sides of the bowl as necessary to ensure even mixing. This creaming process incorporates air into the batter, resulting in a tender cake.
-
Add one-third of the flour mixture to the butter and sugar mixture and beat on medium-low speed until just incorporated, about 30 seconds. Avoid overmixing at this stage, as it can develop the gluten in the flour and result in a tough cake.
-
Add half of the buttermilk mixture and beat on low speed until combined, about 30 seconds. Again, scrape down the bowl as necessary.
-
Repeat with half of the remaining flour mixture, the remaining buttermilk mixture, and finally the remaining flour mixture. This gradual addition of wet and dry ingredients ensures that the batter remains smooth and prevents it from curdling.
-
Scrape down the bowl, add the cocoa mixture, and beat on medium speed until completely incorporated, about 30 seconds. The cocoa paste is what gives the cake its signature red hue and a subtle chocolate flavor.
-
Using a rubber spatula, give the batter a final stir to ensure everything is evenly mixed.
-
Scrape the batter into the prepared cake pans, dividing it evenly between the two.
-
Bake in the preheated oven until a cake tester inserted into the center comes out clean, about 25 minutes. Baking times may vary depending on your oven, so start checking for doneness around 23 minutes.
-
Cool the cakes in the pans for 10 minutes before turning them out onto a cooling rack to cool completely, at least 30 minutes. Cooling the cakes completely is essential before frosting, as the frosting will melt on a warm cake.
-
While the cakes are cooling, prepare the frosting. In a large bowl, using an electric mixer, beat the softened butter and confectioners’ sugar on medium-high speed until light and fluffy, about 2 minutes.
-
Add the softened cream cheese, one piece at a time, and beat until incorporated, about 30 seconds. Make sure the cream cheese is fully softened to prevent lumps in the frosting.
-
Beat in the vanilla extract and salt.
-
Refrigerate the frosting until ready to use. This will help it firm up and make it easier to spread.
-
Once the cakes are completely cooled, it’s time to assemble. Spread about 2 cups of the frosting on one cake layer. Top with the second cake layer and spread the top and sides of the cake with the remaining frosting.
-
Cover and refrigerate the cake until ready to serve, up to 3 days. Chilling the cake allows the frosting to set and the flavors to meld together.
Expert Tips & Tricks
- For a more intense red color, you can increase the amount of red food coloring slightly, but be careful not to add too much, as it can affect the taste and texture of the cake.
- If you don’t have buttermilk, you can make a substitute by adding 1 tablespoon of white vinegar or lemon juice to 1 cup of milk and letting it sit for 5 minutes.
- To ensure the cakes bake evenly, use cake strips wrapped around the outside of the cake pans. These strips help to insulate the sides of the pans and prevent the edges from overbaking.
- If you want to make the cake ahead of time, you can bake the cake layers and wrap them tightly in plastic wrap. Store them at room temperature for up to 2 days or in the freezer for up to 2 months.
- For a smoother frosting, sift the confectioners’ sugar before adding it to the butter and cream cheese.
Serving & Storage Suggestions
Serve the Red Velvet Cake chilled for the best flavor and texture. Garnish with fresh berries or a dusting of cocoa powder for an elegant presentation. The cake can be stored in the refrigerator for up to 3 days. For longer storage, you can freeze the cake, wrapped tightly in plastic wrap, for up to 2 months. Thaw in the refrigerator overnight before serving. It pairs wonderfully with a cup of coffee or a glass of cold milk.
Nutritional Information
| Nutrient | Amount per Serving | % Daily Value |
|---|---|---|
| Calories | 730 kcal | 37% |
| Total Fat | 41g | 63% |
| Saturated Fat | 25g | 124% |
| Cholesterol | 145mg | 48% |
| Sodium | 344mg | 14% |
| Total Carbohydrate | 86g | 28% |
| Dietary Fiber | 1g | 3% |
| Sugars | 67g | 266% |
| Protein | 7g | 13% |
Variations & Substitutions
- Chocolate Red Velvet Cake: Add 1/4 cup of melted dark chocolate to the batter for a richer chocolate flavor.
- Vegan Red Velvet Cake: Substitute the butter with vegan butter, the buttermilk with non-dairy milk mixed with vinegar, and the eggs with applesauce or a commercial egg replacer. For the cream cheese frosting, use a vegan cream cheese alternative.
- Gluten-Free Red Velvet Cake: Replace the all-purpose flour with a gluten-free flour blend, ensuring it contains xanthan gum for binding.
- Red Velvet Cupcakes: Pour the batter into lined cupcake tins and bake for 18-20 minutes.
FAQs (Frequently Asked Questions)
Q: Why is natural cocoa powder so important in this recipe?
A: Natural cocoa powder is acidic, which reacts with the baking soda and buttermilk to create the characteristic tangy flavor and red color of red velvet cake. Dutch-processed cocoa powder, which is alkaline, will not produce the same results.
Q: Can I make the cream cheese frosting ahead of time?
A: Yes, you can make the cream cheese frosting up to 2 days in advance. Store it in an airtight container in the refrigerator. Before using, let it soften slightly at room temperature and rewhip it to restore its fluffy texture.
Q: How do I prevent the cake from sticking to the pans?
A: Grease and flour the cake pans thoroughly. You can also use parchment paper rounds in the bottom of the pans for extra insurance.
Q: My cream cheese frosting is too soft. What can I do?
A: Add a little more confectioners’ sugar, one tablespoon at a time, until the frosting reaches the desired consistency. You can also chill the frosting in the refrigerator for 30 minutes to firm it up.
Q: Can I freeze the entire frosted cake?
A: Yes, you can freeze the entire frosted cake. Place the cake in the freezer for 1-2 hours to firm up the frosting, then wrap it tightly in plastic wrap and aluminum foil. Freeze for up to 2 months. Thaw in the refrigerator overnight before serving.
Final Thoughts
Now it’s your turn to create this timeless classic! Don’t be intimidated by the multiple steps; each one is simple and yields a fantastic result. I encourage you to bake this Tender Red Velvet Cake with Cream Cheese Frosting for your next special occasion or simply to brighten up a weekday. Share your creations and feedback with me – I’d love to see your baking triumphs! And for an extra touch of indulgence, try pairing a slice of this cake with a rich cup of dark roast coffee or a sweet dessert wine. Happy baking!