
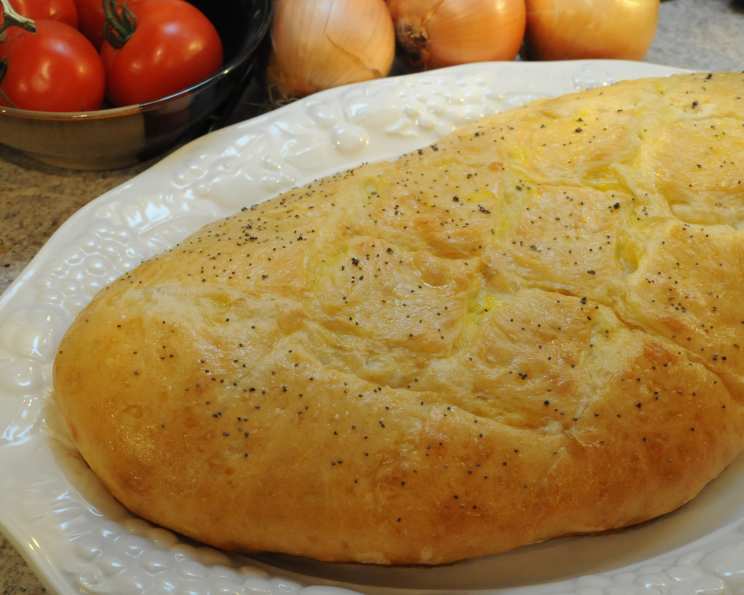
Tendir Choreyi: An Azerbaijani Bread Journey
The scent of baking bread has always been a source of comfort and nostalgia for me. Growing up, my grandmother, a master baker in her own right, had a knack for transforming simple ingredients into edible masterpieces. But the first time I tasted Tendir Choreyi, the traditional Azerbaijani bread, it transported me to a different place altogether. I was at a small gathering in Baku, and the warm, subtly sweet aroma of the bread filled the air as it was pulled, still steaming, from a makeshift oven. The crust was perfectly golden, adorned with poppy seeds, and the inside was soft and yielding. Every bite was an invitation to delve deeper into Azerbaijan’s rich culture and culinary heritage.
Recipe Overview
- Prep Time: 2 hours
- Cook Time: 25 minutes
- Total Time: 2 hours 25 minutes
- Servings: 8
- Yield: 1 Loaf
- Dietary Type: Vegetarian
Ingredients
- 2 ¼ teaspoons dry active yeast
- 1 ½ cups warm water
- 1 teaspoon salt
- 3 cups bread flour, plus extra for kneading
- 1 egg yolk, for brushing (optional: for a vegan option, substitute with plant-based milk or a mixture of maple syrup and water)
- 1 teaspoon poppy seeds
Equipment Needed
- Large bowl
- Measuring cups and spoons
- Lightly floured surface
- Rolling pin
- Greased or non-stick baking sheet
Instructions
-
Begin by activating the yeast. In a small bowl, combine the 2 ¼ teaspoons of dry active yeast with the 1 ½ cups of warm water. Let this mixture stand for about 5 minutes. You’ll notice the yeast starting to bubble and foam, indicating it’s active and ready to go.
-
In a large bowl, sift together the 3 cups of bread flour and the 1 teaspoon of salt. This ensures that there are no lumps in the flour and that the salt is evenly distributed.
-
Gradually add the water and yeast mixture to the flour. Using your hand, mix the ingredients until a dough starts to form. Don’t add all the liquid at once; add it slowly until the dough comes together in a ball.
-
Turn the dough out onto a lightly floured surface. This prevents the dough from sticking as you knead it.
-
Knead the dough for 8 to 10 minutes, or until it becomes smooth and elastic. Kneading develops the gluten in the flour, which gives the bread its structure. If the dough is too sticky, add a little more flour, a tablespoon at a time.
-
Place the kneaded dough in a large bowl. Cover the bowl with a clean cloth or plastic wrap.
-
Let the dough rise in a warm place until it has doubled in size. This typically takes 1 to 1 ½ hours, depending on the warmth of your environment. A warm place helps the yeast to ferment and the dough to rise properly.
-
Once the dough has doubled, punch it down to release the air. Turn it out onto a lightly floured surface again.
-
Stretch the dough into an oblong shape. Use a rolling pin to roll it out until it is about ½ inch thick.
-
Carefully transfer the dough to a greased or non-stick baking sheet. This prevents the bread from sticking to the pan during baking.
-
Let the dough stand for another 15 minutes on the baking sheet. This allows the gluten to relax, which will result in a softer bread.
-
Use a sharp knife or pizza cutter to cut crosshatches in the top of the dough. Make about four cuts in each direction. This not only looks appealing but also helps the bread to bake evenly.
-
Brush the top of the dough with the beaten egg yolk. For a richer color, you can mix the egg yolk with a little bit of water. Alternatively, for a vegan option, brush with plant-based milk or a mixture of maple syrup and water.
-
Sprinkle the top with 1 teaspoon of poppy seeds.
-
Bake in a preheated oven at 400 degrees Fahrenheit (200 degrees Celsius) for 20 to 25 minutes, or until the bread is golden brown on top. Keep a close eye on it to prevent burning.
Expert Tips & Tricks
- Yeast Activation: Ensure your water isn’t too hot when activating the yeast. High temperatures can kill the yeast, preventing the dough from rising. Aim for lukewarm water (around 105-115°F or 40-46°C).
- Dough Temperature: A slightly warmer dough will rise faster. Placing the bowl in a warm oven (turned off!) can expedite the process, especially in colder climates.
- Egg Wash Substitute: If you don’t have eggs, or prefer a vegan alternative, a mixture of maple syrup and water will add a nice shine to the crust.
- Crispier Crust: For a crisper crust, lightly spray the bread with water before placing it in the oven. This creates steam, which helps develop a beautiful golden crust.
- Over-Proofing: If you accidentally let the dough rise for too long, don’t panic. Punch it down, knead it briefly, and allow it to rise again for a shorter period.
Serving & Storage Suggestions
Tendir Choreyi is best served warm, straight from the oven. Its soft interior and slightly chewy crust make it a perfect accompaniment to cheeses, dips, soups, or stews. In Azerbaijan, it’s often served alongside grilled meats and fresh herbs.
To store any leftovers, wrap the bread tightly in plastic wrap or place it in an airtight container. It will stay fresh at room temperature for 2-3 days. For longer storage, you can freeze the bread for up to 2 months. To reheat, simply wrap the frozen bread in foil and warm it in a preheated oven at 350°F (175°C) for about 15-20 minutes, or until heated through. Alternatively, you can slice the bread and toast it for a quick and easy snack.
Nutritional Information
| Nutrient | Amount per Serving | % Daily Value |
|---|---|---|
| Calories | 182 kcal | 9% |
| Total Fat | 1.2g | 2% |
| Saturated Fat | 0.3g | 1% |
| Cholesterol | 0.0mg | 0% |
| Sodium | 100mg | 4% |
| Total Carbohydrate | 37.4g | 12% |
| Dietary Fiber | 1.5g | 6% |
| Sugars | 0.5g | 1% |
| Protein | 5.5g | 11% |
Nutritional information is an estimate and can vary based on specific ingredients and serving sizes.
Variations & Substitutions
- Whole Wheat Tendir Choreyi: Substitute half of the bread flour with whole wheat flour for a nuttier flavor and increased fiber content.
- Herb Infusion: Add finely chopped fresh herbs like dill, cilantro, or parsley to the dough for an aromatic twist.
- Spice it Up: Incorporate a pinch of red pepper flakes or a dash of cumin for a subtle kick.
- Sweet Variation: Add a tablespoon of sugar or honey to the dough for a sweeter version, perfect as a dessert bread.
- Gluten-Free: Although it deviates significantly from the traditional recipe, experiment with gluten-free flour blends (such as a mix of rice flour, tapioca starch, and potato starch) and xanthan gum to bind the dough. Be aware that the texture will be different.
FAQs (Frequently Asked Questions)
Q: Can I use instant yeast instead of active dry yeast?
A: Yes, you can. If using instant yeast, you can add it directly to the flour without activating it in water first. Use the same amount as specified for active dry yeast.
Q: What if my dough doesn’t rise?
A: There could be a few reasons. Make sure your yeast is fresh and that the water you used to activate it wasn’t too hot (which can kill the yeast). Also, ensure the environment where you are letting the dough rise is warm enough.
Q: Can I make this dough in a bread machine?
A: Absolutely! Just follow your bread machine’s instructions for dough preparation, then shape and bake the bread as described in the recipe.
Q: How do I know when the bread is done baking?
A: The bread is done when it’s golden brown on top and sounds hollow when you tap the bottom. You can also use a thermometer; the internal temperature should be around 200-210°F (93-99°C).
Q: Can I freeze the baked bread?
A: Yes, you can freeze the baked bread. Allow it to cool completely, then wrap it tightly in plastic wrap and place it in a freezer bag. It can be stored in the freezer for up to 2 months. Thaw it at room temperature before reheating.
Final Thoughts
Tendir Choreyi is more than just bread; it’s a cultural symbol and a culinary experience. It’s a celebration of simple ingredients transformed into something truly special. I encourage you to try this recipe and experience the warmth and flavor of Azerbaijan in your own kitchen. Don’t be intimidated if it’s your first time baking bread—the process is as rewarding as the final product. Experiment with different variations, share your creations with loved ones, and most importantly, enjoy the journey. And if you happen to have some leftover qurut on hand, crumble it over a slice for an authentic Azerbaijani snack!