
The Warm Embrace of Texas Roadhouse Rolls: A Kitchen Love Story
The first time I tasted a Texas Roadhouse roll, I was a wide-eyed kid on a family road trip. The aroma alone—buttery, yeasty, and subtly sweet—was intoxicating. They arrived in a basket, a mountain of pillowy goodness, and the cinnamon honey butter…oh, the cinnamon honey butter! That first bite was pure comfort, a moment of simple joy that transported me from a cramped backseat to a world of warmth and deliciousness. I’ve been chasing that feeling ever since, striving to recreate those iconic rolls in my own kitchen and share that experience with others.
Recipe Overview
- Prep Time: 25 minutes
- Cook Time: 10-15 minutes
- Rise Time: 2 hours
- Total Time: 2 hours 45 minutes
- Servings: 36 rolls
- Dietary Type: Vegetarian
Ingredients
- 4 teaspoons active dry yeast
- 1/2 cup warm water
- 2 cups milk, scalded and cooled to lukewarm
- 3 tablespoons melted butter, slightly cooled
- 1/2 cup sugar
- 2 quarts all-purpose flour (or 7-8 cups all-purpose flour)
- 2 whole eggs
- 2 teaspoons salt
- Melted butter, for brushing after baking
Equipment Needed
- Large Mixing Bowl
- Measuring Cups and Spoons
- Baking Sheets
- Clean Kitchen Towel
- Stand Mixer (optional, but recommended)
Instructions
-
Activate the Yeast: In a small bowl, dissolve 4 teaspoons active dry yeast in 1/2 cup warm water along with 1 teaspoon of sugar (taken from the 1/2 cup). Let stand for 5-10 minutes, or until frothy. This indicates that the yeast is active and ready to use.
-
Combine Wet Ingredients: In a large mixing bowl, combine the yeast mixture with 2 cups of scalded and cooled lukewarm milk, and the remaining 1/2 cup sugar. Scalding the milk helps to soften the dough and improve its texture, but it’s crucial to let it cool down before adding the yeast to avoid killing it.
-
Create a Batter: Add enough all-purpose flour to the wet ingredients to form a medium batter, about the consistency of pancake batter. This usually takes around 2-3 cups of flour. Beat thoroughly with a spoon or whisk until smooth.
-
Add Remaining Wet Ingredients: Incorporate the 3 tablespoons melted butter (slightly cooled), 2 whole eggs, and 2 teaspoons salt into the batter. Beat well to combine all ingredients evenly.
-
Form the Dough: Gradually add the remaining all-purpose flour (approximately 4-5 cups) to form a soft, slightly sticky dough. Be careful not to add too much flour, as this can result in dry, dense rolls.
-
Rest the Dough: Sprinkle a small amount of flour onto a clean counter or work surface. Let the dough rest for 5 minutes. This allows the gluten to relax, making the dough easier to knead.
-
Prepare for Rising: Grease a large bowl with butter or cooking spray. This will prevent the dough from sticking as it rises.
-
Knead the Dough: Turn the dough out onto the floured surface and knead for 8-10 minutes until smooth and satiny. If using a stand mixer with a dough hook, knead for about 4-5 minutes on medium speed. The dough should be elastic and slightly tacky to the touch.
-
First Rise: Place the kneaded dough in the greased bowl, turning it over to grease the top. This prevents a skin from forming as it rises. Cover the bowl with a clean kitchen towel or plastic wrap. Let rise in a warm place for about 1-1.5 hours, or until doubled in bulk. A warm environment encourages the yeast to ferment and the dough to rise properly.
-
Punch Down and Divide: Once the dough has doubled, punch it down gently to release the air. Turn the dough out onto a lightly floured board. Divide the dough into portions for shaping, aiming for approximately 36 rolls.
-
Rest Again: Let the divided dough portions rest for 10 minutes. This allows the gluten to relax again, making them easier to shape.
-
Shape the Rolls: Shape the dough into your desired roll shape. You can make them round, oval, or even tie them into knots. Ensure all rolls are uniform in size for even baking.
-
Second Rise: Place the shaped rolls on greased baking sheets, leaving some space between each roll to allow for expansion. Let rise for another 30-45 minutes, or until doubled in size.
-
Bake: Preheat your oven to 350 degrees Fahrenheit (175 degrees Celsius). Bake the rolls for 10-15 minutes, or until golden brown. Keep a close eye on them to prevent over-browning.
-
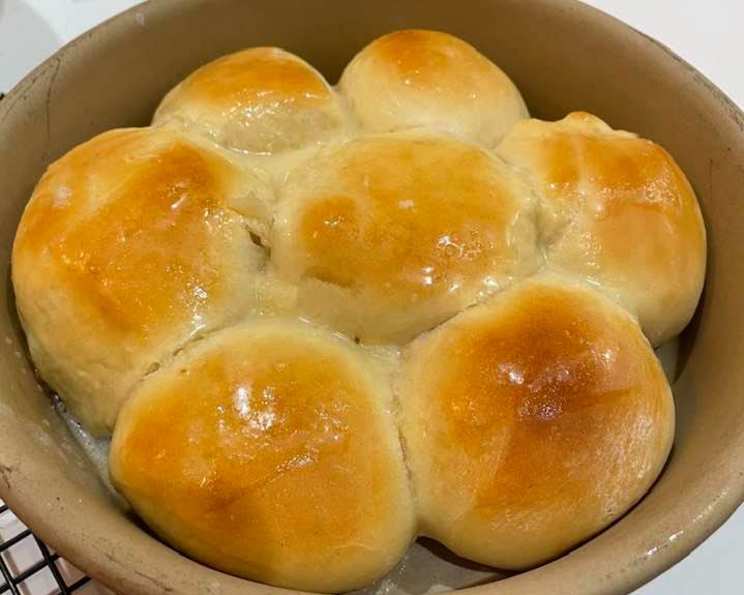
Butter Baste: As soon as the rolls come out of the oven, immediately baste them with melted butter. This gives them that signature Texas Roadhouse shine and flavor.
-
Serve Immediately: Serve warm with cinnamon honey butter or your favorite spread.
Expert Tips & Tricks
- Yeast Proofing: Always proof your yeast before starting the recipe. If it doesn’t foam up, your yeast is dead and you’ll need to get a fresh batch.
- Dough Temperature: The ideal dough temperature for rising is around 75-80°F (24-27°C). If your kitchen is too cold, try placing the dough in a slightly warmed (turned off) oven.
- Kneading Time: Don’t skimp on the kneading! This is crucial for developing the gluten and creating a light, airy roll.
- Even Baking: For more even baking, rotate the baking sheets halfway through the baking time.
- Preventing Sticking: Use parchment paper under the rolls to prevent sticking.
- Enhance the Flavor: Add a touch of vanilla extract to the dough for extra flavor.
Serving & Storage Suggestions
Serve these rolls warm, straight from the oven, with a generous dollop of cinnamon honey butter. They are also delicious with savory dishes like chili, stew, or BBQ. Leftover rolls can be stored in an airtight container at room temperature for 1-2 days, in the refrigerator for up to a week, or in the freezer for up to 2 months. To reheat, wrap the rolls in foil and warm them in a 350°F (175°C) oven for about 10 minutes, or until heated through. You can also microwave them for a few seconds, but they may become slightly chewy.
Nutritional Information
| Nutrient | Amount per Serving | % Daily Value |
|---|---|---|
| Calories | 132.9 kcal | N/A |
| Calories from Fat | N/A | N/A |
| Total Fat | 2g | 3% |
| Saturated Fat | 1.1g | 5% |
| Cholesterol | 14.8mg | 4% |
| Sodium | 149.1mg | 6% |
| Total Carbohydrate | 24.5g | 8% |
| Dietary Fiber | 0.9g | 3% |
| Sugars | 2.9g | N/A |
| Protein | 3.8g | 7% |
Note: Nutritional information is an estimate and may vary based on specific ingredients and serving sizes.
Variations & Substitutions
- Whole Wheat Rolls: Substitute up to half of the all-purpose flour with whole wheat flour for a nuttier flavor and added fiber.
- Dairy-Free Rolls: Use a plant-based milk alternative like almond milk or soy milk instead of cow’s milk. Ensure the butter used for basting is also dairy-free.
- Sweet Potato Rolls: Add 1/2 cup of mashed sweet potato to the dough for a subtle sweetness and vibrant color.
- Herb Rolls: Add 1 tablespoon of dried herbs, such as rosemary, thyme, or oregano, to the dough for a savory twist.
- Garlic Rolls: Add 1-2 teaspoons of garlic powder to the dough or brush the baked rolls with garlic butter.
FAQs (Frequently Asked Questions)
Q: Why aren’t my rolls rising properly?
A: Several factors can affect the rise of your rolls, including inactive yeast, a cold environment, or too much salt. Ensure your yeast is fresh, provide a warm place for rising, and measure ingredients accurately.
Q: How do I keep the rolls from drying out?
A: Avoid overbaking the rolls and basting them generously with melted butter immediately after they come out of the oven. Store leftovers in an airtight container to prevent them from drying out.
Q: Can I make the dough ahead of time?
A: Yes, you can make the dough ahead of time. After the first rise, punch down the dough, cover it tightly, and refrigerate it for up to 24 hours. Allow the dough to come to room temperature before shaping and baking.
Q: What is the best way to reheat these rolls?
A: The best way to reheat these rolls is to wrap them in foil and warm them in a 350°F (175°C) oven for about 10 minutes, or until heated through. This will help to prevent them from drying out.
Q: Can I freeze these rolls?
A: Yes, these rolls freeze well. Allow them to cool completely, then wrap them tightly in plastic wrap and place them in a freezer-safe bag or container. They can be frozen for up to 2 months. Thaw overnight in the refrigerator before reheating.
Final Thoughts
Making these Texas Roadhouse rolls is a journey of patience, love, and a whole lot of flour. It is a rewarding experience that fills your kitchen with a comforting aroma and results in pillowy soft rolls that are sure to impress. Don’t be afraid to experiment with different variations and put your own spin on this classic recipe. Share your creations with friends and family, and watch their faces light up with every bite. Happy baking!