
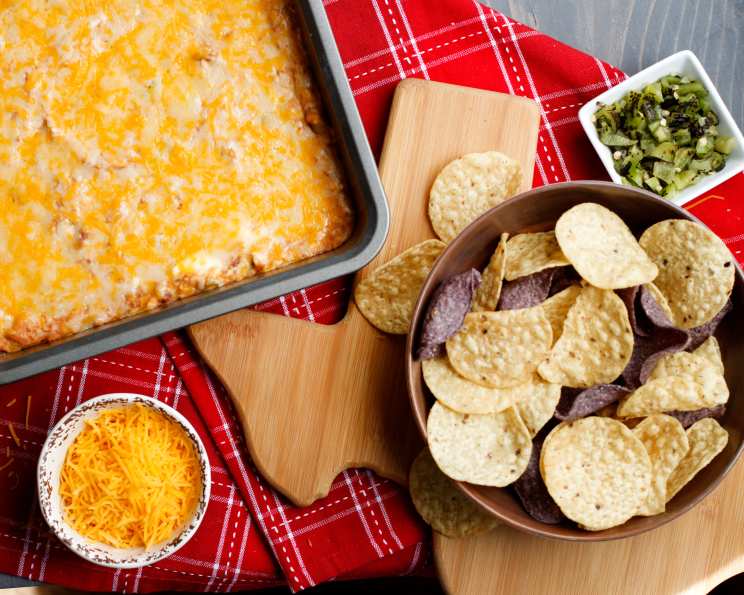
Texas Trash Dip: The Crowd-Pleasing, Can’t-Stop-Eating Appetizer
I can still picture it: a chipped ceramic baking dish, perpetually stained from countless batches, sitting smack-dab in the center of my Aunt Carol’s kitchen island. It was always surrounded by a chaotic swirl of family members, all jostling for position to get another scoop of this glorious, cheesy, utterly addictive concoction. Texas Trash Dip. It wasn’t fancy, it wasn’t photogenic (at least, not in the pre-Instagram era), but it was, without a doubt, the undisputed king of every family gathering. This recipe isn’t just a dish; it’s a memory, a feeling of home, and a guaranteed party starter all rolled into one bubbly, cheesy bite.
Recipe Overview
- Prep Time: 10 minutes
- Cook Time: 25 minutes
- Total Time: 35 minutes
- Servings: Approximately 16
- Yield: 8 cups
- Dietary Type: Not Gluten-Free (unless served with gluten-free chips)
Ingredients
- 1 (8 ounce) package cream cheese
- 1 cup sour cream
- 2 (16 ounce) cans refried beans
- 1 (4 1/2 ounce) can chopped green chilies, drained
- 1 (1 1/4 ounce) package taco seasoning mix
- 4 cups shredded Mexican blend cheese, divided
Equipment Needed
- Large microwaveable bowl
- Wire whisk
- 13×9-inch baking dish
- Non-stick cooking spray
Instructions
-
Begin by preheating your oven to 350°F (175°C). This ensures that the dip will cook evenly and the cheese will melt perfectly.
-
In a large microwaveable bowl, combine the cream cheese and sour cream. Microwave on HIGH for 1 minute, or until the cream cheese is softened. Don’t overheat it; you want it soft and pliable, not melted into a liquid.
-
Remove the bowl from the microwave and use a wire whisk to mix the cream cheese and sour cream until smooth. A whisk is crucial here; it prevents lumps and ensures a creamy base for the dip. If you don’t have a whisk, a sturdy fork will work in a pinch, but be prepared to put in a little extra elbow grease.
-
Add the refried beans, drained chopped green chilies, and taco seasoning mix to the cream cheese mixture. Mix well until everything is thoroughly combined. Make sure to drain the green chilies well, as excess liquid can make the dip watery.
-
Stir in 2 cups of the shredded Mexican blend cheese, reserving the remaining 2 cups for topping. Ensure the cheese is evenly distributed throughout the mixture for optimal cheesy goodness.
-
Spray a 13×9-inch baking dish with non-stick cooking spray. This will prevent the dip from sticking and make cleanup a breeze. If you don’t have cooking spray, you can lightly grease the dish with butter or oil.
-
Spread the bean mixture evenly into the prepared baking dish. A smooth, even layer will ensure that the dip cooks uniformly.
-
Sprinkle the remaining 2 cups of shredded Mexican blend cheese evenly over the top of the bean mixture. This generous layer of cheese will create a bubbly, golden-brown crust that is simply irresistible.
-
Bake for 25 minutes, or until the cheese is melted and bubbly. Keep a close eye on it; ovens can vary, and you want the cheese to be melted and lightly browned, not burnt.
-
Remove from the oven and let cool slightly before serving. Serve warm with your favorite tortilla chips.
Expert Tips & Tricks
- Spice it up: If you like a little extra heat, add a pinch of cayenne pepper or a dash of hot sauce to the bean mixture.
- Make it ahead: You can assemble the dip up to 24 hours in advance. Simply cover it tightly with plastic wrap and refrigerate it until you’re ready to bake. Add a few minutes to the baking time if baking from cold.
- Cream cheese consistency is key: Ensuring the cream cheese is properly softened is crucial for a smooth dip. If you forget to take it out ahead of time, you can soften it in the microwave, but be careful not to overheat it.
- Even Baking: To ensure even baking, rotate the dish halfway through the cooking time.
Serving & Storage Suggestions
Serve Texas Trash Dip warm, straight from the oven, alongside a generous bowl of your favorite tortilla chips. It’s also fantastic with vegetable sticks, crackers, or even spread on toasted baguette slices.
Leftovers can be stored in an airtight container in the refrigerator for up to 3 days. Reheat in the microwave or oven until warmed through. For longer storage, you can freeze the dip for up to 2 months. Thaw it overnight in the refrigerator before reheating. Note that the texture may change slightly after freezing and thawing.
Do not leave the dip at room temperature for more than 2 hours, as this can increase the risk of bacterial growth.
Nutritional Information
| Nutrient | Amount per Serving | % Daily Value |
|---|---|---|
| Calories | 516.8 kcal | N/A |
| Calories from Fat | 328 g | 64% |
| Total Fat | 36.5 g | 56% |
| Saturated Fat | 21.8 g | 109% |
| Cholesterol | 115.5 mg | 38% |
| Sodium | 1728.3 mg | 72% |
| Total Carbohydrate | 26.4 g | 8% |
| Dietary Fiber | 6.9 g | 27% |
| Sugars | 7.2 g | N/A |
| Protein | 22.9 g | 45% |
Note: Nutritional information is an estimate and can vary based on specific ingredients and portion sizes.
Variations & Substitutions
- Spicier Kick: Add diced jalapenos or a hotter taco seasoning mix.
- Meat Lovers: Brown a pound of ground beef or chorizo and drain the excess fat before adding it to the bean mixture.
- Vegetarian Boost: Add a can of drained and rinsed black beans or corn for added texture and flavor.
- Lighter Version: Use low-fat cream cheese and sour cream to reduce the fat content.
- Extra Cheesy: Experiment with different types of cheese, such as pepper jack or cheddar, for a different flavor profile.
- Layered Dip: Create a layered dip by spreading the bean mixture in a serving dish and topping it with salsa, guacamole, sour cream, and olives.
FAQs (Frequently Asked Questions)
Q: Can I use different types of beans?
A: Yes, you can substitute the refried beans with black beans, pinto beans, or even a combination of beans for a different flavor and texture.
Q: Can I make this dip in a slow cooker?
A: Absolutely! Combine all ingredients in a slow cooker and cook on low for 2-3 hours, or until the cheese is melted and the dip is heated through. Stir occasionally to prevent sticking.
Q: What can I serve with this dip besides tortilla chips?
A: Texas Trash Dip is also delicious with vegetable sticks, crackers, toasted baguette slices, or even as a topping for baked potatoes.
Q: Can I freeze this dip?
A: Yes, you can freeze the dip for up to 2 months. Thaw it overnight in the refrigerator before reheating. The texture may change slightly after freezing and thawing.
Q: Is this recipe gluten-free?
A: The dip itself is gluten-free, but be sure to serve it with gluten-free chips or other gluten-free dippers to keep it gluten-free. Also, double-check your taco seasoning mix to ensure it doesn’t contain any gluten.
Final Thoughts
Texas Trash Dip is more than just an appetizer; it’s a celebration of simple pleasures and shared moments. It’s the kind of dish that brings people together, sparks conversation, and creates lasting memories. So, gather your ingredients, preheat your oven, and prepare to experience the ooey, gooey, cheesy goodness of this ultimate crowd-pleaser. I encourage you to make this your own, try different variations, and most importantly, share it with the people you love. And don’t be surprised if it becomes a family favorite, just like it did for mine. Enjoy!