
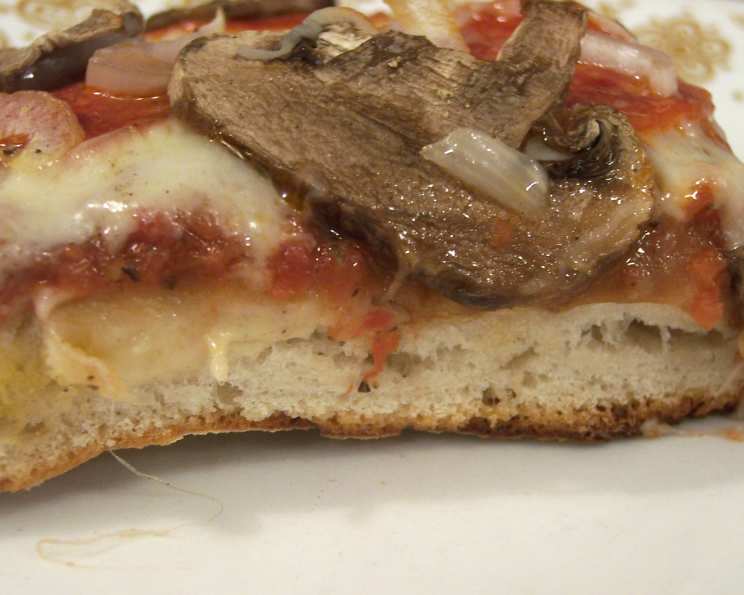
The Art of Making the Perfect Pizza Dough
My earliest memories of pizza aren’t from a restaurant; they’re from my grandmother’s kitchen. She always had a way of making everything from scratch, and her pizza dough was no exception. I remember being mesmerized by the simple act of her kneading the dough, the rhythmic push and fold, the way it transformed from a shaggy mass into a smooth, elastic ball. The aroma of yeast and warm flour filled the air, a promise of the deliciousness to come. And when that first bite of her homemade pizza hit my tongue – the perfectly crisp crust, the tangy sauce, the melty cheese – it was pure bliss. It’s a taste I’ve been chasing ever since, and through years of experimentation, I’ve finally cracked the code to recreating that magic at home.
Recipe Overview:
- Prep Time: 20 minutes
- Rise Time: 1 hour 15 minutes
- Cook Time: Varies based on pizza recipe
- Total Time: 1 hour 35 minutes +
- Servings: 2 (for grilling) or 1 (large baking)
- Yield: One 14-inch pizza or Two 9-inch pizzas
- Dietary Type: Vegetarian
Ingredients:
- 1 (2 1/4 teaspoon) packet active dry yeast
- 2 cups unbleached all-purpose flour, plus additional for kneading and dredging
- 3/4 cup warm water (105-115 degrees)
- 1 1/2 teaspoons salt
- 1 1/2 teaspoons olive oil
Equipment Needed:
- Measuring cups and spoons
- Large mixing bowl
- Measuring cup
- Plastic wrap
- Floured tray
- Work surface
Instructions:
-
Begin by activating the yeast. In a measuring cup, stir together the active dry yeast, 1 tablespoon of the flour, and 1/4 cup of the warm water. Let this mixture stand until the surface appears creamy, about 5 minutes. It’s crucial to use water that’s within the 105-115 degree range; too cold and the yeast won’t activate, too hot and you risk killing it. If the mixture doesn’t become creamy after 5 minutes, discard it and start again with fresh yeast.
-
In a large bowl, stir together 1 1/4 cups of the flour and the salt. Add the yeast mixture, olive oil, and the remaining 1/2 cup of warm water. Stir until a smooth batter forms.
-
Gradually stir in the remaining flour (about 1/2 cup), adding just enough so that the dough begins to pull away from the sides of the bowl. Don’t add too much flour at this stage. This dough will be wetter than some pizza doughs you may have worked with before, and that’s perfectly fine.
-
Turn the dough out onto a dry surface. With lightly floured hands (re-flour your hands when the dough becomes sticky), knead the dough until it is smooth, soft, and elastic, about 8 minutes. This step is vital for developing the gluten, which gives the pizza its chewy texture.
-
Once kneaded, form the dough into 1 ball if you plan to bake a single pizza, or 2 balls if you intend to grill individual pizzas. Place the ball(s) on a lightly floured surface and dust generously with flour.
-
Loosely cover the dough with plastic wrap and let it rise in a warm, draft-free place until it has doubled in bulk, approximately 1 1/4 hours. This is when the magic happens, and the yeast works its wonders, creating air pockets that give the crust its light and airy texture.
-
DO NOT PUNCH DOWN THE DOUGH after rising. This is a crucial step that separates this recipe from others. Deflating the dough will release the air and result in a tougher crust. Instead, gently handle the dough to preserve those precious air pockets.
-
Carefully dredge the dough in a bowl of flour to coat it completely. Transfer the dough to a dry work surface.
-
Now for the shaping: Hold one edge of the dough in the air with both hands, letting the bottom of the dough touch the work surface. Carefully move your hands around the edge of the dough (like turning a steering wheel), allowing the weight of the dough to stretch it into a round shape. For a single pizza to be baked, stretch it to roughly 10 inches in diameter initially. For individual grilled pizzas, stretch each ball to about 7 inches.
-
Lay the dough flat on a lightly floured work surface and continue to work the edges with your fingers, gently stretching it into the desired size: 14-inch round for a single pizza or 9-inch round for each of the two smaller pizzas.
-
If making two individual pizzas, transfer each round to a floured tray. Lightly dust a piece of plastic wrap with flour and invert it loosely over the pizza rounds. Allow the dough to stand for 10 to 20 minutes before grilling. The dough will become slightly puffy.
-
Note: The dough can be allowed to rise, covered, and refrigerated in a covered bowl for up to one day. Bring it to room temperature before shaping. And remember: DO NOT PUNCH DOWN!
-
Assemble and bake or grill the pizza according to your favorite recipe.
-
The dough can also be frozen for up to 1 month. Thaw it and bring it to room temperature before shaping, but once again, remember: DO NOT PUNCH DOWN!
Expert Tips & Tricks:
- Temperature is key: Ensure your water is between 105-115 degrees Fahrenheit for optimal yeast activation. A kitchen thermometer is a worthwhile investment.
- Don’t over-knead: Over-kneading can lead to a tough crust. Stop when the dough is smooth and elastic.
- Patience is a virtue: Allow the dough to rise fully. This is crucial for a light and airy crust.
- Flour dusting: Use enough flour to prevent sticking, but not so much that the dough becomes dry.
- Gentle handling: Avoid punching down the dough after rising. This preserves the air pockets and ensures a tender crust.
- Preheat your baking surface: Whether you’re using a pizza stone or a baking sheet, preheating it in the oven will help create a crispier crust.
- Grilled pizza tip: A perforated pizza pan is fantastic for grilled pizza.
Serving & Storage Suggestions:
Serve your homemade pizza immediately for the best flavor and texture. Garnish with fresh herbs like basil or oregano for an extra touch of freshness.
- Leftovers: Store leftover pizza in an airtight container in the refrigerator for up to 3 days.
- Reheating: Reheat pizza in a preheated oven at 350°F (175°C) until warmed through. For a crispier crust, you can also reheat it in a skillet over medium heat. You can also reheat in a microwave, but the crust might become soggy.
Nutritional Information:
Please note that the nutritional information is an estimate and can vary based on specific ingredients and portion sizes.
| Nutrient | Amount per Serving (1/2 of recipe) | % Daily Value* |
|---|---|---|
| Calories | 500 kcal | N/A |
| Total Fat | 7g | 9% |
| Saturated Fat | 1g | 5% |
| Cholesterol | 0mg | 0% |
| Sodium | 1750mg | 73% |
| Total Carbohydrate | 97g | 32% |
| Dietary Fiber | 4g | 16% |
| Sugars | 0.3g | N/A |
| Protein | 15g | 30% |
*Percent Daily Values are based on a 2,000 calorie diet.
Variations & Substitutions:
- Gluten-free: Substitute all-purpose flour with a gluten-free flour blend. You may need to adjust the amount of water depending on the blend.
- Whole wheat: Replace up to half of the all-purpose flour with whole wheat flour for a nuttier flavor and increased fiber.
- Herb-infused dough: Add dried herbs like oregano, basil, or rosemary to the flour mixture for a flavorful twist.
- Garlic dough: Mix in minced garlic or garlic powder to the dough for a savory kick.
FAQs (Frequently Asked Questions):
Q: Why is my pizza dough so sticky?
A: This dough is designed to be a bit wetter than some pizza doughs, but excessive stickiness could mean you added too much water or not enough flour. Try flouring your hands and work surface more generously.
Q: Can I use bread flour instead of all-purpose flour?
A: Yes, you can substitute bread flour for all-purpose flour. Bread flour has a higher protein content, which will result in a chewier crust.
Q: How do I know if my yeast is still good?
A: If your yeast mixture doesn’t become creamy after 5 minutes, it’s likely expired. Purchase a new packet of yeast for the best results.
Q: Can I add sugar to the dough?
A: While this recipe doesn’t call for sugar, a small amount (about 1 teaspoon) can help activate the yeast and add a touch of sweetness to the crust.
Q: My dough didn’t double in size. What went wrong?
A: Several factors can affect the rise time. Make sure your yeast is fresh, the water is the correct temperature, and the dough is in a warm, draft-free place. Cold temperatures can significantly slow down the rising process.
Final Thoughts:
Making pizza dough from scratch is a rewarding experience. It allows you to control the ingredients and create a pizza that’s perfectly tailored to your taste. Don’t be intimidated by the process; with a little practice, you’ll be whipping up amazing pizzas in no time. Gather your favorite toppings, invite some friends over, and enjoy the fruits of your labor! And feel free to experiment with different variations and toppings to discover your own signature pizza creation. This recipe is a template to be customized!