
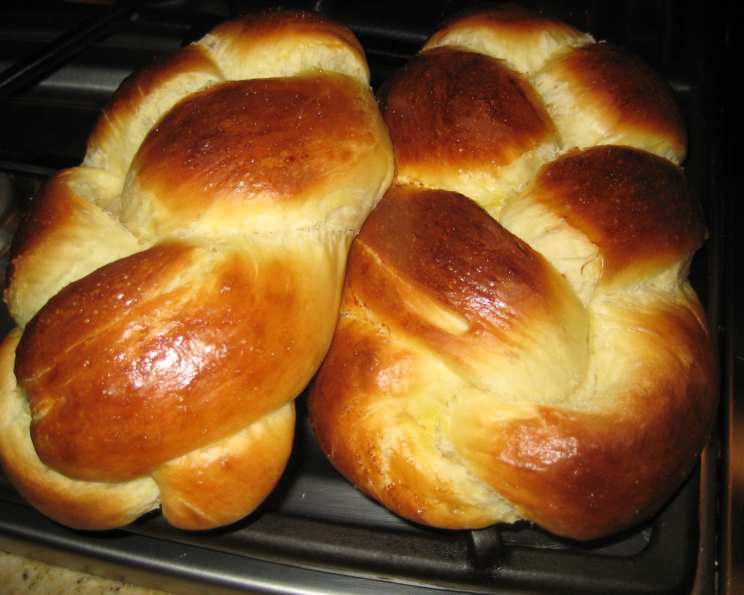
The Best Bread Machine Challah: A Baker’s Secret
I remember the first time I smelled challah baking. I was a young culinary student volunteering at a local synagogue for a holiday bake sale. The aroma of sweet dough, enriched with eggs and a hint of honey, filled the air, a comforting and intoxicating scent. I watched, mesmerized, as seasoned bakers expertly braided the loaves, their hands moving with a practiced grace that spoke of generations of tradition. It wasn’t just bread; it was a tangible link to history, family, and warmth – a feeling I’ve strived to recreate in my own kitchen ever since, often with the help of my trusty bread machine.
Recipe Overview
- Prep Time: 15 minutes
- Cook Time: 25 minutes
- Total Time: 40 minutes to 1 hour 40 minutes (includes rising time)
- Servings: 8
- Yields: 2 challahs
- Dietary Type: Dairy
Ingredients
- 3 egg yolks
- 1 cup water
- 3 1/2 tablespoons vegetable oil
- 3/4 teaspoon salt
- 1/4 cup plus 2 tablespoons sugar, heap the tablespoons
- 2 3/4 cups and 1 tablespoon bread flour, heap the tablespoon
- 1 (1/4 ounce) packet active dry yeast
- 1 egg, beaten for glazing
Equipment Needed
- Bread Machine
- Measuring cups and spoons
- Lightly floured surface
- Cookie sheet
- Parchment paper
- Dish towel
- Pastry brush
- Baking rack
Instructions
-
Begin by adding the ingredients to your bread machine in the precise order listed above. It’s important to follow this order for the best results with most bread machines.
-
Make a small well in the flour. This is where you’ll add the active dry yeast. This helps prevent the yeast from prematurely activating and ensures even distribution throughout the dough.
-
Set your bread machine to the dough cycle. This cycle will mix, knead, and proof the dough for you, taking the guesswork out of the process.
-
Once the dough cycle is complete, preheat your oven to 350 degrees F (175 degrees C). Make sure the rack is in the center position.
-
Lightly flour a clean work surface. This will prevent the dough from sticking as you shape it.
-
Gently remove the dough from the bread machine and place it onto the floured surface.
-
Divide the dough into two equal halves. These will become your two challah loaves.
-
Take each half and divide it again into three equal pieces. You should now have six pieces of dough.
-
Roll each piece of dough into a long rope, about 12-14 inches long.
-
Braid the three ropes together to form a challah loaf. Pinch the ends to seal them. Repeat this process with the remaining three ropes of dough.
-
Place the braided challahs onto a cookie sheet lined with a piece of parchment paper. The parchment paper will prevent the loaves from sticking to the pan and makes cleanup easier.
-
Cover the challahs loosely with a clean dish towel.
-
Let the challahs rise until they have doubled in size. This usually takes about 30 minutes to an hour, depending on the temperature of your kitchen. A warm environment will speed up the rising process.
-
Once the challahs have doubled, remove the dish towel.
-
In a small bowl, beat the egg for glazing.
-
Use a pastry brush to gently brush the beaten egg over the entire surface of each challah loaf, ensuring that all the crevices are coated. This will give the challah a beautiful golden-brown sheen as it bakes.
-
Bake in the preheated oven for 25 minutes, or until the bottom of the challah sounds hollow when tapped on. This indicates that the bread is fully cooked through.
-
Remove the challahs from the cookie sheet and place them on a baking rack to cool completely. This prevents the bottoms from becoming soggy.
Expert Tips & Tricks
- Sugar is Key: Don’t skimp on the sugar! The slight sweetness is traditional and adds to the beautiful browning of the crust. Make sure to heap those tablespoons!
- Flour Power: Bread flour is crucial for the chewy texture of challah. Its higher gluten content creates a stronger dough. If you must substitute, all-purpose flour will work in a pinch, but the texture will be slightly different. Again, heap the tablespoon as directed.
- Yeast Activity: Ensure your yeast is fresh and active. If you’re unsure, proof it by dissolving it in a little warm water with a pinch of sugar before adding it to the bread machine. If it doesn’t foam within 5-10 minutes, it’s likely dead.
- Braiding Perfection: For a more intricate braid, divide each half into more than three strands. Experiment with four, five, or even six strands for a visually stunning loaf.
- Egg Wash Alternatives: If you’re looking for a vegan alternative to the egg wash, try brushing the loaves with a mixture of maple syrup and plant-based milk.
Serving & Storage Suggestions
Challah is best enjoyed fresh, still slightly warm from the oven. Serve it sliced with butter, jam, or alongside your favorite brunch dishes. It’s also fantastic for making French toast!
To store leftover challah, wrap it tightly in plastic wrap or place it in an airtight container at room temperature. It will stay fresh for 2-3 days. For longer storage, freeze the challah for up to 2 months. To reheat, wrap the frozen loaf in foil and bake at 350°F (175°C) for 15-20 minutes, or until heated through. You can also reheat slices in a toaster or microwave.
Nutritional Information
| Nutrient | Amount per Serving | % Daily Value |
|---|---|---|
| Calories | 263.5 kcal | N/A |
| Calories from Fat | 77 g | 29% |
| Total Fat | 8.6 g | 13% |
| Saturated Fat | 1.6 g | 7% |
| Cholesterol | 85.5 mg | 28% |
| Sodium | 231.9 mg | 9% |
| Total Carbohydrate | 39.6 g | 13% |
| Dietary Fiber | 1.4 g | 5% |
| Sugars | 6.4 g | N/A |
| Protein | 6.5 g | 12% |
Variations & Substitutions
- Sweet Challah: Add a tablespoon or two of honey or maple syrup to the dough for an even sweeter flavor.
- Savory Challah: Incorporate herbs like rosemary, thyme, or garlic powder into the dough for a savory twist.
- Seeded Challah: Sprinkle sesame seeds, poppy seeds, or everything bagel seasoning on top of the challah before baking for added flavor and texture.
- Chocolate Chip Challah: Knead chocolate chips into the dough before braiding for a decadent treat.
- Gluten-Free Challah: Substitute the bread flour with a gluten-free bread flour blend. You may need to adjust the amount of liquid depending on the blend you use.
FAQs (Frequently Asked Questions)
Q: Why is my challah dense?
A: This could be due to several factors, including using old yeast, not measuring the flour accurately, or not allowing the dough to rise long enough. Ensure your yeast is fresh, measure the flour correctly (spoon it into the measuring cup and level it off), and be patient with the rising process.
Q: Can I make the dough ahead of time?
A: Yes, you can make the dough ahead of time. After the dough cycle is complete, punch it down and refrigerate it overnight. Let it come to room temperature before shaping and baking.
Q: Can I freeze the baked challah?
A: Absolutely! Wrap the cooled challah tightly in plastic wrap and then foil, or place it in a freezer-safe bag. It will keep in the freezer for up to 2 months.
Q: My challah is browning too quickly. What should I do?
A: If your challah is browning too quickly, tent it loosely with foil during the last 10-15 minutes of baking.
Q: Why does the recipe call for egg yolks only?
A: The egg yolks add richness and tenderness to the challah dough. The extra fat creates a more luxurious texture. Save the egg whites for meringues or an omelet!
Final Thoughts
There’s something truly special about baking challah. The rhythmic kneading, the gentle shaping, the intoxicating aroma that fills your home – it’s an experience that nourishes not only the body but also the soul. Whether you’re a seasoned baker or a complete novice, I encourage you to try this bread machine challah recipe. It’s a foolproof way to create a beautiful and delicious loaf that will impress your family and friends. Serve it with a steaming cup of coffee or alongside a hearty soup, and enjoy the simple pleasures of homemade bread. And don’t forget to share your creations – and your own baking stories – with others. Happy baking!