
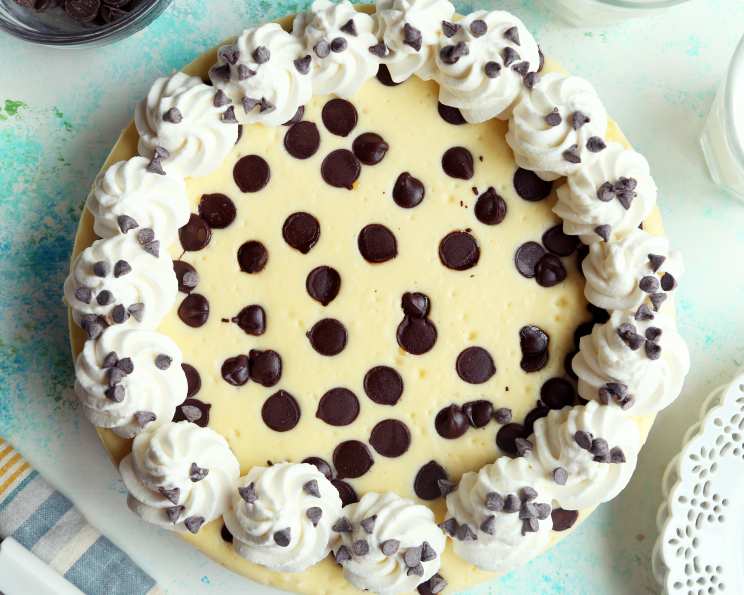
The Best Chocolate Chip Cheesecake (Ever!)
I remember the first time I tasted this cheesecake. It was at a potluck, and amidst a sea of store-bought cookies and generic brownies, this cheesecake stood out like a beacon of homemade goodness. The rich, creamy texture, the bursts of chocolate, and the subtle tang of the sour cream topping – it was pure bliss. After just one bite, I knew I needed the recipe, and thankfully, the baker happily shared it. Now, years later, it’s still my go-to recipe for a guaranteed crowd-pleaser, a testament to simple ingredients transformed into something extraordinary.
Recipe Overview
- Prep Time: 20 minutes
- Cook Time: 1 hour 10 minutes
- Total Time: At least 4 hours (including chilling)
- Servings: 12
- Yield: 1 9-inch cheesecake
- Dietary Type: Not Gluten-Free
Ingredients
For the Crust:
- 1 ½ cups Oreo cookie crumbs
- 3 tablespoons melted butter
For the Filling:
- 3 (8 ounce) packages cream cheese, softened
- 1 (14 ounce) can sweetened condensed milk (such as Eagle Brand)
- 3 eggs
- 2 tablespoons vanilla extract
- 1 cup chocolate chips, divided
- 1 teaspoon flour
For the Topping:
- 1 cup sour cream
- 2 tablespoons brown sugar
Equipment Needed
- 9-inch springform pan
- Large mixing bowl
- Small mixing bowl
- Electric mixer (stand or hand mixer)
- Rubber spatula
Instructions
-
Preheat your oven to 300°F (150°C). This lower temperature is key to preventing cracks in your cheesecake.
-
Prepare the crust: In a medium bowl, combine the Oreo cookie crumbs and melted butter. Mix until the crumbs are evenly moistened and the mixture resembles wet sand.
-
Press the crust mixture firmly and evenly onto the bottom of a 9-inch springform pan. Use the bottom of a measuring cup or your fingers to create a compact and even layer.
-
Make the filling: In a large mixing bowl, beat the softened cream cheese with an electric mixer until light and fluffy. This ensures a smooth, lump-free cheesecake.
-
Gradually beat in the sweetened condensed milk until well combined. Scrape down the sides of the bowl as needed to ensure everything is incorporated.
-
Add the eggs one at a time, beating well after each addition. Overmixing at this stage can incorporate too much air, which can lead to cracks, so mix until just combined.
-
Stir in the vanilla extract.
-
Prepare the chocolate chips: In a small bowl, toss ½ cup of the chocolate chips with the flour. This helps prevent the chocolate chips from sinking to the bottom of the cheesecake during baking.
-
Gently stir the floured chocolate chips into the cheesecake mixture. Be careful not to overmix.
-
Pour the cheesecake filling into the prepared springform pan, over the Oreo crust.
-
Sprinkle the remaining ½ cup of chocolate chips evenly over the top of the cheesecake.
-
Bake in the preheated oven for 1 hour. The cheesecake should be set around the edges but still have a slight jiggle in the center.
-
Turn off the oven and let the cheesecake cool in the oven with the door slightly ajar for 1 hour. This gradual cooling helps prevent cracking.
-
Remove the cheesecake from the oven and let it cool completely at room temperature.
-
Chill the cheesecake in the refrigerator for at least 3 hours, or preferably overnight. This allows the cheesecake to fully set and develop its flavor.
-
Prepare the topping: In a small bowl, beat together the sour cream and brown sugar until smooth.
-
After the cheesecake has chilled, spread the sour cream topping evenly over the top.
-
Return the cheesecake to the oven and bake for an additional 10 minutes.
-
Let the cheesecake cool completely before removing the sides of the springform pan.
-
Optional: Drizzle melted semi-sweet chocolate over the top of the cheesecake.
-
Optional: Decorate with fresh strawberries and serve slices with whipped cream.
Expert Tips & Tricks
- Room Temperature Ingredients: Make sure your cream cheese is fully softened. This is crucial for a smooth, lump-free cheesecake. Take it out of the fridge at least an hour before you start baking.
- Preventing Cracks: The key to preventing cracks is low and slow baking, followed by gradual cooling. Don’t be tempted to increase the oven temperature.
- Water Bath (Optional): For an even creamier texture and further crack prevention, you can bake the cheesecake in a water bath. Wrap the bottom of the springform pan tightly in foil and place it in a larger roasting pan. Pour hot water into the roasting pan until it reaches about halfway up the sides of the springform pan.
- Checking for Doneness: The cheesecake is done when the edges are set, but the center still has a slight jiggle. It will continue to set as it cools.
- Make Ahead: Cheesecakes are great for making ahead of time! They actually taste better after a day or two in the refrigerator.
Serving & Storage Suggestions
This chocolate chip cheesecake is best served chilled. You can slice it and serve it plain, or dress it up with whipped cream, fresh berries, or a drizzle of chocolate sauce.
Storage: Store leftover cheesecake in the refrigerator, tightly covered, for up to 5 days. You can also freeze the cheesecake for longer storage. Wrap it tightly in plastic wrap and then foil, and freeze for up to 2 months. Thaw in the refrigerator overnight before serving.
Nutritional Information
Note: Nutritional information is an estimate and may vary based on specific ingredients and serving size.
| Nutrient | Amount per Serving | % Daily Value |
|---|---|---|
| Calories | 501 kcal | 25% |
| Total Fat | 32g | 49% |
| Saturated Fat | 20g | 100% |
| Cholesterol | 162mg | 54% |
| Sodium | 300mg | 13% |
| Total Carbohydrate | 45g | 15% |
| Dietary Fiber | 0.5g | 2% |
| Sugars | 35g | – |
| Protein | 8g | 16% |
Variations & Substitutions
- Gluten-Free: Use gluten-free Oreo cookies or another type of gluten-free cookie for the crust. Ensure the flour you toss the chocolate chips with is also gluten-free (e.g., rice flour, almond flour).
- Different Chocolate: Experiment with different types of chocolate chips, such as dark chocolate, white chocolate, or even peanut butter chips.
- Flavor Extracts: Add a few drops of almond extract or peppermint extract to the filling for a different flavor profile.
- Seasonal Fruit: Top with seasonal fruits like raspberries, blueberries, or peaches for a burst of freshness.
- Liqueur Infusion: Add a tablespoon of your favorite liqueur (e.g., coffee liqueur, chocolate liqueur) to the filling for an extra touch of flavor.
FAQs (Frequently Asked Questions)
Q: Why did my cheesecake crack?
A: Cracking can be caused by baking at too high a temperature, overbaking, or rapid temperature changes. Follow the recipe instructions carefully and allow the cheesecake to cool gradually.
Q: Can I use a graham cracker crust instead of Oreo crumbs?
A: Yes, you can substitute graham cracker crumbs for Oreo crumbs. Use about 1 ½ cups of graham cracker crumbs and follow the same instructions for preparing the crust.
Q: How can I tell if the cheesecake is done?
A: The edges of the cheesecake should be set, but the center should still have a slight jiggle. It will continue to set as it cools.
Q: Can I freeze the cheesecake?
A: Yes, you can freeze the cheesecake for up to 2 months. Wrap it tightly in plastic wrap and then foil, and thaw it in the refrigerator overnight before serving.
Q: My cream cheese is still a little lumpy. Will it affect the final result?
A: Yes, it’s best to make sure your cream cheese is fully softened and beaten until completely smooth before adding other ingredients. Lumps can affect the texture of the finished cheesecake.
Final Thoughts
This chocolate chip cheesecake is more than just a dessert; it’s a celebration of simple pleasures. The creamy texture, the bursts of chocolate, and the perfect balance of sweetness make it a truly unforgettable treat. I encourage you to try this recipe and experience the joy of creating something delicious from scratch. Share it with your loved ones, and don’t be surprised if they ask for the recipe – it’s that good! And if you put your own unique twist on it, I would love to hear about it!