
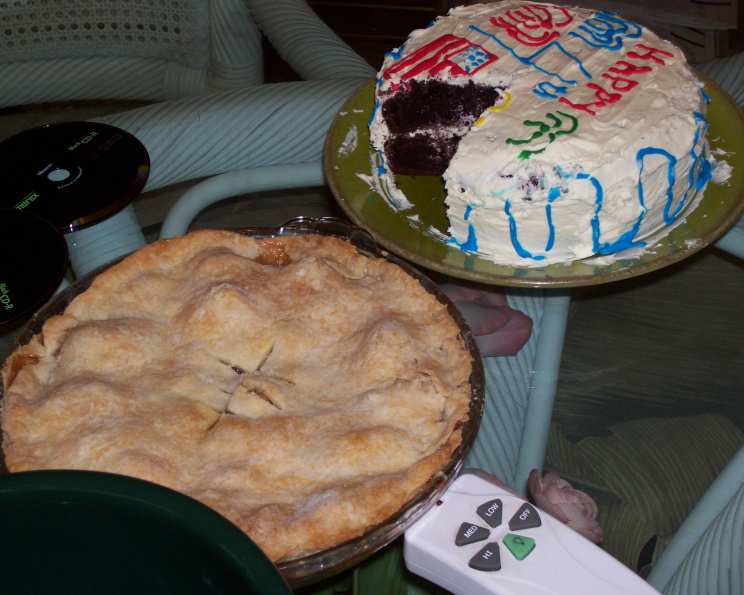
The Best Low-Fat Apple Pie: A Guilt-Free Slice of Heaven
My grandmother, bless her heart, wasn’t known for her healthy cooking. Everything was buttered, sugared, or deep-fried – often all three! But her apple pie… even she knew it was a bit much. It was dense, intensely sweet, and left you feeling like you’d swallowed a brick. Still, the memory of that first bite, the warm spices filling the air, and the happy smiles around the table stuck with me. So, years later, I took it upon myself to create a lighter, healthier version of her apple pie, one that captures the essence of her love without the overwhelming richness. And after many attempts, I nailed it. This low-fat apple pie is a triumph – all the flavour, none of the guilt.
Recipe Overview
- Prep Time: 20 minutes
- Cook Time: 45 minutes
- Total Time: 1 hour 5 minutes
- Servings: 6-8
- Yield: 1 pie
- Dietary Type: Low-Fat
Ingredients
For the Crust:
- 2 cups flour
- ½ cup Splenda sugar substitute
- 1 teaspoon salt
- 1 ½ teaspoons cinnamon
- ⅔ cup shortening
- 5-6 tablespoons cold water
For the Filling:
- 1 tablespoon flour
- 1 ½ tablespoons fat-free margarine
- 6-7 medium apples, pared, cored, and sliced (Granny Smith, Honeycrisp, or a mix work well)
Equipment Needed
- 9-inch pie dish
- Mixing bowls
- Measuring cups and spoons
- Rolling pin
- Pastry blender or fork (optional)
Instructions
-
Prepare the crust: In a large mixing bowl, combine the flour, Splenda sugar substitute, salt, and cinnamon.
-
Cut in the shortening: Use a pastry blender or your fingertips to cut the shortening into the dry ingredients until the mixture resembles coarse crumbs. This step is crucial for a flaky crust. Don’t overmix!
-
Add the water: Gradually add the cold water, one tablespoon at a time, mixing gently after each addition. Continue adding water until the dough just comes together and forms a ball. Be careful not to add too much water, or the crust will be tough.
-
Divide and chill: Divide the dough in half. Wrap each half in plastic wrap and refrigerate for at least 30 minutes. This allows the gluten to relax, resulting in a more tender crust.
-
Preheat the oven: Preheat your oven to 425 degrees F (220 degrees C).
-
Roll out the bottom crust: On a lightly floured surface, roll out one half of the dough into a circle large enough to fit your 9-inch pie dish. Gently transfer the dough to the pie dish and press it into the bottom and up the sides. Trim any excess dough.
-
Prepare the filling: In a separate bowl, mix together the flour and fat-free margarine. Add the pared, cored, and sliced apples, and toss to coat them evenly.
-
Fill the pie: Pour the apple mixture into the prepared pie crust.
-
Roll out the top crust: Roll out the remaining dough into a circle. You can either place the entire circle over the filling or cut it into strips to create a lattice top. If using a full crust, make a few slits in the top to allow steam to escape.
-
Assemble and bake: Carefully place the top crust (or lattice strips) over the filling. Crimp the edges of the top and bottom crusts together to seal.
-
Bake: Bake the pie for 15 minutes at 425 degrees F (220 degrees C). Then, reduce the oven temperature to 350 degrees F (175 degrees C) and continue baking for 30 minutes, or until the crust is golden brown and the filling is bubbly. If the crust starts to brown too quickly, you can loosely cover it with foil.
-
Cool: Let the pie cool completely on a wire rack before slicing and serving. This allows the filling to set properly.
Expert Tips & Tricks
- Use a mix of apple varieties: Combining different apples, such as Granny Smith for tartness and Honeycrisp for sweetness, adds complexity to the flavor.
- Keep your ingredients cold: Cold ingredients are key to a flaky crust. Use ice water and keep your shortening chilled.
- Don’t overwork the dough: Overmixing develops the gluten in the flour, resulting in a tough crust. Mix just until the dough comes together.
- Blind bake the crust: For an extra-crispy bottom crust, you can blind bake it before adding the filling. To do this, line the crust with parchment paper and fill it with pie weights or dried beans. Bake at 375 degrees F (190 degrees C) for 15 minutes, then remove the weights and bake for another 5-10 minutes until lightly golden.
- Add a touch of lemon juice: A squeeze of lemon juice in the apple filling brightens the flavor and prevents the apples from browning.
- Make it ahead: The pie crust can be made ahead of time and stored in the refrigerator for up to 2 days or in the freezer for up to 2 months. The filling can also be prepared ahead of time and stored in the refrigerator for up to 24 hours.
- Use a sugar-free caramel sauce: Drizzle sugar-free caramel sauce when serving the pie.
Serving & Storage Suggestions
Serve the low-fat apple pie warm or at room temperature. It’s delicious on its own or topped with a dollop of light whipped cream or a scoop of sugar-free vanilla ice cream.
Leftovers can be stored in the refrigerator for up to 3-4 days. To reheat, simply warm it in the oven at 350 degrees F (175 degrees C) for 10-15 minutes, or microwave individual slices for a few seconds. You can also freeze the entire pie for up to 2-3 months. Wrap it tightly in plastic wrap and then in aluminum foil. Thaw in the refrigerator overnight before reheating.
Nutritional Information
| Nutrient | Amount per Serving | % Daily Value |
|---|---|---|
| Calories | 324 kcal | N/A |
| Calories from Fat | 158 kcal | N/A |
| Total Fat | 17.7 g | 27% |
| Saturated Fat | 4.4 g | 22% |
| Cholesterol | 0 mg | 0% |
| Sodium | 308.5 mg | 12% |
| Total Carbohydrate | 39.4 g | 13% |
| Dietary Fiber | 3.6 g | 14% |
| Sugars | 10.8 g | N/A |
| Protein | 3.6 g | 7% |
Note: Nutritional information is an estimate and may vary based on specific ingredients and portion sizes.
Variations & Substitutions
- Gluten-Free: Use a gluten-free flour blend for the crust. Be sure to add a binder like xanthan gum to help hold the crust together.
- Vegan: Ensure your shortening is vegan-friendly. Many brands are plant-based, but it’s always best to check the label. You can substitute the fat-free margarine with vegan butter.
- Different Fruits: Experiment with other fruits, such as pears, peaches, or berries. Adjust the amount of Splenda sugar substitute as needed depending on the sweetness of the fruit.
- Spiced Up: Add a pinch of nutmeg, cloves, or ginger to the apple filling for a warmer, more complex flavor.
- Nuts: Add a sprinkle of chopped nuts, such as walnuts or pecans, to the top of the pie for added texture and flavor.
- Crumb Topping: If you prefer a crumb topping over a top crust, combine flour, Splenda sugar substitute, butter (or vegan butter), and oats in a bowl and crumble over the apple filling before baking.
FAQs (Frequently Asked Questions)
Q: Can I use regular sugar instead of Splenda?
A: Yes, you can substitute regular sugar for Splenda, but it will increase the sugar content of the pie. You may need to adjust the amount to your liking.
Q: How do I prevent the crust from burning?
A: If the crust starts to brown too quickly, you can loosely cover it with aluminum foil during the last 15-20 minutes of baking.
Q: My filling is too runny. What can I do?
A: Make sure you are using the correct amount of flour in the filling. If the filling is still too runny, you can add a tablespoon of cornstarch to help thicken it.
Q: Can I freeze the baked pie?
A: Yes, you can freeze the baked pie for up to 2-3 months. Wrap it tightly in plastic wrap and then in aluminum foil. Thaw in the refrigerator overnight before reheating.
Q: How can I tell if the pie is done?
A: The pie is done when the crust is golden brown and the filling is bubbly. You can also insert a knife into the center of the pie; if it comes out clean, the pie is done.
Final Thoughts
This low-fat apple pie recipe is a delicious and guilt-free way to enjoy a classic dessert. It’s perfect for any occasion, from family gatherings to holiday celebrations. Don’t be afraid to experiment with different variations and substitutions to make it your own. I encourage you to try this recipe and share your feedback! Pair it with a warm cup of tea or coffee for the ultimate comfort food experience. Happy baking!