
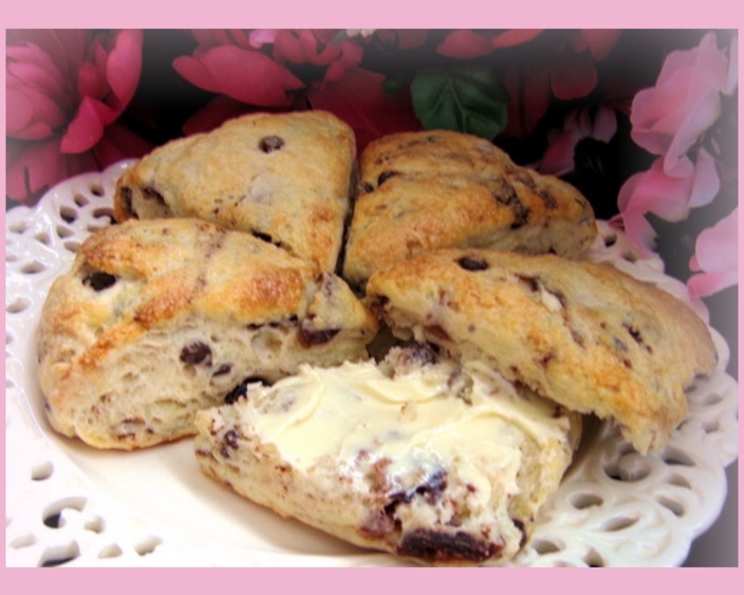
The Bistro’s Cherry Scones: A Taste of Summer All Year Round
The memory is as vivid as the first bite: a sun-drenched morning, the air thick with the scent of blooming lilacs, and the promise of adventure. My grandmother, a woman whose hands could coax magic from the simplest ingredients, would always make cherry scones when the fruit was at its peak. They were the perfect treat to take along for picnics, their golden crust yielding to a soft, crumbly interior bursting with tart cherries and sweet bursts of white chocolate. Each bite was a little piece of sunshine, a reminder of carefree days and the warmth of family. Now, whenever I bake these scones, I am transported back to her kitchen, surrounded by the love and laughter that made those moments so special.
Recipe Overview
- Prep Time: 20 minutes
- Cook Time: 20 minutes
- Total Time: 40 minutes
- Yields: 16 scones
- Serves: 16
- Dietary Type: Vegetarian
Ingredients
- 3 cups flour
- 1/3 cup sugar
- 1 tablespoon baking powder
- 1/2 teaspoon baking soda
- 1/2 teaspoon salt
- 1/2 cup chilled butter, cut into small bits
- 1 1/4 cups frozen sour cherries, thawed and drained
- 1/2 cup white chocolate chips
- 1 cup low-fat vanilla yogurt (or 1 cup buttermilk)
- 4 tablespoons turbinado sugar
Equipment Needed
- Large mixing bowl
- Medium mixing bowl
- Whisk
- Pastry blender or fork
- Cookie sheet
- Cooking spray
- Work surface
- Rolling pin or hands
- Knife or pastry cutter
Instructions
-
Begin by preheating your oven to 375 degrees Fahrenheit (190 degrees Celsius). Preparing the oven beforehand ensures optimal rising and even baking of the scones.
-
In a medium-sized bowl, whisk together the dry ingredients. This includes the 3 cups flour, 1/3 cup sugar, 1 tablespoon baking powder, 1/2 teaspoon baking soda, and 1/2 teaspoon salt. Whisking ensures that the leavening agents are evenly distributed throughout the flour, resulting in a light and airy scone.
-
Now comes the crucial step of incorporating the butter. Add the 1/2 cup chilled butter, cut into small bits, to the flour mixture. Using a pastry blender or even just your fingertips, cut the butter into the flour until the mixture resembles a coarse meal. The goal is to leave small pieces of butter intact, which will create flaky layers in the finished scone. Work quickly to prevent the butter from melting.
-
Gently fold in the 1 1/4 cups thawed and drained sour cherries and 1/2 cup white chocolate chips. Ensure the cherries are well-drained to prevent a soggy dough. Distribute the cherries and chocolate chips evenly throughout the mixture.
-
Create a well in the center of the dry ingredients. Pour in the 1 cup low-fat vanilla yogurt (or buttermilk, if preferred). The yogurt or buttermilk adds moisture and tang to the scones, contributing to their tender texture.
-
Mix the ingredients together until just combined, forming a soft, slightly wet dough. Be careful not to overmix, as this will develop the gluten in the flour and result in tough scones. A few streaks of flour are perfectly acceptable at this stage.
-
Divide the dough in half. This makes it easier to handle and shape the scones.
-
Lightly flour your work surface. Take one half of the dough and turn it out onto the prepared surface. Gently shape the dough into a ball and then roll or pat it into a circle, roughly 1/2 to 3/4 inch thick. Avoid overworking the dough.
-
Using a sharp knife or pastry cutter, cut the circle into 8 wedges. These will be your individual scones.
-
Place each wedge onto a cookie sheet that has been sprayed with cooking spray. This prevents the scones from sticking during baking. Leave a little space between each scone to allow for even heat circulation.
-
Repeat steps 8-10 with the other half of the dough.
-
Before baking, sprinkle the wedges generously with 4 tablespoons of turbinado sugar. This coarse sugar adds a delightful crunch and sweetness to the tops of the scones.
-
Bake in the preheated oven for approximately 20 minutes, or until the scones are golden brown. The exact baking time may vary depending on your oven, so keep a close eye on them.
-
Remove the scones from the oven and let them cool slightly on the baking sheet before transferring them to a wire rack to cool completely (or enjoy them warm!).
Expert Tips & Tricks
- For extra-flaky scones, chill the flour mixture after cutting in the butter for about 15-20 minutes before adding the wet ingredients. The colder the butter, the more steam it will release during baking, creating those desirable layers.
- If you don’t have turbinado sugar, you can use regular granulated sugar mixed with a pinch of coarse sea salt for a similar effect.
- Don’t have vanilla yogurt on hand? Plain yogurt with a teaspoon of vanilla extract works just as well.
- If the dough is too sticky to handle, add a tablespoon or two of flour at a time until it becomes manageable.
- To ensure even baking, rotate the baking sheet halfway through the baking time.
Serving & Storage Suggestions
These cherry scones are best served warm, straight from the oven. They are delicious on their own or with a dollop of clotted cream, whipped cream, or a drizzle of glaze. Leftover scones can be stored in an airtight container at room temperature for up to 2 days. For longer storage, wrap them individually and freeze for up to 2 months. To reheat, simply thaw and warm in a low oven (around 300°F or 150°C) for 5-10 minutes, or until heated through. You can also use a microwave, but the texture might be slightly softer.
Nutritional Information
| Nutrient | Amount per Serving | % Daily Value |
|---|---|---|
| Calories | 200.4 kcal | N/A |
| Calories from Fat | 71 g | 36% |
| Total Fat | 7.9 g | 12% |
| Saturated Fat | 4.8 g | 24% |
| Cholesterol | 17.1 mg | 5% |
| Sodium | 246.5 mg | 10% |
| Total Carbohydrate | 29 g | 9% |
| Dietary Fiber | 0.8 g | 3% |
| Sugars | 10.5 g | 42% |
| Protein | 3.7 g | 7% |
Variations & Substitutions
- Gluten-Free: Substitute the all-purpose flour with a gluten-free blend designed for baking. You may need to add a binder like xanthan gum to help with structure.
- Dairy-Free: Use a dairy-free yogurt alternative such as coconut yogurt or almond yogurt. Substitute the butter with a vegan butter alternative or coconut oil.
- Different Fruits: Try using other fruits like blueberries, raspberries, or cranberries in place of the cherries. Adjust the amount of sugar accordingly based on the fruit’s sweetness.
- Citrus Zest: Add the zest of a lemon or orange to the dry ingredients for a bright, citrusy flavor.
- Nuts: Incorporate chopped nuts like almonds or pecans for added texture and flavor.
FAQs (Frequently Asked Questions)
Q: Can I use fresh cherries instead of frozen?
A: Yes, you can use fresh cherries, but be sure to pit and halve them before adding them to the dough. Frozen cherries are often preferred as they help keep the butter cold, resulting in a flakier scone.
Q: Can I make the dough ahead of time?
A: Yes, you can prepare the dough, shape the scones, and then freeze them unbaked. When ready to bake, simply bake from frozen, adding a few extra minutes to the baking time.
Q: My scones are dry. What did I do wrong?
A: Overbaking or using too much flour can result in dry scones. Be sure to measure the flour accurately and avoid overmixing the dough.
Q: Can I add a glaze to these scones?
A: Absolutely! A simple glaze made from powdered sugar and milk or lemon juice would be a delicious addition.
Q: What is turbinado sugar and can I use something else?
A: Turbinado sugar is a raw sugar that has larger crystals, which gives a nice crunch. If you don’t have any, you can use regular granulated sugar, sanding sugar, or a mixture of granulated sugar and coarse sea salt.
Final Thoughts
These cherry scones are more than just a recipe; they are a connection to the past, a taste of summer, and a celebration of simple pleasures. I encourage you to try your hand at baking them and experience the joy of creating something delicious from scratch. Feel free to experiment with different variations and make them your own. And don’t forget to share your creations and feedback – I’d love to hear about your baking adventures! Perhaps serve them with a pot of Earl Grey tea for a truly delightful afternoon treat. Happy baking!