
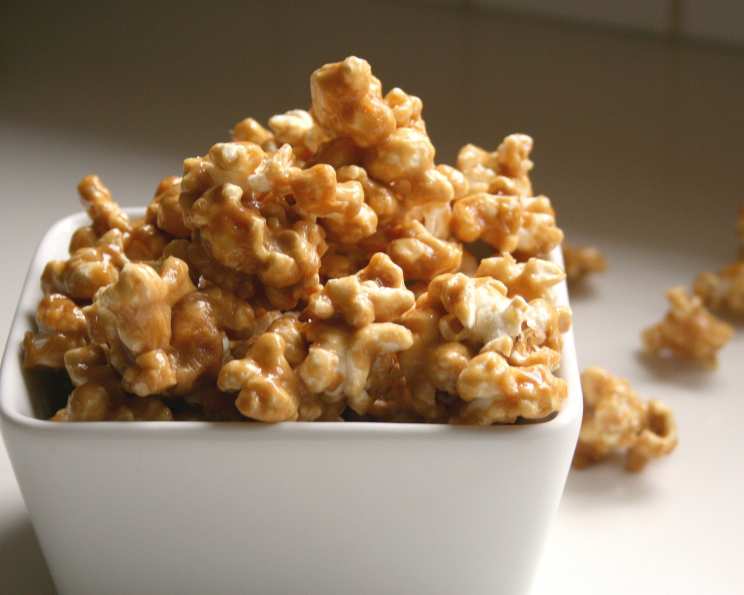
The Easiest and Best Caramel Corn I’ve Ever Made
The scent of caramel corn always transports me back to childhood. Every fall, our family would pile into the station wagon and head to the local harvest festival. The crisp air, the vibrant colors of the pumpkins, and, of course, the irresistible aroma of freshly made caramel corn wafting through the crowd. I’d clutch that warm bag, sticky fingers and a happy heart, convinced it was the best thing I’d ever tasted. This recipe, honed over years of experimenting, captures that same nostalgic magic, but without the need for any fancy equipment or complicated steps.
Recipe Overview
- Prep Time: 10 minutes
- Cook Time: 1 hour 10 minutes
- Total Time: 1 hour 20 minutes
- Yields: Approximately 1 1/2 gallon bag
- Dietary Type: Not specified (contains dairy)
Ingredients
- 2/3 cup unpopped popcorn
- 2 tablespoons oil (for popping)
- 1 cup butter
- 2 cups brown sugar
- 1 teaspoon salt
- 1/2 cup corn syrup
- 1 teaspoon baking soda
Equipment Needed
- Large cookie sheets
- Large bowl (plastic recommended)
- Heavy saucepan
- Wooden spoon or heat-resistant spatula
Instructions
- Preheat your oven to 200°F (93°C). This low temperature helps dry out the caramel corn, giving it that perfect crunchy texture.
- Lightly spray your largest cookie sheets with non-stick cooking spray. This will prevent the caramel corn from sticking and make cleanup a breeze.
- Pop the popcorn in the oil. I find it easiest to do this in two batches to avoid overcrowding the pot. Transfer the popped popcorn to a very large bowl. A plastic bowl works particularly well because the caramel is less likely to stick. Alternatively, you can spray your bowl with a bit of non-stick cooking spray.
- In a heavy saucepan over medium heat, melt the butter. Once melted, stir in the brown sugar, salt, and corn syrup. Using a heavy saucepan is crucial to prevent the caramel from burning.
- Bring the mixture to a rolling boil, stirring constantly with a wooden spoon. Once it reaches a boil, continue boiling for a full 5 minutes, stirring constantly. This step is essential for achieving the right consistency. Be careful, as the mixture will be very hot.
- Remove the saucepan from the heat and quickly stir in the baking soda. The mixture will foam up considerably, so be prepared!
- Immediately pour the caramel mixture directly over the popcorn in the large bowl. Stir to coat the popcorn completely. It’s important to work quickly here, as the caramel will start to harden as it cools.
- Pour the coated popcorn onto the prepared cookie sheets, spreading it out in a single layer.
- Bake in the preheated oven for 1 hour, stirring every 15-20 minutes to ensure even baking and prevent burning. This process is critical for achieving that signature crunchy caramel corn texture.
- Allow the caramel corn to cool completely on the cookie sheets before breaking it into pieces.
- Store in zip-top bags or airtight containers.
Expert Tips & Tricks
- Popcorn Perfection: The type of popcorn matters! Use a good quality popcorn that pops up large and fluffy. Avoid popcorn that has a lot of hulls, as these can make the caramel corn less enjoyable to eat.
- Caramel Consistency: Boiling the caramel for the full 5 minutes is crucial. Underboiling will result in soft, sticky caramel corn. Overboiling can lead to a burnt flavor.
- Even Coating: To ensure even coating, use a very large bowl and stir the popcorn and caramel mixture thoroughly. Don’t be afraid to get your hands in there (once it’s cooled slightly, of course!) to make sure every kernel is covered.
- Oven Calibration: Oven temperatures can vary. Keep a close eye on the caramel corn during baking and adjust the baking time as needed. If it starts to brown too quickly, reduce the oven temperature slightly.
- Salt Balance: The salt is important for balancing the sweetness of the caramel. Don’t be afraid to adjust the amount of salt to your liking.
- Baking Soda Buzz: Don’t skip the baking soda! It creates tiny air bubbles in the caramel, giving it a lighter, crispier texture.
Serving & Storage Suggestions
This caramel corn is perfect for snacking, movie nights, or as a homemade gift. Serve it in individual bags, bowls, or even festive tins.
To store, keep the cooled caramel corn in zip-top bags or airtight containers at room temperature. It will stay fresh for up to 1 week. For longer storage, you can freeze it for up to 2 months. Thaw at room temperature before serving. However, freezing might slightly affect the texture, making it a bit softer.
Nutritional Information
| Nutrient | Amount per Serving | % Daily Value |
|---|---|---|
| Calories | 2664.2 kcal | N/A |
| Calories from Fat | 1269 g | 48% |
| Total Fat | 141 g | 216% |
| Saturated Fat | 80.1 g | 400% |
| Cholesterol | 325.4 mg | 108% |
| Sodium | 3554.4 mg | 148% |
| Total Carbohydrate | 369.1 g | 123% |
| Dietary Fiber | 0.5 g | 2% |
| Sugars | 311.9 g | 1247% |
| Protein | 2.1 g | 4% |
Note: Nutritional information is an estimate and may vary based on specific ingredients and serving sizes.
Variations & Substitutions
- Nutty Caramel Corn: Add 1 cup of chopped nuts (such as peanuts, pecans, or almonds) to the popcorn before pouring on the caramel.
- Spiced Caramel Corn: Stir 1/2 teaspoon of ground cinnamon or pumpkin pie spice into the caramel mixture for a warm, comforting flavor.
- Chocolate Drizzle: Drizzle melted chocolate over the cooled caramel corn for an extra-indulgent treat.
- Sea Salt Caramel Corn: Sprinkle a pinch of sea salt over the warm caramel corn after baking for a salty-sweet flavor.
- Dairy-Free Option: Substitute the butter with a dairy-free butter alternative. Be sure to choose one that behaves similarly to butter when melted and heated.
FAQs (Frequently Asked Questions)
Q: Can I use a candy thermometer instead of just boiling for 5 minutes?
A: While you can use a candy thermometer, it’s not necessary for this recipe. Boiling for 5 minutes, stirring constantly, will yield the perfect caramel consistency without the need for specialized equipment.
Q: My caramel corn is too sticky. What did I do wrong?
A: The caramel was likely underboiled. Make sure to boil for the full 5 minutes, stirring constantly, to reach the correct consistency.
Q: My caramel corn burned in the oven. What happened?
A: Your oven temperature may be too high, or the caramel corn may have been too close to the heat source. Reduce the oven temperature slightly or move the baking sheets to a lower rack.
Q: Can I make this ahead of time?
A: Yes, you can make this caramel corn up to a week in advance. Store it in an airtight container at room temperature to maintain its crispness.
Q: Is it okay to use pre-popped popcorn?
A: While you can use pre-popped popcorn in a pinch, freshly popped popcorn will give you the best texture and flavor.
Final Thoughts
This caramel corn is more than just a snack; it’s a taste of nostalgia, a connection to simpler times, and a reminder of the joy of sharing homemade treats with loved ones. I urge you to try this recipe. It’s incredibly easy, surprisingly delicious, and guaranteed to disappear faster than you can say “second helping!” Don’t hesitate to add your own personal touch – a sprinkle of sea salt, a handful of nuts, or a drizzle of chocolate. And, most importantly, share your creation and your feedback! I can’t wait to hear about your caramel corn adventures.