
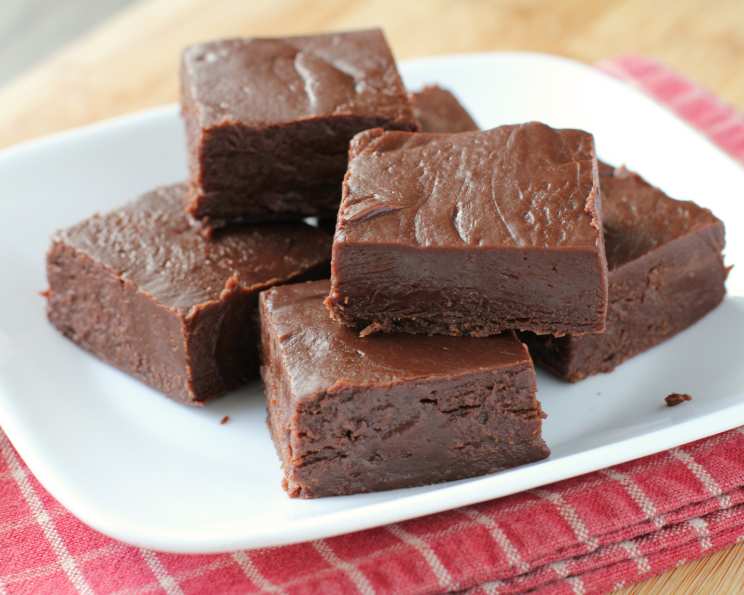
The Easiest Fudge: A Sweet Memory in Every Bite
My grandmother, Nana Rose, always had a stash of fudge hidden away in her pantry. As a child, the thrill of discovering that tin, its contents promising pure, unadulterated joy, remains a vivid memory. Nana Rose wasn’t much for elaborate desserts, but her fudge was legendary. It was simple, honest, and utterly divine – the kind of treat that made you feel instantly loved and comforted. This recipe is my attempt to recreate that same magical experience, a tribute to Nana Rose and her effortlessly delicious fudge.
Recipe Overview
- Prep Time: 5 minutes
- Cook Time: 1.5 minutes
- Total Time: Overnight (Refrigeration)
- Yields: 25-30 pieces
- Dietary Type: Vegetarian
Ingredients
- 1 (450-500 g) can sweetened condensed milk
- 1 (300 g) bag chocolate chips (semi-sweet or milk chocolate)
- 1 (100 g) chocolate candy bar, chopped (such as a Hershey’s bar or similar)
- ½ – ¾ cup peanut butter (optional)
- 1 pinch salt
- 1 dash vanilla extract
Equipment Needed
- Microwave-safe bowl
- Spatula or spoon
- 8×8 inch square pan (or similar size)
- Aluminum foil
Instructions
- Line your cake or brownie pan with aluminum foil. This will make it easier to remove the fudge later. Make sure the foil overhangs the sides of the pan.
- In a microwave-safe bowl, combine the sweetened condensed milk and chocolate chips.
- Microwave on high for about 1 minute and 30 seconds, or until the sweetened condensed milk is hot and slightly watery, and the chocolate chips are beginning to melt. Keep a very close watch!
- Important Note: Do NOT OVERHEAT the mixture. Overheating can burn the chocolate, resulting in a clumpy, grainy texture and an unpleasant taste. Err on the side of undercooking rather than overcooking.
- Carefully remove the bowl from the microwave. Using a spatula or spoon, stir the mixture until it is smooth and well blended. The residual heat should melt the remaining chocolate chips as you stir. Be patient and persistent!
- Now it’s time to customize! If you want to make peanut butter fudge, add the peanut butter to the chocolate mixture and stir until fully incorporated. For a more classic fudge, add the salt and vanilla extract. Or, if you’re feeling adventurous, add all three!
- Stir until all ingredients are completely mixed, smooth, even, and the mixture has a lovely sheen. The fudge should look tempting and glossy.
- Add in the chopped chocolate candy bar and stir gently to combine.
- Pour the fudge mixture into the foil-lined pan. Spread it evenly to ensure a consistent thickness.
- Refrigerate the pan until the fudge is firm. This usually takes at least 4 hours, but overnight is ideal for the best results.
- Once the fudge is completely firm, remove it from the pan by lifting the edges of the aluminum foil.
- Place the fudge on a cutting board and cut it into squares (or any other shapes you desire). A warm knife may help with clean cuts.
- Store the fudge in an airtight container at room temperature or in the refrigerator. You can also freeze the fudge for longer storage.
- And finally, eat and enjoy!
Expert Tips & Tricks
- High-Quality Chocolate Matters: The flavor of your fudge will only be as good as the chocolate you use. Opt for good-quality chocolate chips and candy bars for the best results.
- Microwave Power Varies: Every microwave is different, so adjust the cooking time accordingly. Start with a shorter time (e.g., 1 minute) and add increments of 15 seconds until the chocolate is just beginning to melt.
- Salt is Your Friend: Don’t skip the pinch of salt! It enhances the sweetness of the chocolate and balances the flavors perfectly.
- For a Fancier Look: Sprinkle the top of the fudge with chopped nuts, sea salt flakes, or mini chocolate chips before refrigerating.
- Troubleshooting Grainy Fudge: If your fudge turns out grainy, it’s likely because the chocolate was overheated. Unfortunately, there’s no easy fix. Next time, be extra careful not to overheat the mixture.
- Room temperature is key: Bringing the chocolate to room temperature will help with the melting process.
Serving & Storage Suggestions
Serve the fudge chilled or at room temperature. It’s delicious on its own, but it also pairs well with a scoop of vanilla ice cream or a cup of hot coffee.
- Storage: Store the fudge in an airtight container at room temperature for up to 1 week, in the refrigerator for up to 2 weeks, or in the freezer for up to 3 months.
- Freezing: To freeze, wrap the fudge tightly in plastic wrap and then place it in a freezer-safe bag or container. Thaw in the refrigerator before serving.
Nutritional Information
(Note: The following is an estimate and can vary based on specific ingredient brands and amounts used.)
| Nutrient | Amount per Serving | % Daily Value |
|---|---|---|
| Calories | 137 kcal | – |
| Calories from Fat | 57 kcal | – |
| Total Fat | 6.4 g | 9% |
| Saturated Fat | 3.9 g | 19% |
| Cholesterol | 7 mg | 2% |
| Sodium | 33.5 mg | 1% |
| Total Carbohydrate | 19.9 g | 6% |
| Dietary Fiber | 0.8 g | 3% |
| Sugars | 18.4 g | – |
| Protein | 2.2 g | 4% |
Variations & Substitutions
- Dark Chocolate Fudge: Use dark chocolate chips instead of semi-sweet or milk chocolate for a richer, more intense flavor.
- White Chocolate Fudge: Substitute white chocolate chips for the regular chocolate chips. Add some dried cranberries or chopped macadamia nuts for a festive twist.
- Mint Chocolate Fudge: Add a few drops of peppermint extract to the fudge mixture. You can also swirl in some green food coloring for a festive look.
- Espresso Fudge: Add a teaspoon of instant espresso powder to the fudge mixture for a coffee-flavored kick.
- Nutella Fudge: Substitute Nutella for the peanut butter for a hazelnut-chocolate variation.
- Vegan Fudge: Use vegan sweetened condensed milk and vegan chocolate chips to make a completely vegan version.
- Different Candy Bars: Experiment with different candy bars! Snickers, Twix, or even chopped-up Oreos can add unique flavors and textures.
FAQs (Frequently Asked Questions)
Q: Can I use a different size pan?
A: Yes, you can use a different size pan, but the thickness of the fudge will vary. A smaller pan will result in thicker fudge, while a larger pan will result in thinner fudge.
Q: How do I prevent the fudge from being grainy?
A: The key is to avoid overheating the chocolate. Microwave in short intervals and stir frequently.
Q: Can I add nuts to the fudge?
A: Absolutely! Chopped walnuts, pecans, or almonds would be delicious additions. Stir them in after the mixture is smooth.
Q: How long does the fudge last?
A: Fudge will last up to one week at room temperature, two weeks in the refrigerator, or three months in the freezer.
Q: My fudge is too soft. What did I do wrong?
A: It likely wasn’t refrigerated long enough. Place it back in the refrigerator for a few more hours until firm.
Final Thoughts
This incredibly easy fudge recipe is more than just a dessert; it’s a connection to simpler times and cherished memories. It’s the perfect treat to share with loved ones, a delightful gift, or simply a little indulgence for yourself. Don’t be afraid to experiment with different flavors and variations to create your own signature fudge. So, gather your ingredients, get in the kitchen, and let the magic of easy fudge bring a smile to your face. I hope it becomes a new family favorite, just as it is in mine. Enjoy!