
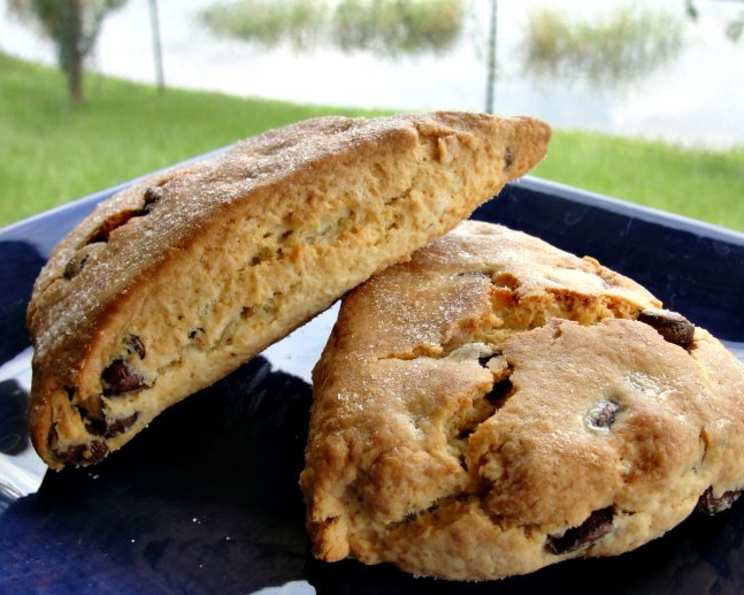
The Fluffiest, Moistest Ever Chocolate Chip Scones
The scent of warm scones baking always takes me back to my grandmother’s kitchen. She wasn’t a fancy baker, but she had a knack for simple comfort food. I remember sitting at her kitchen table, impatiently waiting as the aroma of melting butter and sweet dough filled the air. The slightly uneven edges of her scones and the generously scattered chocolate chips were perfect in their imperfection, and each bite was a warm hug. I’ve spent years chasing that memory, tweaking and experimenting until I finally landed on this recipe – one that truly captures the fluffy, moist, and utterly delightful experience of those childhood scones.
Recipe Overview
- Prep Time: 15 minutes
- Cook Time: 12-15 minutes
- Total Time: 25-30 minutes
- Yields: 12 scones
- Dietary Type: Vegetarian
Ingredients
- 1 cup sour cream
- 1 teaspoon baking soda
- 4 cups all-purpose flour
- 1 cup white sugar
- 2 teaspoons baking powder
- ¼ teaspoon cream of tartar
- 1 teaspoon salt
- 1 cup (2 sticks) cold butter, cut into cubes
- 1 egg
- 1 cup chocolate chips
Equipment Needed
- Large bowl
- Small bowl
- Measuring cups and spoons
- Baking sheet
- Lightly floured surface
- Pastry cutter or fork (optional)
Instructions
- First, in a small bowl, thoroughly blend the sour cream and baking soda. The mixture will fizz slightly. Set this aside; it’s the secret to our moist scones!
- Preheat your oven to 350 degrees F (175 degrees C). While the oven is heating, lightly grease a large baking sheet to prevent sticking.
- In a large bowl, whisk together the flour, sugar, baking powder, cream of tartar, and salt. Make sure these dry ingredients are well combined for even baking.
- Now, the most crucial step: incorporate the cold butter. Using a pastry cutter or even just your fingertips, cut the butter into the flour mixture until it resembles coarse crumbs. Work quickly to keep the butter cold; this is key to creating those flaky layers. Small chunks of butter are your friend!
- Next, stir the sour cream mixture and egg into the flour mixture until just moistened. Be careful not to overmix – a few streaks of flour are perfectly fine. Overmixing will result in tough scones.
- Gently fold in the chocolate chips. Distribute them evenly throughout the dough.
- Turn the dough out onto a lightly floured surface and knead briefly – just a few times, until it comes together.
- Roll or pat the dough into a round that is approximately ¾ inch thick. Don’t worry about perfection; rustic scones are beautiful!
- Using a sharp knife or a pastry scraper, cut the round into 12 wedges.
- Place the wedges onto the prepared baking sheet, ensuring they are about 2 inches apart to allow for even baking.
- Bake in the preheated oven for 12 to 15 minutes, or until the bottoms are golden brown. The tops should be lightly golden as well. Keep a close eye on them to prevent burning!
- Remove from the oven and let them cool slightly on the baking sheet before transferring them to a wire rack to cool completely (or, if you’re like me, eat them warm!).
Expert Tips & Tricks
- Cold Ingredients are Key: The colder your butter and sour cream, the flakier your scones will be. Consider chilling your dry ingredients as well for an extra boost!
- Don’t Overmix: Overmixing develops the gluten in the flour, resulting in tough, dense scones. Mix until just combined.
- Adjust for Altitude: If you’re baking at a high altitude, you may need to reduce the baking powder slightly (about ¼ teaspoon) to prevent the scones from rising too quickly and then collapsing.
- For a Golden Top: Brush the tops of the scones with a little milk or cream before baking for a beautiful golden-brown finish.
- Make-Ahead Tip: Prepare the dough up to the point of baking, then cover and refrigerate for up to 24 hours. Bake as directed when ready. You may need to add a minute or two to the baking time if the dough is cold.
- Freezing: You can freeze unbaked scone wedges on a baking sheet until solid, then transfer them to a freezer bag. Bake directly from frozen, adding a few minutes to the baking time.
Serving & Storage Suggestions
These scones are best enjoyed warm, straight from the oven. Serve them with a pat of butter, a dollop of clotted cream, or a spoonful of your favorite jam. They are also delicious alongside a cup of coffee or tea.
To store leftovers, place them in an airtight container at room temperature. They will stay fresh for about 2 days. For longer storage, you can freeze them for up to 2 months. To reheat, wrap the scones in foil and warm them in a low oven (300 degrees F / 150 degrees C) for about 10-15 minutes, or until heated through.
Nutritional Information
| Nutrient | Amount per Serving | % Daily Value |
|---|---|---|
| Calories | 462.5 kcal | N/A |
| Total Fat | 24.1 g | 37% |
| Saturated Fat | 14.6 g | 73% |
| Cholesterol | 66.1 mg | 22% |
| Sodium | 518.1 mg | 21% |
| Total Carbohydrate | 58.2 g | 19% |
| Dietary Fiber | 1.9 g | 7% |
| Sugars | 25.1 g | N/A |
| Protein | 6 g | 11% |
Note: Nutritional information is an estimate and may vary based on specific ingredients and portion sizes.
Variations & Substitutions
- Fruit Scones: Substitute the chocolate chips with 1 cup of blueberries, raspberries, dried cranberries, or chopped dried apricots.
- Nutty Scones: Add ½ cup of chopped walnuts, pecans, or almonds to the dough along with the chocolate chips (or instead of them!).
- Savory Scones: Omit the sugar and chocolate chips. Add ½ cup of shredded cheddar cheese, chopped chives, and a pinch of black pepper for a savory twist.
- Lemon Poppy Seed Scones: Add the zest of one lemon and 2 tablespoons of poppy seeds to the dry ingredients.
- Spiced Scones: Add 1 teaspoon of cinnamon, ½ teaspoon of nutmeg, and ¼ teaspoon of ground cloves to the dry ingredients for a warm, spiced flavor.
FAQs (Frequently Asked Questions)
Q: Why is it important to keep the butter cold?
A: Cold butter melts during baking, creating steam that separates the layers of dough and results in a flaky, tender scone.
Q: Can I use a different type of flour?
A: While all-purpose flour works best, you can substitute with pastry flour for an even more tender scone. Avoid using bread flour, as it will result in a tougher texture.
Q: My scones are dry. What did I do wrong?
A: Overbaking or using too much flour are common causes of dry scones. Be sure to measure your flour accurately and bake until just golden brown on the bottom. Also, avoid overmixing the dough.
Q: Can I make these scones without sour cream?
A: Sour cream adds moisture and tang, but you can substitute it with plain Greek yogurt or buttermilk in a pinch. The flavor and texture may be slightly different.
Q: How do I prevent the chocolate chips from melting too much during baking?
A: Use good-quality chocolate chips and avoid overbaking the scones. You can also try freezing the chocolate chips for about 15 minutes before adding them to the dough.
Final Thoughts
These chocolate chip scones are more than just a recipe; they’re a slice of pure comfort. I encourage you to give them a try and experience the joy of biting into a perfectly fluffy, moist, and chocolatey scone. Don’t be afraid to experiment with variations and make them your own! And please, let me know how they turn out – I’d love to hear your stories and see your creations. Pair them with a warm beverage and good company for the ultimate cozy experience. Happy baking!