
The Great Australian Pikelets
The scent of pikelets sizzling on a hot pan is a sensory time machine for me, instantly transporting me back to childhood weekends spent at my grandmother’s house. Nanna June, with her ever-present floral apron and mischievous twinkle in her eye, would preside over the stovetop, churning out stacks of these golden discs. The air would be thick with the sweet aroma of vanilla and warm butter, a comforting blanket that wrapped around us as we eagerly awaited our turn to slather them with homemade strawberry jam. Those simple moments, filled with laughter, sticky fingers, and the unmatched joy of freshly cooked pikelets, are etched in my heart forever.
Recipe Overview
- Prep Time: 5 minutes
- Cook Time: 20 minutes
- Total Time: 25 minutes
- Yields: 15 pikelets
- Dietary Type: Not specified
Ingredients
- 1 large egg
- ¼ cup sugar (use vanilla sugar if you have it, or add ½ to 1 teaspoon of vanilla extract)
- ½ cup milk (1-2 tbsp extra may be required for correct consistency)
- 1 cup self-raising flour
Equipment Needed
- Pouring jug or bowl
- Whisk
- Frypan or griddle
- Spatula
- Plate
- Paper towel
Instructions
-
In a pouring jug or a mixing bowl, whisk together the egg, sugar, and half of the milk until well combined. This initial blending is key to a smooth batter.
-
Add the self-raising flour to the wet ingredients and mix thoroughly. Don’t overmix at this stage; just ensure the flour is incorporated.
-
Gradually add the remaining milk, a little at a time, until the batter reaches the consistency of a thick cream. You might need an extra tablespoon or two of milk to get it just right. The batter should pour easily but still hold its shape slightly.
-
Beat the batter until it is smooth and free of lumps. A smooth batter results in light and fluffy pikelets.
-
Preheat a lightly greased frypan or griddle over medium-high heat. It’s crucial to have the pan hot enough before you start cooking; otherwise, the pikelets will be flat and pale. After a few rounds, you may need to reduce the heat to medium to prevent them from burning.
-
Pour about a soup spoon-sized amount of batter onto the preheated frypan for each pikelet. Don’t overcrowd the pan; leave enough space between each pikelet for easy flipping.
-
Cook the pikelets until the top surface is covered with bubbles and the edges look set. This usually takes about 2-3 minutes. The underside should be a lovely golden color.
-
Flip the pikelets carefully with a spatula and cook the other side for another 1-2 minutes, or until golden brown.
-
Remove the cooked pikelets from the pan and pile them up on a plate. Cover the plate with a paper towel to keep the pikelets warm and prevent them from becoming rubbery.
-
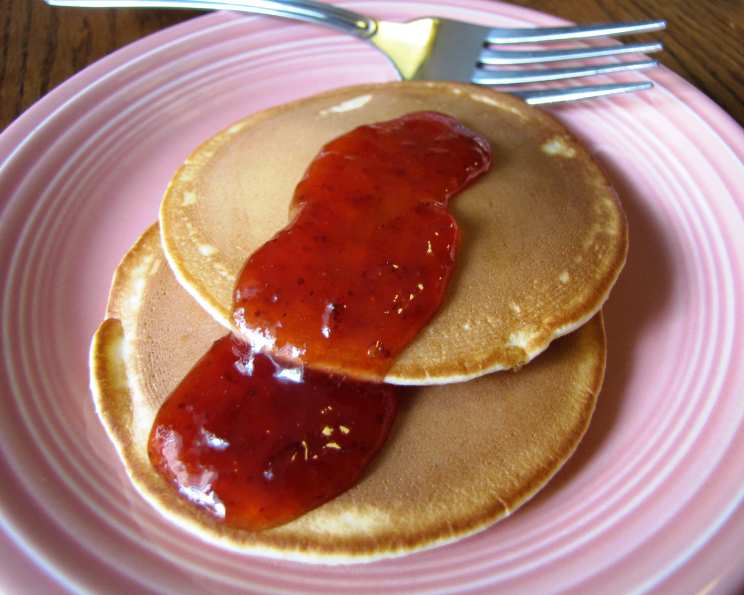
Serve the pikelets warm with your favorite toppings, such as jam, honey, maple syrup, or whipped cream.
Expert Tips & Tricks
- Vanilla Sugar Magic: Using vanilla sugar instead of regular sugar adds a subtle, aromatic sweetness that elevates the flavor profile of the pikelets. If you don’t have vanilla sugar, simply add ½ to 1 teaspoon of vanilla extract to the batter.
- Resting the Batter: Allowing the batter to rest for 10-15 minutes before cooking allows the gluten to relax, resulting in more tender pikelets.
- Even Cooking: To ensure even cooking, use a non-stick frypan or griddle and lightly grease it with butter or oil between batches.
- Perfect Consistency: The batter consistency is crucial for achieving light and fluffy pikelets. If the batter is too thick, add a little more milk. If it’s too thin, add a tablespoon of flour.
- Don’t Overmix: Overmixing the batter develops the gluten, resulting in tough pikelets. Mix just until the ingredients are combined.
Serving & Storage Suggestions
Serve your freshly cooked pikelets warm, piled high on a plate. Accompany them with a selection of toppings, such as your favorite jam (strawberry, raspberry, or apricot are classic choices), honey, maple syrup, whipped cream, fresh berries, or a dusting of icing sugar.
Leftover pikelets can be stored in an airtight container at room temperature for up to 2 days or in the refrigerator for up to 4 days. To reheat, warm them in a toaster, microwave, or frypan until heated through. You can also freeze pikelets for longer storage. Place them in a single layer on a baking sheet and freeze until solid. Then, transfer them to a freezer-safe bag or container. Frozen pikelets can be reheated directly from frozen in a toaster or oven.
Nutritional Information
| Nutrient | Amount per Serving | % Daily Value |
|---|---|---|
| Calories | 53.2 kcal | N/A |
| Calories from Fat | 6 g | 12% |
| Total Fat | 0.7 g | 1% |
| Saturated Fat | 0.3 g | 1% |
| Cholesterol | 13.5 mg | 4% |
| Sodium | 8.9 mg | 0% |
| Total Carbohydrate | 10.1 g | 3% |
| Dietary Fiber | 0.2 g | 0% |
| Sugars | 3.4 g | N/A |
| Protein | 1.6 g | 3% |
Note: Nutritional information is an estimate and may vary depending on specific ingredients and portion sizes.
Variations & Substitutions
- Gluten-Free Pikelets: Substitute the self-raising flour with a gluten-free self-raising flour blend.
- Dairy-Free Pikelets: Use non-dairy milk, such as almond milk, soy milk, or oat milk, in place of cow’s milk.
- Whole Wheat Pikelets: Replace half of the self-raising flour with whole wheat flour for a slightly nuttier flavor and added fiber.
- Spiced Pikelets: Add a pinch of ground cinnamon, nutmeg, or cardamom to the batter for a warm, aromatic twist.
- Chocolate Chip Pikelets: Stir in a handful of chocolate chips to the batter for a decadent treat.
FAQs (Frequently Asked Questions)
Q: Why are my pikelets flat and not fluffy?
A: This is usually due to the pan not being hot enough or the batter being too thin. Ensure the pan is preheated to medium-high heat and adjust the batter consistency by adding a little more flour if needed.
Q: How do I prevent my pikelets from sticking to the pan?
A: Use a non-stick frypan or griddle and lightly grease it with butter or oil between batches.
Q: Can I make the batter ahead of time?
A: Yes, you can make the batter up to 24 hours in advance and store it in the refrigerator. Whisk it gently before using.
Q: How do I keep the pikelets warm while cooking?
A: Pile the cooked pikelets on a plate and cover them with a paper towel to keep them warm and prevent them from becoming rubbery.
Q: Can I freeze pikelets?
A: Yes, pikelets freeze well. Place them in a single layer on a baking sheet and freeze until solid. Then, transfer them to a freezer-safe bag or container. Reheat directly from frozen in a toaster or oven.
Final Thoughts
So there you have it – the recipe for truly great Australian pikelets, little bites of sunshine that are perfect for breakfast, brunch, afternoon tea, or anytime you crave a simple, comforting treat. Don’t be afraid to experiment with different toppings and variations to create your own signature pikelet creation. Gather your loved ones, fire up the frypan, and enjoy the simple pleasure of sharing a plate of warm, homemade pikelets. I encourage you to try it and share your experiences! Maybe pair it with a freshly brewed cup of coffee or a refreshing glass of lemonade. Enjoy!