
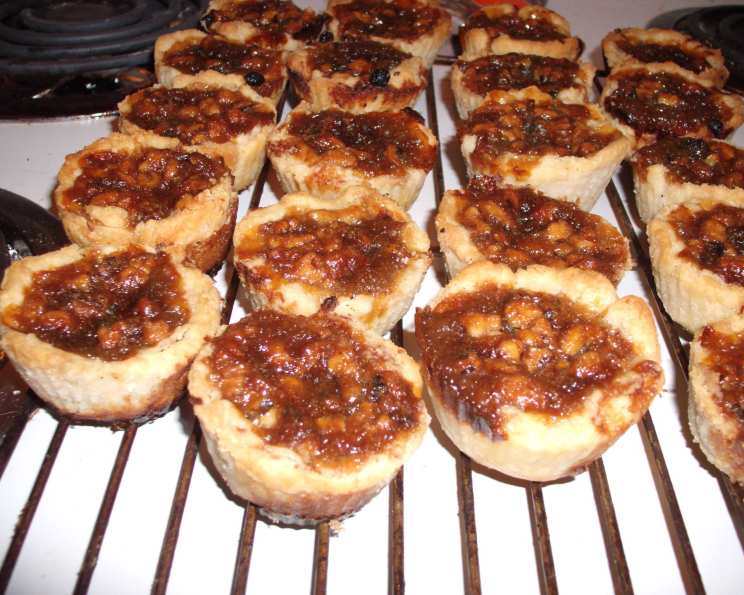
The Great Canadian Butter Tart: A Taste of Home
The smell alone transports me back to my grandmother’s kitchen, a warm haven filled with the comforting aroma of caramelized sugar and buttery pastry. I remember being perched on a stool, mesmerized as she carefully crimped the edges of each miniature pie shell, her hands moving with practiced grace. The anticipation was almost unbearable, knowing that soon I’d be holding a warm, gooey butter tart, its sweetness a perfect reward for my patience. To this day, no other dessert evokes such a strong sense of nostalgia and pure, unadulterated joy. These are not just tarts; they’re edible memories, little bites of happiness.
Recipe Overview
- Prep Time: 30 minutes
- Cook Time: 20 minutes
- Total Time: 50 minutes
- Yields: 24 tarts
- Serves: 8-12
- Dietary Type: Not specified
Ingredients
- 1 batch double crust pie crust
- 2 eggs
- 1 1/2 cups packed brown sugar
- 1/2 cup corn syrup
- 4 tablespoons butter, melted
- 1 cup currants
- 1/2 cup walnuts
- 2 teaspoons white vinegar
- 1 pinch salt
- 1/2 teaspoon vanilla extract
Equipment Needed
- Muffin tin or silicone muffin cups
- Mixing bowls
- Measuring cups and spoons
- Whisk or mixer
Instructions
-
Preheat your oven to 350 degrees Fahrenheit. This consistent heat is crucial for even baking and achieving that perfect golden-brown crust.
-
In a mixing bowl, beat the eggs well. Whisking vigorously incorporates air and ensures a smooth, even texture in the filling.
-
Add the brown sugar, corn syrup, and melted butter to the beaten eggs. Beat until combined. The melted butter should be cooled slightly to prevent it from cooking the eggs. Make sure the brown sugar is packed when measuring to ensure correct sweetness and moisture levels.
-
Add the currants, walnuts, vinegar, salt, and vanilla extract to the mixture. Mix vigorously to distribute the ingredients evenly throughout the filling. The vinegar may seem like an odd addition, but it provides a subtle tang that balances the sweetness and enhances the other flavors.
-
On a lightly floured surface, roll out your prepared pie crust. Using a cookie cutter or a knife, cut out circles of pastry that are slightly larger than the diameter of your muffin tin cavities.
-
Place the circles of unbaked pie pastry into either cornmeal-sprinkled muffin pans or silicone muffin cups. The cornmeal adds a subtle texture and prevents the tarts from sticking. Paper cups can also be used in a pinch.
-
Fill the shells 3/4 full with the prepared filling. Be careful not to overfill, as the filling will expand during baking and could overflow.
-
Bake until the pastry is lightly browned, approximately 20 minutes. Keep a close eye on them; oven temperatures can vary. For a runnier tart, reduce the baking time to 15-17 minutes. The filling should be slightly jiggly in the center when removed from the oven for a gooier consistency.
-
Let the tarts cool in the muffin tin for a few minutes before transferring them to a wire rack to cool completely. This prevents them from sticking and allows the pastry to firm up.
Expert Tips & Tricks
- For a richer flavor, use dark brown sugar instead of light brown sugar. The molasses content will add depth and complexity to the filling.
- To prevent a soggy crust, blind-bake the pastry shells for a few minutes before filling them. This helps to set the crust and create a barrier against the moisture in the filling. Use pie weights or dried beans to prevent the pastry from puffing up during baking.
- Customize your tarts by adding other ingredients such as raisins, pecans, chocolate chips, or even a dash of maple syrup.
- If your filling is too thick, add a tablespoon or two of milk or cream to thin it out.
- For a shiny glaze, brush the warm tarts with melted butter or a simple syrup made from sugar and water.
- Make-ahead tip: You can prepare the pie crust and filling a day in advance and store them separately in the refrigerator. Assemble and bake the tarts just before serving.
Serving & Storage Suggestions
Butter tarts are best served slightly warm, allowing the filling to be at its gooey peak. They pair perfectly with a scoop of vanilla ice cream, a dollop of whipped cream, or a dusting of powdered sugar. For a truly Canadian experience, serve them alongside a steaming cup of maple-flavored coffee.
To store leftover butter tarts, keep them in an airtight container at room temperature for up to 3 days. For longer storage, refrigerate them for up to a week or freeze them for up to 3 months. To reheat, warm them in a preheated oven at 300 degrees Fahrenheit for 5-10 minutes, or microwave them in short bursts until heated through.
Nutritional Information
| Nutrient | Amount per Serving | % Daily Value |
|---|---|---|
| Calories | 616.2 kcal | N/A |
| Calories from Fat | 246 g | 40% |
| Total Fat | 27.4 g | 42% |
| Saturated Fat | 8.4 g | 41% |
| Cholesterol | 68.1 mg | 22% |
| Sodium | 339.8 mg | 14% |
| Total Carbohydrate | 90.7 g | 30% |
| Dietary Fiber | 2.5 g | 9% |
| Sugars | 57.3 g | 229% |
| Protein | 6.4 g | 12% |
Please note that these are approximate values and may vary depending on specific ingredients and portion sizes.
Variations & Substitutions
- Gluten-Free Butter Tarts: Use a gluten-free pie crust recipe or store-bought gluten-free pie crust.
- Vegan Butter Tarts: Substitute the butter with vegan butter, the eggs with a flax egg replacement (1 tablespoon flaxseed meal mixed with 3 tablespoons water per egg), and ensure your pie crust is vegan.
- Maple Butter Tarts: Replace a portion of the corn syrup with pure maple syrup for a distinctly Canadian flavor.
- Nut-Free Butter Tarts: Omit the walnuts or substitute them with sunflower seeds or pumpkin seeds.
- Spice it Up: Add a pinch of cinnamon, nutmeg, or allspice to the filling for a warmer, more festive flavor.
FAQs (Frequently Asked Questions)
Q: Why is there vinegar in the butter tart filling?
A: The vinegar adds a subtle tanginess that balances the sweetness of the filling and enhances the other flavors. It also helps to tenderize the pastry.
Q: Can I use pre-made pie crust for this recipe?
A: Yes, you can use store-bought pie crust to save time. Just make sure to choose a good-quality crust that will hold its shape during baking.
Q: How do I prevent the butter tarts from sticking to the muffin tin?
A: Sprinkle the muffin tin with cornmeal or use silicone muffin cups. You can also lightly grease the tin with butter or cooking spray.
Q: What is the best way to tell if the butter tarts are done?
A: The pastry should be lightly browned, and the filling should be set around the edges but still slightly jiggly in the center. For a runnier tart, reduce the baking time.
Q: Can I freeze butter tarts?
A: Yes, butter tarts freeze well. Allow them to cool completely before wrapping them individually in plastic wrap and placing them in a freezer-safe container. They can be frozen for up to 3 months.
Final Thoughts
Whether you’re a seasoned baker or just starting out, these butter tarts are sure to become a family favorite. Don’t be afraid to experiment with different variations and find your perfect combination of flavors. The most important ingredient, however, is love. Bake these with care, and you’ll create a dessert that is not only delicious but also filled with warmth and cherished memories. I encourage you to try this recipe and share your creations with loved ones. These are best enjoyed with a cup of tea and good company, of course!