
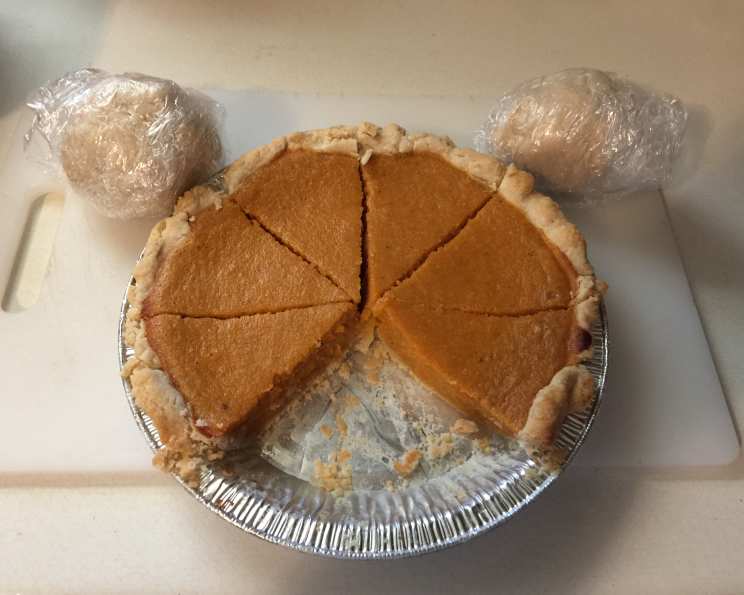
The Lard Tub Pie Crust: A Culinary Ode to Simplicity
The scent of baking pie still transports me back to my grandmother’s kitchen. I can almost see her now, a whirlwind of flour and smiles, her hands working magic with a simplicity that belied the incredible flavor she coaxed from every ingredient. While she had countless handwritten recipes, tucked away in a worn binder, it was the memory of her effortlessly perfect pie crust that always stuck with me. Her secret, she whispered, wasn’t a secret at all – it was the humble lard, the very same lard sold in those ubiquitous tubs, which she swore created the flakiest, most tender crust imaginable.
Recipe Overview
- Prep Time: 20 minutes
- Cook Time: Varies depending on filling
- Total Time: 4 hours 20 minutes (including chilling)
- Yields: 3 regular 9-inch crusts
- Serves: 24
- Dietary Type: Not suitable for vegetarians or vegans
Ingredients
- 3 cups all-purpose flour
- 1 cup room temperature lard
- 1 1/2 teaspoons salt
- 1/3 cup water
Equipment Needed
- Large mixing bowl
- Pastry cutter (preferably with ridged blades)
- Measuring cups and spoons
- Kitchen scale (optional, but recommended for accuracy)
- Cellophane wrap
- Rolling pin
- Pie dish
Instructions
- Begin by inspecting your lard. It should be odorless and tasteless. If it has any off-putting smell or taste, it may be rancid and unsuitable for baking. This is crucial for the final flavor of your pie.
- In a large mixing bowl, thoroughly combine the all-purpose flour and salt. Use a whisk or fork to ensure even distribution.
- Add the room temperature lard to the flour mixture, a spoonful at a time. Ensure that each spoonful is lightly coated with the flour in the bowl before adding the next.
- Using a sturdy pastry cutter, work the lard into the flour until the mixture resembles coarse crumbs, about pea-sized. The colder the lard, the better, so work quickly or chill the bowl briefly if the mixture seems too warm.
- Drizzle the water into the flour and lard mixture all at once. Don’t add more water than specified, as too much liquid will result in a tough crust.
- Use your hand to gently work the water into the dough. Incorporate the mixture from the edges of the bowl, lightly smooshing it into the center. Be careful not to overwork the dough.
- Continue mixing until the dough just comes together and forms a cohesive blob. It should hold its shape when pressed but still have visible streaks of lard. Think biscuit dough: handle it gently!
- Form the dough into a single ball. If you have a kitchen scale, weigh the ball – it should be approximately 600 grams. This will help you divide it evenly later.
- Clean your hands thoroughly. Prepare three sheets of cellophane wrap.
- Divide the dough into three equal portions, each weighing approximately 200 grams. Shape each portion into a small ball.
- Wrap each ball tightly in cellophane wrap, pressing out any excess air.
- Refrigerate the wrapped dough for at least 4 hours, ideally for 24 hours. This allows the gluten to relax and the lard to firm up, resulting in a more tender and flaky crust.
Expert Tips & Tricks
- Keep it cold: The key to a flaky lard crust is to keep the ingredients and the dough as cold as possible throughout the process. Consider chilling the flour and the mixing bowl before you begin.
- Don’t overmix: Overworking the dough develops the gluten, which leads to a tough crust. Mix only until the dough just comes together.
- Rest is best: Chilling the dough allows the gluten to relax and the lard to solidify, resulting in a more tender and flaky crust. Don’t skip this step!
- Blind Baking: For pies with wet fillings, such as pumpkin or custard, blind bake the crust first to prevent a soggy bottom. Prick the bottom of the crust with a fork, line it with parchment paper, and fill with pie weights or dried beans. Bake at 375°F (190°C) for 15-20 minutes, then remove the weights and paper and bake for another 5-10 minutes, or until lightly golden.
- Egg Wash: For a golden-brown crust, brush the top with an egg wash (1 egg beaten with 1 tablespoon of water) before baking.
- Crimping: Experiment with different crimping techniques to create a decorative edge for your pie. You can use a fork, your fingers, or a specialized crimping tool.
Serving & Storage Suggestions
Serve your pie warm or at room temperature, depending on the filling. Freshly baked pie is best enjoyed within 1-2 days. To store leftover pie, cover it loosely with plastic wrap or foil and refrigerate for up to 3 days. You can also freeze individual slices for longer storage. To reheat, bake in a preheated oven at 350°F (175°C) until warmed through.
Nutritional Information
| Nutrient | Amount per Serving | % Daily Value |
|---|---|---|
| Calories | 133.9 kcal | N/A |
| Calories from Fat | 78 g | 58% |
| Total Fat | 8.7 g | 13% |
| Saturated Fat | 3.4 g | 16% |
| Cholesterol | 8.1 mg | 2% |
| Sodium | 145.8 mg | 6% |
| Total Carbohydrate | 11.9 g | 3% |
| Dietary Fiber | 0.4 g | 1% |
| Sugars | 0 g | 0% |
| Protein | 1.6 g | 3% |
Note: Nutritional information is an estimate and may vary based on specific ingredients and portion sizes.
Variations & Substitutions
- All-Butter Crust: While this recipe celebrates the virtues of lard, you can substitute butter for a different flavor profile. Use unsalted butter, chilled and cut into small cubes, and follow the same instructions as with the lard. Keep in mind that an all-butter crust may not be as flaky as a lard crust.
- Half-and-Half: For a slightly less rich crust, try using half lard and half butter. This combination offers a balance of flavor and flakiness.
- Whole Wheat Crust: Substitute up to half of the all-purpose flour with whole wheat flour for a nuttier flavor and added fiber. You may need to add a little more water to bring the dough together.
- Sweet Crust: For sweet pies, add 1-2 tablespoons of sugar to the flour mixture. You can also add a pinch of cinnamon or nutmeg for extra flavor.
FAQs (Frequently Asked Questions)
Q: Why use lard instead of butter?
A: Lard has a higher fat content than butter, which results in a flakier and more tender crust. It also has a neutral flavor that allows the filling to shine.
Q: Can I use shortening instead of lard?
A: Yes, shortening can be used as a substitute for lard, but the flavor and texture may be slightly different. Shortening is pure fat, so it will still produce a flaky crust.
Q: How do I prevent the crust from shrinking during baking?
A: Avoid overworking the dough, chill it thoroughly before rolling, and use pie weights or dried beans during blind baking.
Q: What if my dough is too dry?
A: Add a teaspoon of ice water at a time until the dough comes together. Be careful not to add too much water, as this will make the crust tough.
Q: Can I make this crust ahead of time?
A: Yes! This crust can be made up to 3 days in advance and stored in the refrigerator, or frozen for up to 3 months. Thaw in the refrigerator overnight before using.
Final Thoughts
This Lard Tub Pie Crust is more than just a recipe; it’s a connection to simpler times, a taste of tradition, and a reminder that sometimes the most humble ingredients can create the most extraordinary results. I encourage you to try it for yourself, to experience the magic of a perfectly flaky, tender crust that elevates any pie to a new level of deliciousness. Don’t be afraid to experiment with different fillings and flavors, and most importantly, don’t forget to share your creations with those you love. Pair it with a scoop of vanilla ice cream or a warm cup of coffee, and savor the moment. And be sure to let me know how it turns out!