
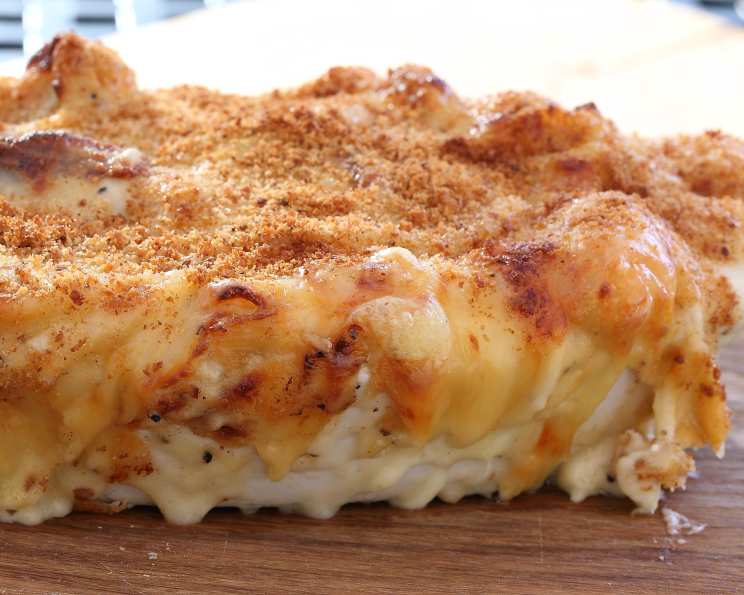
The Ultimate Mac N Cheese: A Chef’s Ode to Comfort
Macaroni and cheese. The name alone conjures images of childhood comfort, family gatherings, and that irresistible, cheesy aroma filling the kitchen. I can vividly recall my grandmother’s version, a humble yet deeply satisfying dish she made every Sunday. It wasn’t fancy, just elbow macaroni, a simple cheese sauce, and a sprinkle of paprika, but every bite was a warm hug. It was the kind of dish that made you forget your worries, if only for a little while. It’s been my culinary mission to recreate that feeling with my own spin on this beloved classic.
Recipe Overview
- Prep Time: 20 minutes
- Cook Time: 28 minutes
- Total Time: 48 minutes
- Servings: 4-6
- Yield: 1 large casserole
- Dietary Type: Vegetarian
Ingredients
- 1 lb orecchiette pasta
- 1 tablespoon olive oil
- 1 small loaf brioche bread or 1 small other enriched bread
- 1/3 cup butter
- 1/3 cup flour
- 1/4 lb chevre cheese
- 1/3 lb extra-sharp cheddar cheese
- 1/3 lb gouda cheese (aged 1 year)
- 1/3 lb comte cheese (aged 1 year)
- 1/3 lb raclette cheese (French or Swiss)
- 1/4 lb provolone cheese
- 1 quart milk
- 1 teaspoon freshly grated nutmeg
- Kosher salt & freshly ground black pepper
Equipment Needed
- Large pot
- Bowl
- Cooking sheet
- Small pan
- Whisk
- Small saucepot
- Oven-proof dish
Instructions
-
Preheat the oven to 175 degrees F. This initial low temperature is for drying the breadcrumbs.
-
Bring water to a boil in a large pot. Boil the orecchiette until slightly undercooked. This is crucial because the pasta will continue to cook in the oven within the cheese sauce, and you want to avoid a mushy final product.
-
Drain the pasta well. Toss the cooked pasta in a bowl with olive oil to prevent it from sticking together while you prepare the cheese sauce. Set aside.
-
Slice the brioche thinly and place the slices on a cooking sheet. Place the sheet in the preheated oven at 175 degrees F for 20 minutes, or until the bread is completely dry. The low temperature ensures even drying without burning.
-
Remove the dried brioche from the oven and let it cool completely. Once cooled, crumble the bread into small pieces. You will likely have more breadcrumbs than you need for this particular recipe, but homemade breadcrumbs are far superior to store-bought and can be stored for future use. Resist the urge to use pre-made breadcrumbs! Freshly made makes all the difference.
-
Increase the oven temperature to 400 degrees F. This is the temperature at which the mac and cheese will bake and become bubbly and golden brown.
-
Melt the butter in a small pan over medium heat. Once melted, whisk in the flour until completely incorporated and smooth, with no lumps. This creates a roux, the foundation of the béchamel sauce that gives the mac and cheese its creamy texture. Continue to cook the roux for about 1-2 minutes, stirring constantly, to cook out the raw flour taste.
-
Crumble the chevre into small pieces. This cheese has a unique flavor and texture that will enhance the overall profile of the dish. Grate all the other cheeses: extra-sharp cheddar, gouda, comte, raclette, and provolone. Having all the cheeses prepped and ready to go makes the sauce-making process much smoother.
-
In a small saucepot, bring the milk to a boil over medium heat, stirring occasionally to prevent scorching.
-
Slowly add the roux to the boiling milk, whisking constantly until the mixture returns to a boil. The mixture will thicken as the starch in the roux gelatinizes. This creates the béchamel sauce.
-
Turn off the heat under the béchamel sauce. Add 3/4 of the grated cheese mixture to the sauce, whisking until the cheese is completely melted and incorporated. Stir until the sauce is smooth and creamy.
-
Add the freshly grated nutmeg to the cheese sauce. Nutmeg adds a subtle warmth and complexity to the flavor profile that complements the richness of the cheese. Season the sauce with kosher salt and freshly ground black pepper to taste. Be generous, as seasoning is key to a flavorful mac and cheese.
-
Add the cheese sauce to the cooked orecchiette pasta and toss gently to coat each piece evenly. Ensure the pasta is thoroughly coated for maximum cheesy goodness.
-
Place the pasta and cheese sauce mixture in an oven-proof dish. Top the mixture with the remaining grated cheese.
-
Bake in the preheated oven at 400 degrees F for 25 minutes, or until the mac and cheese is bubbling hot and the cheese on top is melted and slightly browned.
-
Top the baked mac and cheese with the prepared brioche breadcrumbs. Continue to bake for an additional 3 minutes, or until the breadcrumbs are golden brown and crispy. Keep a close eye on it to prevent the breadcrumbs from burning.
-
Remove from the oven when you see things looking very oozy and bubbly. Let the mac and cheese cool slightly before serving.
Expert Tips & Tricks
- Cheese Selection: The blend of cheeses is key! Don’t be afraid to experiment with different combinations to find your perfect flavor profile. Gruyere, fontina, or even a touch of blue cheese can add depth and complexity.
- Pasta Shape: While the recipe calls for orecchiette, other shapes like cavatappi, shells, or even classic elbow macaroni will work well. Choose a shape that has plenty of nooks and crannies to hold the cheese sauce.
- Make-Ahead Tip: You can prepare the mac and cheese up to the point of baking, then cover it tightly and refrigerate it for up to 24 hours. Add a few extra minutes to the baking time if baking from cold.
- Preventing a Grainy Sauce: Avoid overheating the cheese sauce, as this can cause the cheese to separate and the sauce to become grainy. If this happens, try whisking in a tablespoon of lemon juice or a splash of white wine vinegar to help emulsify the sauce.
Serving & Storage Suggestions
Serve the mac and cheese hot, straight from the oven. Garnish with a sprinkle of fresh parsley or chives for a pop of color. Leftovers can be stored in an airtight container in the refrigerator for up to 3 days. To reheat, bake in a preheated oven at 350 degrees F until heated through, or microwave in short intervals, stirring occasionally. You can also freeze the mac and cheese for up to 2 months. Thaw completely before reheating.
Nutritional Information
| Nutrient | Amount per Serving | % Daily Value |
|---|---|---|
| Calories | 1299 kcal | N/A |
| Calories from Fat | 619 kcal | 48% |
| Total Fat | 68.8 g | 105% |
| Saturated Fat | 41.6 g | 208% |
| Cholesterol | 199.7 mg | 66% |
| Sodium | 1243.3 mg | 51% |
| Total Carbohydrate | 111.9 g | 37% |
| Dietary Fiber | 4.2 g | 16% |
| Sugars | 5.4 g | N/A |
| Protein | 57.4 g | 114% |
Variations & Substitutions
- Spicy Mac: Add a pinch of cayenne pepper or a dash of hot sauce to the cheese sauce for a spicy kick.
- Vegetable Boost: Stir in steamed broccoli florets, roasted vegetables, or sautéed mushrooms for added nutrients and flavor.
- Gluten-Free: Use gluten-free pasta and a gluten-free flour blend for the roux.
- Smoked Mac: Add smoked gouda or smoked paprika to the cheese sauce for a smoky flavor.
- Lobster Mac: Incorporate chunks of cooked lobster meat for a decadent twist.
FAQs (Frequently Asked Questions)
Q: Can I use pre-shredded cheese instead of grating it myself?
A: While convenient, pre-shredded cheese often contains cellulose, which can prevent it from melting smoothly. Grating your own cheese is highly recommended for the best results.
Q: Can I use a different type of bread for the breadcrumbs?
A: Absolutely! While brioche adds a touch of richness, any stale bread will work. Sourdough or Italian bread are great alternatives.
Q: How do I prevent the breadcrumbs from burning?
A: Keep a close eye on the mac and cheese during the last few minutes of baking. If the breadcrumbs start to brown too quickly, tent the dish with aluminum foil.
Q: Can I add bacon to this recipe?
A: Absolutely! Crispy bacon bits add a delicious smoky and salty flavor to the mac and cheese. Stir them in before baking.
Q: What can I serve with this mac and cheese?
A: Mac and cheese is a versatile dish that pairs well with many sides, such as a simple green salad, roasted vegetables, or grilled chicken.
Final Thoughts
This mac and cheese recipe is more than just a dish; it’s an experience. From the careful selection of cheeses to the homemade breadcrumbs, every step is designed to create a symphony of flavors and textures that will transport you back to your fondest childhood memories. So, gather your ingredients, preheat your oven, and prepare to indulge in the ultimate comfort food. I encourage you to try this recipe and make it your own. Don’t be afraid to experiment with different cheeses and toppings to create a mac and cheese masterpiece that reflects your personal taste. Share your creations and let me know what you think. Bon appétit!