
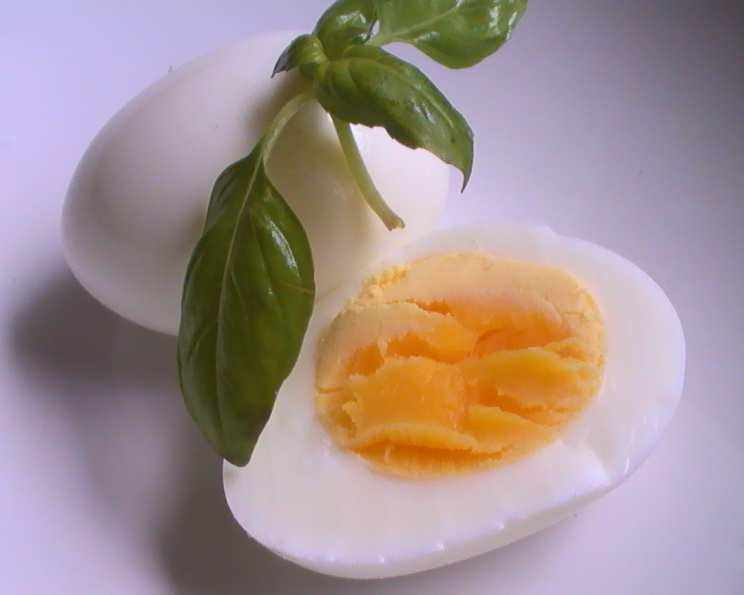
The Most Perfect Hard-Boiled Eggs (No Needles Involved)
My grandmother, a woman of unwavering culinary precision, always had a bowl of perfectly hard-boiled eggs in her refrigerator. They weren’t just for snacking; they were a canvas for her creativity. Deviled eggs for every potluck, egg salad sandwiches on crustless white bread for tea parties, and simple halved eggs sprinkled with paprika were staples of my childhood. But it wasn’t just the end result; it was the process she revered, passing down the “perfect” method for achieving consistently cooked, easy-to-peel eggs – a tradition I’m thrilled to share with you now.
Recipe Overview
- Prep Time: 30 minutes
- Cook Time: 8 minutes
- Total Time: 38 minutes
- Servings: 3
- Yields: 6 hard-boiled eggs
- Dietary Type: Gluten-Free, Dairy-Free
Ingredients
- 6 large eggs
- 1 bowl warm water
- 1 bowl of ice-cold water
Equipment Needed
- Medium saucepan
- Slotted spoon or wire egg sieve
Instructions
-
About 30 minutes before you want to cook the eggs, place them gently in the bowl of warm water. Let them sit there for about 30 minutes, or until they reach room temperature or are a bit warmer. This pre-warming step is crucial; it helps prevent the eggs from cracking when they are submerged in the boiling water.
-
While the eggs are warming, prepare the ice bath. Fill a medium bowl with cold water and add a generous handful of ice cubes. Alternatively, you can place cold water in a bowl and put it in the fridge or even the freezer – it’ll only need about 10 minutes to get nicely chilled.
-
Bring a medium saucepan of water to a rolling boil over medium-high heat. Ensure there’s enough water to completely cover the eggs.
-
Carefully lower the eggs into the boiling water. I find using a wire egg sieve or a slotted spoon is the easiest way to avoid cracking the eggs as they go in.
-
Once the eggs are submerged, reduce the heat slightly to maintain a simmer – a gentle bubbling is ideal. Simmer the eggs for exactly 8 minutes. For slightly softer, more golden yolks, you can reduce the cooking time to 7 and a half minutes. If you prefer a completely firm yolk with no soft center, increase the cooking time to 9 minutes.
-
When the timer goes off, immediately remove the eggs from the hot water using a slotted spoon or wire sieve and transfer them to the bowl of ice water. This abrupt change in temperature halts the cooking process and helps to prevent that unsightly green ring from forming around the yolk.
-
Let the eggs cool completely in the ice bath, which should only take a couple of minutes.
-
Once cooled, gently tap each egg on the counter to crack the shell all around. Return the cracked eggs to the ice water for a few more minutes. The cold water will seep under the shell, making them much easier to peel.
-
Peel the eggs. As you peel, you’ll notice a thin membrane between the white and the shell. Once you find and rupture this membrane, it provides excellent leverage to peel off the shell in larger, easier-to-manage pieces.
-
Store the peeled eggs in the fridge and consume within a day or two for optimal freshness and flavor.
Expert Tips & Tricks
- Aging Eggs: Eggs that are a week or two old tend to peel more easily than super-fresh ones. If you’re planning on making a big batch of hard-boiled eggs, use eggs that have been in your refrigerator for a little while.
- The Simmer is Key: A rolling boil can cause the eggs to bounce around and crack. A gentle simmer ensures even cooking and minimizes the risk of breakage.
- Don’t Overcrowd: Ensure the eggs have enough space in the saucepan; overcrowding can lead to uneven cooking. If you’re making a large batch, consider using a larger pot.
- Salt in the Water: Some cooks add salt to the boiling water, believing it helps the eggs peel more easily. While the scientific evidence is debatable, it certainly won’t hurt!
- Baking Method: Believe it or not, you can “hard-boil” eggs in the oven! Place the eggs in a muffin tin and bake at 325°F (160°C) for 30 minutes, then transfer them to an ice bath. This method is great for hands-off cooking, though some find the texture slightly different.
Serving & Storage Suggestions
Hard-boiled eggs are incredibly versatile! Serve them:
- Halved and sprinkled with paprika or everything bagel seasoning.
- Deviled, as a classic appetizer.
- Sliced in salads, like a Niçoise salad.
- Mashed into egg salad sandwiches.
- Pickled, for a tangy treat.
Store peeled hard-boiled eggs in an airtight container in the refrigerator for up to 2 days. Unpeeled hard-boiled eggs can last a bit longer, up to 5 days, in the refrigerator. It’s not recommended to freeze hard-boiled eggs, as the texture of the white can become rubbery.
Nutritional Information
| Nutrient | Amount per Serving | % Daily Value |
|---|---|---|
| Calories | 143 kcal | N/A |
| Calories from Fat | 85 kcal | N/A |
| Total Fat | 9.5 g | 14% |
| Saturated Fat | 3.1 g | 15% |
| Cholesterol | 372 mg | 124% |
| Sodium | 142 mg | 5% |
| Total Carbohydrate | 0.7 g | 0% |
| Dietary Fiber | 0 g | 0% |
| Sugars | 0.4 g | 1% |
| Protein | 12.6 g | 25% |
Note: Percent Daily Values are based on a 2,000 calorie diet.
Variations & Substitutions
- Spicy Deviled Eggs: Add a dash of hot sauce or a pinch of cayenne pepper to your deviled egg filling for a kick.
- Mediterranean Eggs: Sprinkle chopped olives, feta cheese, and oregano over halved eggs for a Mediterranean twist.
- Curried Egg Salad: Add curry powder, mango chutney, and raisins to your egg salad for an exotic flavor.
- Pickled Quail Eggs: For a more elegant presentation, use quail eggs instead of chicken eggs. The pickling liquid can be flavored with different spices and herbs to customize the taste.
FAQs (Frequently Asked Questions)
Q: Why do my eggs sometimes crack when I boil them?
A: The most common reason for cracked eggs is a rapid temperature change. That’s why pre-warming the eggs in warm water is essential.
Q: How can I tell if my eggs are hard-boiled without cutting into them?
A: You can try the “spin test.” Place a cooked egg on its side and spin it. If it spins easily, it’s likely hard-boiled. If it wobbles, it’s still soft inside.
Q: What causes the green ring around the yolk of hard-boiled eggs?
A: The green ring is caused by a reaction between iron and sulfur, which occurs when eggs are overcooked. Cooling the eggs quickly in an ice bath can help prevent this.
Q: How long can I keep hard-boiled eggs in the refrigerator?
A: Peeled hard-boiled eggs should be eaten within 1-2 days. Unpeeled hard-boiled eggs can last up to 5 days in the fridge.
Q: Can I use this method for different sizes of eggs?
A: Yes, but you may need to adjust the cooking time slightly. For smaller eggs, reduce the cooking time by a minute or two; for extra-large eggs, increase it by a minute or two.
Final Thoughts
Mastering the art of the perfect hard-boiled egg is a culinary skill that will serve you well for years to come. From simple snacks to elegant appetizers, these versatile protein bombs are a kitchen staple. Don’t be intimidated – this method is foolproof. Give it a try, experiment with different cooking times to find your perfect yolk consistency, and share your creations with friends and family. Perhaps you’ll even inspire a new generation of egg enthusiasts! And don’t forget to let me know how they turn out!