
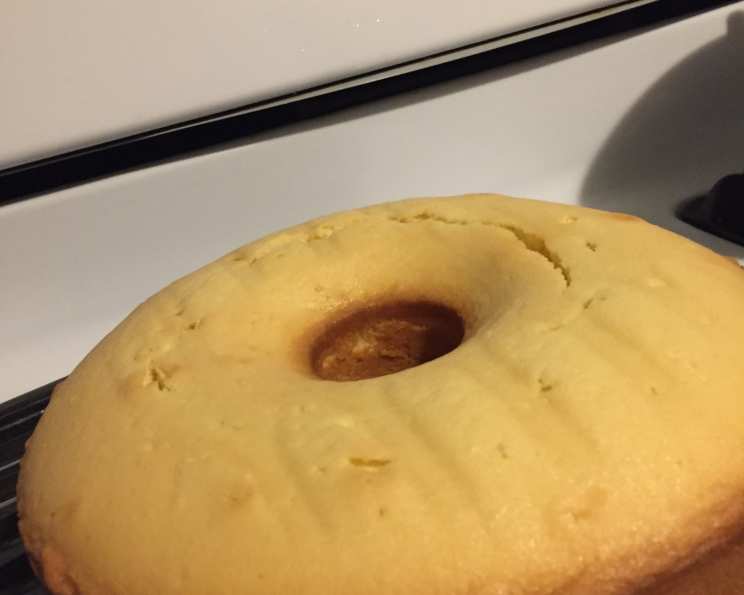
The Most Ultimate Buttery Cream Cheese Pound Cake
There are some flavors that transport you instantly back to childhood. For me, the aroma of a rich, buttery pound cake baking in the oven does just that. I can almost feel the warmth of my grandmother’s kitchen, hear the gentle hum of her ancient stand mixer, and see her hands, dusted with flour, carefully guiding me through each step. This isn’t just a cake; it’s a memory, a feeling of comfort, and a taste of home. This recipe, adapted from one of her cherished handwritten cards, comes as close as I can get to replicating that warm nostalgia.
Recipe Overview
- Prep Time: 20 minutes
- Cook Time: 60-75 minutes
- Total Time: 1 hour 20 minutes – 1 hour 35 minutes
- Servings: 16
- Yield: Two 8×4 inch loaf cakes or one 4-quart tube cake
- Dietary Type: Not Gluten-Free, Not Dairy-Free
Ingredients
- 1 1/2 cups butter, softened (no substitutions)
- 1 (8 ounce) package cream cheese, softened
- 3 cups sugar
- 6 large eggs, room temperature
- 1 1/2 teaspoons vanilla extract (or use almond extract)
- 3 cups all-purpose flour
- 2 teaspoons salt
Equipment Needed
- Stand mixer or electric hand mixer
- Two 8 x 4-inch loaf pans or a 4-quart tube pan
- Measuring cups and spoons
- Mixing bowls
- Wire rack
Instructions
-
Preheat your oven to 350 degrees F (175 degrees C). Proper oven temperature is crucial for even baking, so ensure your oven is accurately calibrated.
-
Prepare your baking pan(s). Generously grease two 8 x 4-inch loaf pans or a 4-quart tube pan. This will prevent the cake from sticking and ensure easy removal after baking. Using a baking spray with flour included can also be helpful.
-
In a large bowl, preferably using a stand mixer fitted with the paddle attachment, cream together the softened butter and cream cheese until smooth. This step is essential for creating a tender crumb.
-
Gradually add the sugar to the butter and cream cheese mixture. Beat until the mixture is light and fluffy, approximately 5-7 minutes. This step is critical for incorporating air into the batter, which is what gives the cake its volume. Don’t rush this process; you MUST beat for at least 5 minutes for the best results.
-
Add the eggs one at a time, beating well after each addition. Ensure each egg is fully incorporated before adding the next. Room temperature eggs emulsify more easily into the batter, creating a smoother texture.
-
Mix in the vanilla extract (or almond extract). This adds a delicate flavor that complements the richness of the cake.
-
With the mixer on low speed, gradually add the flour and salt in two additions. Be careful not to overmix the batter once the flour is added, as this can develop the gluten and result in a tougher cake. Mix just until the flour is incorporated.
-
Immediately pour the batter into the prepared pan(s). Distribute the batter evenly between the two loaf pans or into the tube pan.
-
Tap the pans gently on the counter to eliminate any large air bubbles in the batter. This will help create a more uniform texture in the finished cake.
-
Bake for 60-75 minutes, or until the cake tests done. To check for doneness, insert a wooden skewer or toothpick into the center of the cake. If it comes out clean or with just a few moist crumbs attached, the cake is ready.
-
Note: If the tops of the cakes begin to brown too quickly, tent them loosely with foil to prevent them from burning.
-
Cool the cakes in the pans for 10 minutes before inverting them onto a wire rack to cool completely. Cooling in the pans allows the cake to set slightly and prevents it from breaking when turned out.
-
Cool completely with the tops up on a wire rack.
-
Note: If baking in a 4-quart tube pan, increase baking time by approximately 5 minutes.
Expert Tips & Tricks
- Use high-quality butter and cream cheese: Since these are the stars of the show, using the best quality ingredients will significantly impact the flavor and texture of your cake.
- Room temperature ingredients are key: Softened butter, softened cream cheese, and room temperature eggs are essential for creating a smooth, well-emulsified batter. If you forget to take your eggs out ahead of time, you can place them in a bowl of warm (not hot) water for 10-15 minutes.
- Don’t overmix the batter: Overmixing develops the gluten in the flour, resulting in a tough cake. Mix just until the ingredients are combined.
- Use a kitchen scale for accurate measurements: For best results, weigh your ingredients using a kitchen scale. This ensures accuracy and consistency in your baking.
- Check your oven temperature: Ovens can vary in temperature, so it’s a good idea to check yours with an oven thermometer to ensure it’s accurate.
- To easily remove the cake from the pan, after greasing the pan, dust it with flour or line the bottom with parchment paper. This provides an extra layer of protection against sticking.
- For even baking, rotate the pan(s) halfway through the baking time. This ensures that all sides of the cake bake evenly.
- If the cake browns too quickly, tent it loosely with aluminum foil. This will prevent the top from burning while the inside continues to bake.
Serving & Storage Suggestions
This pound cake is incredibly versatile and can be enjoyed in many ways. Serve it plain with a dusting of powdered sugar, or alongside fresh berries and whipped cream. It’s also delicious with a scoop of vanilla ice cream or a drizzle of chocolate sauce. For a truly decadent treat, try serving it with a homemade blueberry or strawberry sauce.
The cake is best enjoyed the day after baking, as the flavors meld and the texture becomes even more moist and tender.
Storage:
- Room Temperature: Store the cake tightly wrapped in plastic wrap or in an airtight container at room temperature for up to 3 days.
- Refrigerator: For longer storage, wrap the cake tightly and store it in the refrigerator for up to a week.
- Freezer: The cake can also be frozen for up to 3 months. Wrap it tightly in plastic wrap and then in foil, or place it in a freezer-safe bag. Thaw overnight in the refrigerator before serving.
Reheating:
While this cake is delicious at room temperature, you can gently warm individual slices in the microwave for a few seconds for a warm, comforting treat.
Nutritional Information
Please note that these values are estimates and can vary based on specific ingredients and portion sizes.
| Nutrient | Amount per Serving | % Daily Value |
|---|---|---|
| Calories | 459.5 kcal | N/A |
| Calories from Fat | 217 g | 47% |
| Total Fat | 24.1 g | 37% |
| Saturated Fat | 14.3 g | 71% |
| Cholesterol | 131.1 mg | 43% |
| Sodium | 515.7 mg | 21% |
| Total Carbohydrate | 56.1 g | 18% |
| Dietary Fiber | 0.6 g | 2% |
| Sugars | 38.1 g | N/A |
| Protein | 5.8 g | 11% |
Variations & Substitutions
- Lemon Pound Cake: Add the zest of one lemon to the batter for a bright, citrusy twist.
- Chocolate Chip Pound Cake: Fold in 1 cup of chocolate chips to the batter before baking.
- Marble Pound Cake: Divide the batter in half. Mix cocoa powder into one half and leave the other half plain. Swirl the two batters together in the pan for a beautiful marbled effect.
- Spiced Pound Cake: Add 1 teaspoon of ground cinnamon, 1/2 teaspoon of ground nutmeg, and 1/4 teaspoon of ground cloves to the batter for a warm, spiced flavor.
- Extract Substitutions: If you don’t have vanilla extract on hand, almond extract also pairs beautifully with the rich flavor of the cake.
FAQs (Frequently Asked Questions)
Q: Why is it important to beat the butter and sugar for 5-7 minutes?
A: This crucial step incorporates air into the batter, creating a light and fluffy texture. It also helps to dissolve the sugar, resulting in a smoother crumb.
Q: Can I use a different size pan?
A: While this recipe is designed for two 8×4 inch loaf pans or a 4-quart tube pan, you can adapt it to other sizes. Just be sure to adjust the baking time accordingly. Smaller pans will require less time, while larger pans will require more.
Q: How do I prevent the cake from sticking to the pan?
A: Generously greasing and flouring the pan is the best way to prevent sticking. You can also line the bottom of the pan with parchment paper for added insurance.
Q: What does it mean to “tent” the cake with foil?
A: Tenting means loosely covering the top of the cake with aluminum foil to prevent it from browning too quickly. This allows the inside of the cake to bake through without the top burning.
Q: Can I freeze the pound cake?
A: Yes, this pound cake freezes beautifully. Wrap it tightly in plastic wrap and then in foil, or place it in a freezer-safe bag. Thaw overnight in the refrigerator before serving.
Final Thoughts
This Buttery Cream Cheese Pound Cake is more than just a dessert; it’s an experience. The simple act of baking it, filling your kitchen with its irresistible aroma, is a joy in itself. I truly hope you’ll try this recipe and discover the magic of this classic cake. Don’t hesitate to experiment with variations and make it your own. And please, share your creations and experiences – I’d love to hear how it turns out for you! Pair it with a cup of hot tea or coffee for the perfect afternoon treat. Happy Baking!