
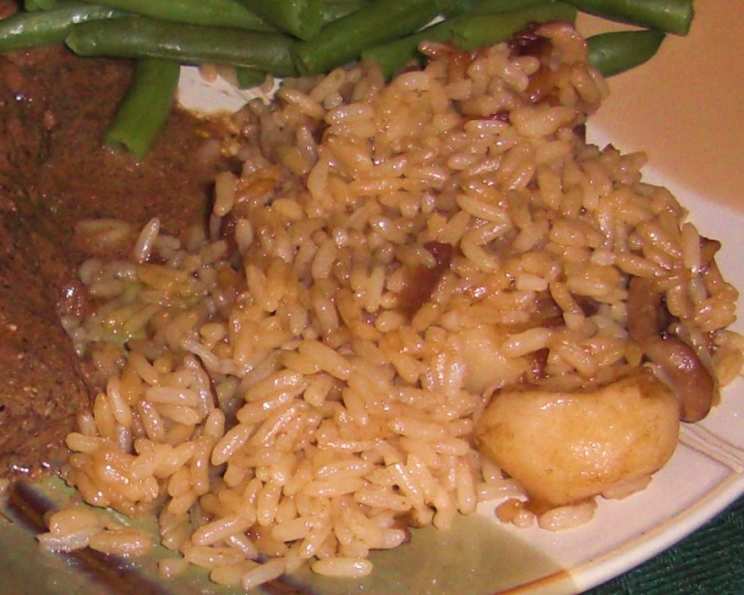
The Effortless Elegance of Baked Rice Pilaf
There’s something deeply comforting about rice. Not just any rice, but a specific rice dish that evokes memories of potlucks and family gatherings. My aunt Carol always brought this to every holiday dinner, and it wasn’t until years later that I discovered how incredibly simple – almost deceptively so – it was to make. The subtle flavors of the onion soup and the delicate crunch of the water chestnuts created a symphony of textures and tastes that elevated humble rice to a dish worthy of any celebration. I can almost smell Aunt Carol’s kitchen when I think about this recipe.
Recipe Overview
- Prep Time: 5 minutes
- Cook Time: 1 hour
- Total Time: 1 hour 5 minutes
- Servings: 6
- Yield: 6 servings
- Dietary Type: Gluten-Free (check ingredients)
Ingredients
- 1 cup water
- 1 cup raw rice
- 1 (8 ounce) can water chestnuts, drained
- 1 (6 ounce) can sliced mushrooms, drained
- 1 (10 1/4 ounce) can onion soup
- 1/2 cup butter, melted
Equipment Needed
- Casserole dish
- Measuring cups
- Can opener
Instructions
-
Preheat your oven to 350°F (175°C). This gentle heat ensures the rice cooks evenly and absorbs all the delicious flavors.
-
In a casserole dish, combine the water, raw rice, drained water chestnuts, and drained sliced mushrooms. Make sure the casserole dish is large enough to accommodate the rice as it expands during cooking – a 9×13 inch dish works well.
-
Pour the can of onion soup over the rice mixture. The onion soup acts as both a flavoring agent and a part of the cooking liquid, adding a savory depth to the dish.
-
Drizzle the melted butter evenly over the top of the rice mixture. The butter adds richness and helps to prevent the rice from sticking together. Ensure the butter is thoroughly melted before adding it to the casserole.
-
Cover the casserole dish tightly with a lid or aluminum foil. This step is crucial for trapping steam and ensuring the rice cooks properly.
-
Bake in the preheated oven for 30 minutes with the cover on.
-
Remove the cover (or foil) and bake for an additional 30 minutes, or until the rice is tender and the liquid has been absorbed. The uncovered baking allows the top of the rice to brown slightly and develop a pleasant texture.
-
Let the rice pilaf rest for a few minutes before serving. This allows the flavors to meld together even further.
Expert Tips & Tricks
-
Rice Selection: While any long-grain rice will work, I find that converted rice (like Uncle Ben’s) holds its shape best in this dish and doesn’t get mushy. Brown rice can also be used, but will require a longer cooking time (about 1 hour covered and 45 minutes uncovered) and extra water (add 1/2 cup).
-
Butter Browning: For an even richer flavor, brown the butter before adding it to the rice. Watch it carefully as it melts in a saucepan until it turns a nutty brown color and smells fragrant.
-
Mushroom Enhancement: If you prefer a more intense mushroom flavor, sauté fresh sliced mushrooms in butter with a pinch of garlic powder before adding them to the rice mixture.
-
Preventing Sticking: To prevent the rice from sticking to the bottom of the casserole dish, you can lightly grease the dish with cooking spray or butter before adding the ingredients.
-
Spice It Up: A pinch of black pepper or a dash of hot sauce can add a subtle kick to this dish.
-
Broth Boost: For an even deeper flavor, substitute the water with chicken or vegetable broth. Reduce the salt if using broth.
Serving & Storage Suggestions
This baked rice pilaf makes a fantastic side dish to almost any main course. It pairs particularly well with grilled chicken, roasted vegetables, baked ham, or pan-seared fish. For a vegetarian meal, serve it alongside a lentil stew or a vegetable curry.
To store leftovers, allow the rice to cool completely before transferring it to an airtight container. It can be stored in the refrigerator for up to 3-4 days. Reheat in the microwave or in a covered saucepan over low heat, adding a splash of water or broth if needed to prevent it from drying out.
The rice pilaf can also be frozen for longer storage. Spread the cooled rice in a single layer on a baking sheet and freeze for about an hour, then transfer it to a freezer-safe bag or container. This will prevent the rice from clumping together when frozen. It can be stored in the freezer for up to 2-3 months. Thaw it overnight in the refrigerator before reheating.
Nutritional Information
| Nutrient | Amount per Serving | % Daily Value |
|---|---|---|
| Calories | 315 kcal | 16% |
| Total Fat | 16 g | 21% |
| Saturated Fat | 10 g | 50% |
| Cholesterol | 41 mg | 14% |
| Sodium | 538 mg | 23% |
| Total Carbohydrate | 38 g | 14% |
| Dietary Fiber | 3 g | 11% |
| Sugars | 4 g | – |
| Protein | 5 g | 10% |
Variations & Substitutions
-
Vegetarian/Vegan: Ensure the onion soup is vegetarian or vegan. Substitute the butter with a plant-based butter alternative or olive oil.
-
Herbs: Add fresh or dried herbs, such as thyme, rosemary, or parsley, for an extra layer of flavor. Stir them in with the rice before baking.
-
Nuts: Toast some slivered almonds or chopped pecans and sprinkle them over the rice before serving for added texture and flavor.
-
Vegetables: Add other vegetables, such as diced carrots, peas, or bell peppers, to the rice mixture for a more colorful and nutritious dish.
-
Cheese: Sprinkle shredded Parmesan cheese over the rice during the last 10 minutes of baking for a cheesy twist.
-
Spicy: Add a pinch of red pepper flakes or a dash of your favorite hot sauce for a little heat.
FAQs (Frequently Asked Questions)
Q: Can I use instant rice in this recipe?
A: No, this recipe is designed for raw rice. Instant rice cooks too quickly and will likely become mushy.
Q: What if I don’t have onion soup?
A: You can substitute the onion soup with 1 cup of beef or vegetable broth mixed with 1 teaspoon of onion powder.
Q: Can I make this in a slow cooker?
A: While I haven’t tested it, you could try cooking it on low for 2-3 hours. Check it periodically to make sure it doesn’t dry out.
Q: The rice is still crunchy after an hour, what should I do?
A: Add 1/4 cup more water or broth, cover, and continue baking for another 15-20 minutes, checking for doneness.
Q: Can I use brown rice instead of white rice?
A: Yes, but you will need to adjust the cooking time and liquid. Use 1 1/2 cups of water or broth and cook for 1 hour covered, then 45 minutes uncovered.
Final Thoughts
This baked rice pilaf is a testament to the fact that simple ingredients, when combined with care, can create something truly special. It’s a versatile and comforting dish that’s perfect for any occasion. I hope you’ll try this recipe and make it your own. Feel free to experiment with different variations and flavors to create a rice pilaf that perfectly suits your taste. And don’t forget to share your creations and feedback! This dish pairs beautifully with a crisp Sauvignon Blanc or a light-bodied Pinot Noir. Happy cooking!