
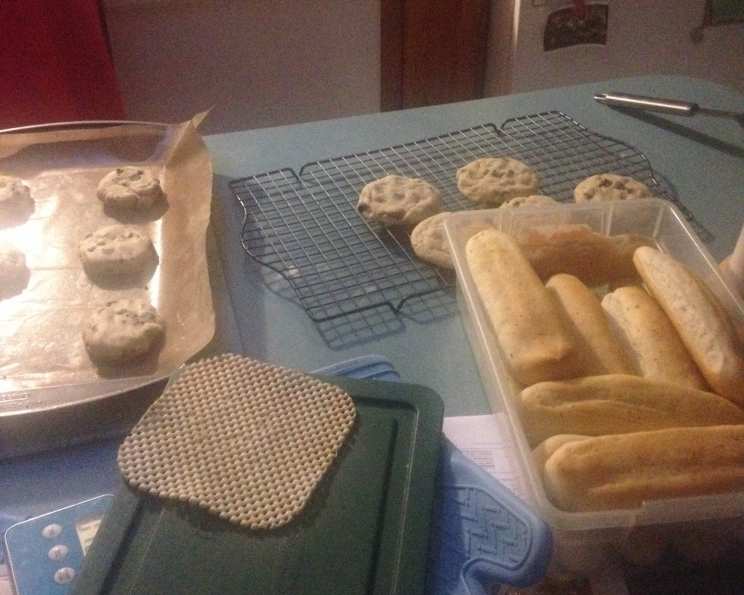
The Ultimate Breadsticks
I remember the first time I tasted a truly great breadstick. It wasn’t at some fancy Italian restaurant, but at a potluck hosted by my neighbor, Mrs. Olsen. Warm, yeasty, and brushed with a garlicky butter that clung to every golden crevice, these breadsticks were a revelation. They were soft, chewy, and unbelievably addictive. Every time I brought my own dish, I hoped secretly that Mrs. Olsen would bring her famous breadsticks. I experimented for years to try and achieve that perfect balance of texture and flavor, and I think I’ve finally cracked the code. This recipe will bring you that same comfort and joy, whether you’re serving them alongside a hearty pasta dish or simply enjoying them as a snack.
Recipe Overview
- Prep Time: 45 minutes (including rise time)
- Cook Time: 15-18 minutes
- Total Time: 2 hours 15 minutes
- Yields: 32 huge breadsticks
- Dietary Type: Vegetarian
Ingredients
- 2 tablespoons dry yeast
- 3 cups lukewarm water, divided
- 2 tablespoons sugar
- 1 tablespoon salt
- ¼ cup oil
- 8 cups flour
- ½ cup butter, melted (1 ½ teaspoons garlic salt may be added depending on variation used)
Equipment Needed
- Large bowl
- Measuring cups and spoons
- Heavy-duty mixer (optional, but recommended)
- Greased bowl
- Rolling pin
- Floured surface
- Parchment paper
- Cookie sheets
- Pastry brush
Instructions
-
In a large bowl, dissolve the dry yeast in 1 cup of lukewarm water with the sugar. Let the mixture stand for 5 minutes. This allows the yeast to activate and ensures a good rise for the dough. You’ll know it’s ready when it gets foamy.
-
Add the remaining 2 cups of lukewarm water, salt, oil, and flour to the yeast mixture. Stir to combine, then knead until the dough is smooth, elastic, and slightly sticky. I prefer to use a heavy-duty mixer with a dough hook for this process, but you can definitely do it by hand. Kneading develops the gluten, which gives the breadsticks their chewy texture. Aim for about 5-7 minutes of kneading.
-
Place the dough in a greased bowl, turning to coat all sides. This prevents the dough from drying out as it rises. Cover the bowl and let the dough rise in a warm place until it has doubled in size, about 1 hour. The warmer the environment, the faster the dough will rise.
-
Punch down the risen dough to release the air. This helps to redistribute the yeast and create a more even texture in the final breadsticks.
-
Divide the dough in half.
-
On a floured surface, roll one half of the dough out into a 12 x 18 inch rectangle. A well-floured surface prevents the dough from sticking and makes it easier to work with.
-
Brush the rolled-out dough with half of the melted butter. If using garlic salt, mix it into the butter before brushing.
-
Cut the dough in half vertically, then cut horizontally into 8 strips. This will yield 16 breadsticks from one half of the dough.
-
Repeat steps 6-8 with the remaining half of the dough. You should now have a total of 32 breadsticks.
-
To make Cheesy Breadsticks: Press the buttered side down of each breadstick in freshly grated Parmesan cheese. Twist each breadstick multiple times and lay them out on parchment-lined cookie sheets. Leave about an inch between each breadstick. Parchment paper is essential here to prevent the cheese from sticking to the pan. Cover and let rise for 30 minutes, or until doubled in bulk, before baking. After baking, brush with the remaining melted garlic butter.
-
For Garlic Butter Breadsticks: After brushing with garlic butter mixture, simply twist the breadsticks. Place them on a greased baking sheet and let them rise for 30 minutes. After baking, brush them again with the melted garlic butter. This double application of garlic butter intensifies the flavor.
-
Herb & Cheese Breadsticks: Use plain melted butter to spread on the dough. Then, sprinkle the breadsticks with Parmesan cheese and Salad Supreme seasoning. Place them on sprayed baking sheets and let them rise for 30 minutes before baking. Brush again with the remaining melted butter after baking.
-
Pizza Breadsticks: Let the buttered breadsticks rise on parchment-lined baking sheets for 30 minutes. Spread with pizza sauce and place pepperoni slices on top. During the last 5 minutes of baking, add shredded cheese. This is a fun and flavorful variation that’s perfect for pizza night!
-
Cinnamon Sugar Breadsticks: Skip the brush with melted butter step initially. Dip each breadstick in 1 stick of melted butter (skip the initial butter brush). Roll in a mixture of 2 cups of brown sugar and about 1 tablespoon of cinnamon (you might need more sugar mixture depending on how much you use). Twist and let rise on parchment-lined baking sheets. Then, bake as directed.
-
Bake all breadsticks at 350°F (175°C) for 15 to 18 minutes, or until they are lightly browned. Keep a close eye on them during the last few minutes of baking to prevent burning. The exact baking time will depend on your oven.
Expert Tips & Tricks
- Proofing the yeast is crucial: If the yeast doesn’t foam after 5 minutes, it’s likely dead and you’ll need to start over with fresh yeast.
- Don’t over-knead the dough: Over-kneading can result in tough breadsticks. Stop kneading when the dough is smooth and elastic.
- Use a pizza stone for extra-crispy breadsticks: Preheat the pizza stone in the oven before baking the breadsticks on it.
- For a softer breadstick, add a tablespoon of milk powder to the dough.
- Adjust the amount of salt to your taste: If you’re using salted butter, you may want to reduce the amount of salt in the dough.
- To make the breadsticks ahead of time, you can prepare the dough and store it in the refrigerator for up to 24 hours. Let it come to room temperature before rolling and baking.
Serving & Storage Suggestions
Serve these delicious breadsticks warm, alongside your favorite pasta dishes, soups, or salads. They also make a great snack on their own.
- Room Temperature: Breadsticks can be stored at room temperature in an airtight container for up to 2 days.
- Refrigerator: For longer storage, store them in the refrigerator for up to 5 days.
- Freezer: Breadsticks freeze well. Wrap them individually in plastic wrap and then place them in a freezer bag. They can be frozen for up to 2 months.
- Reheating: To reheat, bake the breadsticks in a preheated oven at 350°F (175°C) for 5-10 minutes, or until warmed through. You can also microwave them for a quick reheat, but they may become slightly softer.
Nutritional Information
(Estimated per breadstick, without toppings):
| Nutrient | Amount per Serving | % Daily Value |
|---|---|---|
| Calories | 160 kcal | 8% |
| Total Fat | 5g | 6% |
| Saturated Fat | 2g | 10% |
| Cholesterol | 8mg | 3% |
| Sodium | 245mg | 10% |
| Total Carbohydrate | 25g | 9% |
| Dietary Fiber | 1g | 4% |
| Sugars | 1g | 2% |
| Protein | 4g | 8% |
Variations & Substitutions
- Gluten-Free Breadsticks: Substitute the all-purpose flour with a gluten-free flour blend. You may need to adjust the amount of liquid depending on the blend you use.
- Whole Wheat Breadsticks: Substitute half of the all-purpose flour with whole wheat flour for a nuttier flavor and added fiber.
- Dairy-Free Breadsticks: Use a dairy-free butter substitute.
- Vegan Breadsticks: Use a dairy-free butter substitute and ensure that the sugar used is vegan-friendly.
- Spicy Breadsticks: Add a pinch of red pepper flakes to the dough for a little heat.
- Rosemary Garlic Breadsticks: Add finely chopped fresh rosemary to the garlic butter mixture.
FAQs (Frequently Asked Questions)
Q: Can I use instant yeast instead of active dry yeast?
A: Yes, you can. You don’t need to dissolve instant yeast in water first; just add it directly to the flour mixture.
Q: What if my dough doesn’t rise?
A: Make sure your yeast is fresh and that the water is lukewarm, not too hot or too cold. The room temperature also affects the rise. A cooler room will require a longer rise time.
Q: Can I make the dough ahead of time and bake the breadsticks later?
A: Absolutely! You can prepare the dough, let it rise, punch it down, and then store it in the refrigerator for up to 24 hours. When you’re ready to bake, let the dough come to room temperature for about 30 minutes before rolling and shaping the breadsticks.
Q: My breadsticks are too hard. What did I do wrong?
A: Overbaking can cause the breadsticks to become hard. Make sure to bake them until they are lightly golden brown and no longer doughy. Also, kneading the dough for too long can also make them tough.
Q: Can I add other toppings to the breadsticks?
A: Absolutely! Get creative with your toppings. Try adding sesame seeds, poppy seeds, everything bagel seasoning, or different types of cheese.
Final Thoughts
These breadsticks are more than just a side dish; they’re a warm, comforting hug in bread form. They are surprisingly easy to make and infinitely customizable to your tastes. So gather your ingredients, preheat your oven, and get ready to experience the joy of baking your own perfect breadsticks. I encourage you to experiment with different flavors and toppings to create your own signature breadsticks. Don’t forget to share your creations with friends and family – they’ll thank you for it! And if you’re feeling extra indulgent, pair these breadsticks with a bowl of creamy tomato soup for the ultimate comfort meal.