
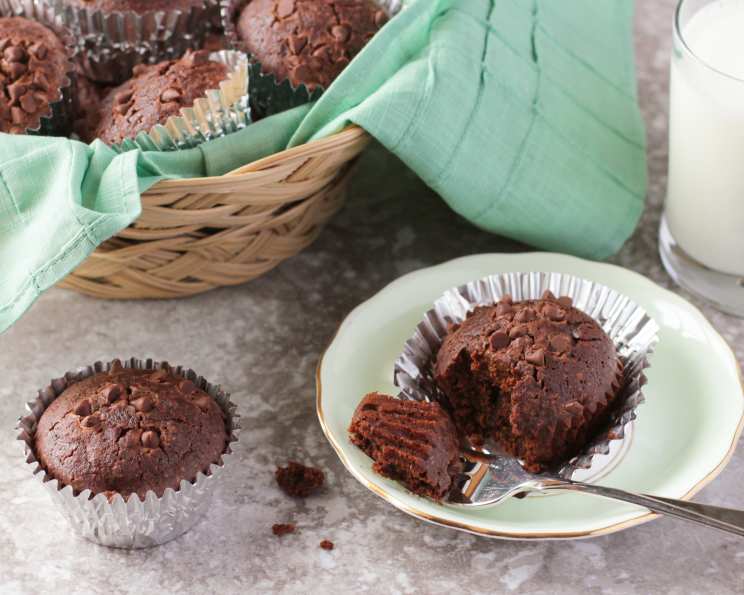
The Ultimate Chocolate Brownie Muffins
There’s something magical about the smell of chocolate wafting through the kitchen. It takes me back to childhood weekends spent with my grandmother, “Nana,” baking up a storm. While she was famous for her elaborate layer cakes, it was her simple brownie muffins that truly captured my heart. These weren’t fancy, but they were intensely chocolatey, moist, and always gone in a flash. To this day, the aroma conjures up images of her warm smile and the comforting feeling of home. This recipe is an ode to her, a timeless classic that’s guaranteed to bring joy to every bite.
Recipe Overview
- Prep Time: 10 minutes
- Cook Time: 25-30 minutes
- Total Time: 35-40 minutes
- Servings: 12
- Yield: 12 muffins
- Dietary Type: Vegetarian
Ingredients
- 3/4 cup good quality baking cocoa
- 1 teaspoon baking powder (heaping)
- 3/4 cup butter or 3/4 cup margarine, melted
- 1/2 cup boiling water
- 1 tablespoon vanilla extract
- 1 1/4 cups sugar (or to taste)
- 2 eggs
- 1 1/3 cups all-purpose flour
- 1/4 teaspoon salt
- 1/2 cup mini chocolate chips (optional)
- 1/2 cup walnuts, chopped (optional)
Equipment Needed
- 12-cup muffin tin
- Paper liners
- Medium bowl
- Wooden spoon
- Ice cream scoop (optional, for even filling)
Instructions
-
Preheat your oven to 350°F (175°C). Prepare a 12-cup muffin tin by lining it with paper liners. This prevents the muffins from sticking and makes for easy cleanup.
-
In a medium bowl, combine the cocoa powder and baking powder. Whisk them together until evenly distributed. This ensures that the baking powder is properly incorporated and that the muffins rise evenly.
-
Pour in the boiling water and mix thoroughly with a wooden spoon until a smooth paste forms. The hot water helps to “bloom” the cocoa, intensifying its chocolate flavor.
-
Add the melted butter (or margarine) and the vanilla extract. Stir well to combine. Make sure the butter isn’t too hot, as it could partially cook the eggs in the next step.
-
Add the sugar and mix thoroughly with a wooden spoon until well combined. The mixture should be smooth and glossy.
-
Stir in the eggs one at a time, mixing until just combined after each addition. Be careful not to overmix at this stage, as it can lead to tough muffins.
-
In a separate bowl, whisk together the flour and salt. This ensures that the salt is evenly distributed throughout the batter.
-
Add the flour mixture to the chocolate mixture and mix until just combined. The batter will be a bit on the thin side, which is perfectly normal. Resist the urge to overmix; a few streaks of flour are okay.
-
If desired, add the mini chocolate chips or chopped walnuts (or 1 cup of both!). Gently fold them into the batter until evenly distributed.
-
Using an ice cream scoop (or a spoon), fill each muffin liner almost to the top. Filling them generously will give you nice, tall muffins.
-
Bake for 25-30 minutes, or until the muffins are done. To check for doneness, insert a toothpick into the center of a muffin. If it comes out clean or with just a few moist crumbs, the muffins are ready. Be careful not to overbake them, as this can make them dry. The baking time might take a little longer, depending on how full you fill the muffin tins with the batter.
-
Remove the muffins from the oven and let them cool in the muffin tin for a few minutes before transferring them to a wire rack to cool completely.
-
Once cooled, you can drizzle them with a glaze or frost them with your favorite buttercream frosting. Alternatively, enjoy them plain – they’re delicious either way!
Expert Tips & Tricks
- Use high-quality cocoa powder: The better the cocoa powder, the richer and more intense the chocolate flavor will be. Dutch-processed cocoa is a great option for a deeper, more complex flavor.
- Don’t overmix the batter: Overmixing develops the gluten in the flour, resulting in tough muffins. Mix until just combined.
- Melt the butter carefully: Melt the butter in a saucepan over low heat or in the microwave in short intervals, stirring in between, to prevent it from splattering or burning. Allow it to cool slightly before adding it to the batter.
- Add a shot of espresso powder: For an extra boost of chocolate flavor, add a teaspoon of espresso powder to the cocoa powder.
- Make them fudgy: For a fudgier texture, reduce the amount of flour by 2 tablespoons and increase the butter by 2 tablespoons.
- Adjust the sugar to your liking: If you prefer a less sweet muffin, reduce the amount of sugar by 1/4 cup.
Serving & Storage Suggestions
These brownie muffins are best served slightly warm, either on their own or with a scoop of vanilla ice cream. They also pair well with a cup of coffee or tea.
Store leftover muffins in an airtight container at room temperature for up to 3 days. For longer storage, you can freeze them for up to 2 months. To freeze, wrap each muffin individually in plastic wrap and then place them in a freezer-safe bag or container.
To reheat frozen muffins, thaw them at room temperature or in the microwave for a few seconds.
Nutritional Information
| Nutrient | Amount per Serving | % Daily Value |
|---|---|---|
| Calories | 260.4 kcal | N/A |
| Calories from Fat | 118 g | 46% |
| Total Fat | 13.2 g | 20% |
| Saturated Fat | 8 g | 40% |
| Cholesterol | 61.5 mg | 20% |
| Sodium | 193.8 mg | 8% |
| Total Carbohydrate | 34.8 g | 11% |
| Dietary Fiber | 2.2 g | 8% |
| Sugars | 21.1 g | 84% |
| Protein | 3.7 g | 7% |
Note: Nutritional information is an estimate and may vary based on specific ingredients and preparation methods.
Variations & Substitutions
- Gluten-free: Substitute the all-purpose flour with a gluten-free blend. Be sure to use a blend that contains xanthan gum for best results.
- Dairy-free: Replace the butter with a plant-based butter alternative. Ensure the chocolate chips are also dairy-free.
- Vegan: In addition to the dairy-free substitutions above, replace the eggs with applesauce (1/4 cup per egg) or a flax egg (1 tablespoon ground flaxseed mixed with 3 tablespoons water, let sit for 5 minutes).
- Peanut butter swirl: Swirl a spoonful of peanut butter into the batter before baking for a delicious peanut butter chocolate combination.
- Espresso chocolate chip: Add 1 teaspoon of instant espresso powder to the batter and use espresso chocolate chips.
- Mint chocolate chip: Add 1/2 teaspoon of peppermint extract to the batter and use mint chocolate chips.
FAQs (Frequently Asked Questions)
Q: Can I use unsweetened chocolate instead of cocoa powder?
A: Yes, but you’ll need to adjust the amount of sugar. Use about 2 ounces of melted unsweetened chocolate and reduce the sugar by about 1/4 cup.
Q: Can I make these muffins ahead of time?
A: Absolutely! These muffins can be made a day or two in advance and stored in an airtight container at room temperature.
Q: What if I don’t have muffin liners?
A: You can grease the muffin tin well with butter or cooking spray instead of using liners.
Q: My muffins are sinking in the middle. What did I do wrong?
A: This could be due to overmixing the batter or opening the oven door too frequently during baking. Ensure careful mixing and avoid peeking!
Q: Can I add other mix-ins besides chocolate chips and walnuts?
A: Of course! Feel free to add other nuts, dried fruits, or even chopped candy bars to the batter.
Final Thoughts
These Ultimate Chocolate Brownie Muffins are more than just a recipe; they’re a little piece of happiness baked into every bite. Easy to make, incredibly delicious, and endlessly adaptable, they’re perfect for a quick breakfast, a satisfying snack, or a delightful dessert. I encourage you to try this recipe and make it your own. Experiment with different mix-ins, frostings, or glazes to create your perfect brownie muffin. And most importantly, don’t forget to share your creations with friends and family – because nothing tastes better than a homemade treat shared with loved ones. I’d love to hear your feedback and see your variations, so please share your experience! Pair these with a cold glass of milk or a scoop of vanilla ice cream for an extra special treat. Happy baking!