
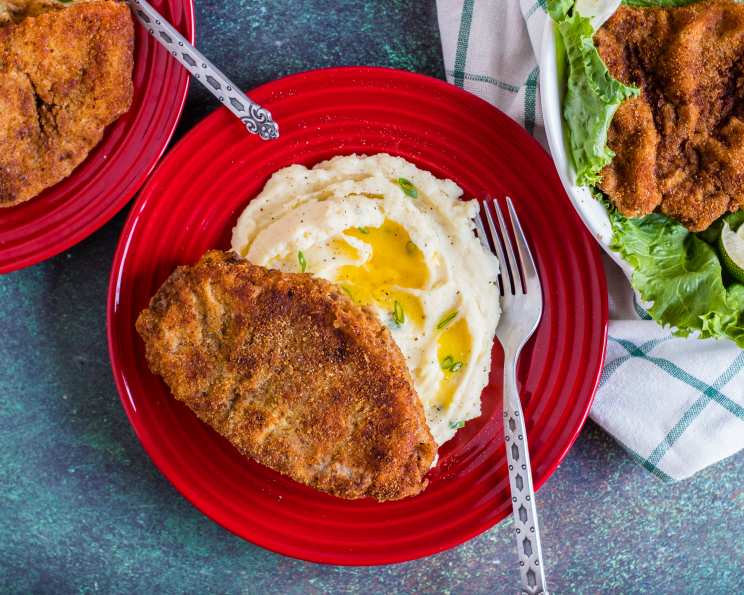
The Quintessential Veal Milanese: A Symphony of Simplicity
My grandmother, a formidable Italian matriarch named Nonna Emilia, had a way of making even the simplest dishes feel like a celebration. Her Veal Milanese, with its perfectly golden crust and tender interior, was a constant source of joy. I remember standing beside her, mesmerized as she pounded the veal cutlets, each strike a testament to her unwavering love and dedication to feeding her family. The aroma of garlic oil and butter sizzling in the pan, the satisfying crunch as I took my first bite – these are memories etched in my culinary soul, a reminder that sometimes, the most profound flavors come from the most uncomplicated recipes.
Recipe Overview
- Prep Time: 20 minutes
- Cook Time: 4 minutes
- Total Time: 1 hour 24 minutes (includes resting time)
- Servings: 4
- Dietary Type: Dairy-Free (if using dairy-free butter alternative)
Ingredients
- 4 veal cutlets
- 1/4 cup flour
- 1/4 cup seasoned breadcrumbs
- 1 egg, beaten
- 1 teaspoon garlic oil
- 1 teaspoon butter
Equipment Needed
- Meat mallet
- Shallow dishes or plates for breading
- Wax paper
- Large skillet
Instructions
- Begin by preparing the veal cutlets. Place each cutlet between two sheets of plastic wrap or parchment paper. Using a meat mallet, gently but firmly flatten the cutlets to a thickness of approximately 1/4 inch. This tenderizes the meat and ensures even cooking. Avoid pounding too forcefully, as this can tear the delicate fibers.
- Set up your breading station. In a shallow dish, place the flour. In a second shallow dish, place the beaten egg. In a third shallow dish, place the seasoned breadcrumbs. The quality of your breadcrumbs will significantly impact the final flavor, so choose a variety with a robust, savory profile. You can easily make your own by toasting stale bread and grinding it in a food processor with your favorite Italian herbs, garlic powder, and a pinch of salt and pepper.
- Dredge each flattened veal cutlet in the flour, ensuring it is evenly coated. Shake off any excess flour. This creates a dry surface for the egg to adhere to.
- Next, dip the floured cutlet into the beaten egg, making sure it is fully submerged. Allow any excess egg to drip off.
- Finally, coat the egg-covered cutlet with the seasoned breadcrumbs, pressing gently to ensure the breadcrumbs adhere well to the surface. A generous coating of breadcrumbs is key to achieving that signature crispy crust.
- Once all the cutlets are breaded, layer them between sheets of wax paper in a container. Place the container in the refrigerator and let the cutlets sit for at least one hour. This crucial step allows the breadcrumbs to adhere properly to the veal, preventing them from falling off during cooking.
- After the resting period, heat a skillet over medium-high heat. Add the garlic oil and butter to the skillet. The combination of oil and butter adds flavor and prevents the butter from burning. Ensure the skillet is hot before adding the cutlets.
- Carefully place the breaded veal cutlets in the hot skillet, being careful not to overcrowd the pan. Overcrowding will lower the temperature of the oil and result in soggy cutlets. Cook the cutlets for approximately 2 minutes per side, or until they are golden brown and cooked through. The internal temperature of the veal should reach 145°F (63°C).
- Remove the cooked veal cutlets from the skillet and place them on a wire rack to drain any excess oil. This will help maintain the crispiness of the breadcrumb coating.
Expert Tips & Tricks
- Pounding the Veal: Aim for a uniform thickness of 1/4 inch. Thinner cutlets cook faster and are less likely to become tough.
- Breading Technique: For an extra crispy crust, try double breading the cutlets. Dip them in the flour, egg, and breadcrumbs, then repeat the egg and breadcrumb steps.
- Oil Temperature: Ensure the oil is hot before adding the cutlets. Test the temperature by dropping a small breadcrumb into the oil. If it sizzles and turns golden brown quickly, the oil is ready.
- Resting Time: Don’t skip the resting time in the refrigerator! This is essential for the breadcrumbs to adhere properly.
- Pan Overcrowding: Cook the cutlets in batches to avoid overcrowding the pan. This ensures even cooking and a crispy crust.
- Flavor Boost: Add a pinch of grated Parmesan cheese to the breadcrumb mixture for extra flavor.
Serving & Storage Suggestions
Serve the Veal Milanese immediately while it is still hot and crispy. Traditionally, it is served with a simple lemon wedge, which adds a bright, acidic contrast to the richness of the veal. It pairs beautifully with risotto, particularly a saffron risotto or a creamy Parmesan risotto. Tender asparagus spears or a simple green salad also make excellent accompaniments.
Leftover Veal Milanese can be stored in an airtight container in the refrigerator for up to 3 days. To reheat, bake in a preheated oven at 350°F (175°C) for 10-15 minutes, or until heated through. Reheating in the oven will help maintain some of the crispness. Microwaving is not recommended, as it will make the cutlets soggy. Freezing is not recommended as it impacts the breading.
Nutritional Information
| Nutrient | Amount per Serving | % Daily Value |
|---|---|---|
| Calories | 81.4 kcal | N/A |
| Calories from Fat | N/A | N/A |
| Total Fat | 2.6 g | 3% |
| Saturated Fat | 1.1 g | 5% |
| Cholesterol | 49 mg | 16% |
| Sodium | 75.7 mg | 3% |
| Total Carbohydrate | 10.9 g | 3% |
| Dietary Fiber | 0.5 g | 2% |
| Sugars | 0.5 g | 1% |
| Protein | 3.3 g | 6% |
Note: Nutritional information is an estimate and may vary based on specific ingredients and portion sizes.
Variations & Substitutions
- Gluten-Free: Use gluten-free flour and gluten-free breadcrumbs to make this dish gluten-free.
- Chicken Milanese: Substitute chicken cutlets for veal cutlets for a more budget-friendly option.
- Pork Milanese: Use pork loin chops pounded thin instead of veal.
- Herb Variations: Experiment with different herbs in the breadcrumb mixture, such as rosemary, thyme, or oregano.
- Spicy Kick: Add a pinch of red pepper flakes to the breadcrumb mixture for a touch of heat.
- Lemon-Herb Crust: Add lemon zest and fresh herbs to the breadcrumbs for a brighter, more fragrant crust.
FAQs (Frequently Asked Questions)
Q: Can I prepare the Veal Milanese ahead of time?
A: Yes, you can bread the cutlets and store them in the refrigerator for up to 24 hours before cooking. This is a great way to save time on a busy weeknight.
Q: What is the best way to keep the breadcrumbs from falling off during cooking?
A: Make sure to dredge the cutlets in flour first, then dip them in egg, and finally coat them generously with breadcrumbs. Allowing the breaded cutlets to rest in the refrigerator for at least one hour is also crucial.
Q: Can I use olive oil instead of garlic oil and butter?
A: Yes, you can use olive oil, but the combination of garlic oil and butter adds a richer flavor. If using olive oil, choose a high-quality extra virgin olive oil.
Q: How do I know when the veal is cooked through?
A: The internal temperature of the veal should reach 145°F (63°C). Use a meat thermometer to check the temperature. The cutlets should also be golden brown and firm to the touch.
Q: Can I bake the Veal Milanese instead of frying it?
A: Yes, you can bake it. Place the breaded cutlets on a baking sheet lined with parchment paper. Drizzle with olive oil and bake in a preheated oven at 400°F (200°C) for 15-20 minutes, or until golden brown and cooked through. Baking will result in a slightly less crispy crust, but it’s a healthier option.
Final Thoughts
The Veal Milanese is more than just a recipe; it’s a culinary experience that connects us to tradition, family, and the joy of simple, honest food. Don’t be intimidated by its apparent simplicity – the key lies in the quality of the ingredients and the attention to detail in each step. So, gather your ingredients, channel your inner Nonna, and create a Veal Milanese that will transport you to the sun-drenched hills of Italy with every delicious bite. I encourage you to try this recipe and share your feedback. Serve it with a chilled glass of Pinot Grigio and enjoy the symphony of flavors. Buon appetito!