
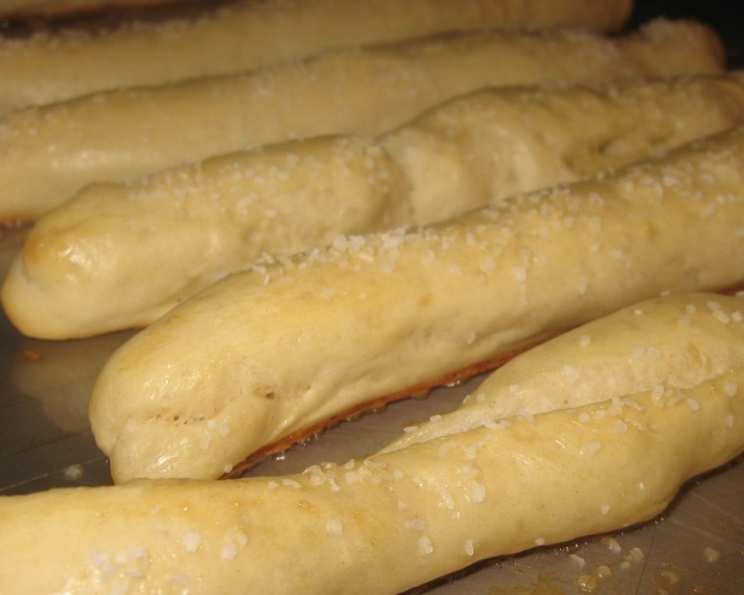
The Very Best Italian Bread!
I remember the first time I truly appreciated the simple perfection of Italian bread. It wasn’t in a fancy restaurant, but rather at a small, family-run pizzeria in Naples. The air was thick with the scent of wood smoke and bubbling cheese, and the crusty, fragrant loaves were sliced and served alongside steaming bowls of pasta. That humble bread, with its chewy interior and golden crust, elevated the entire meal and left an unforgettable impression. It was a reminder that sometimes, the most basic ingredients, when treated with care, can create something extraordinary.
Recipe Overview
- Prep Time: 20 minutes
- Cook Time: 30-35 minutes
- Total Time: 1 hour 35 minutes (including rise time)
- Yields: 2 loaves
- Dietary Type: Vegetarian
Ingredients
- 4 cups unbleached all-purpose flour
- 1 tablespoon light brown sugar
- 1 1/3 cups warm water (110 degrees F/45 degrees C)
- 1 1/2 teaspoons salt
- 1 1/2 teaspoons olive oil
- 1 (1/4 ounce) package active dry yeast
- 1 egg
- 1 tablespoon water
- 2 tablespoons cornmeal
Equipment Needed
- Bread Machine
- Measuring cups and spoons
- Lightly floured surface
- Cutting board
- Damp cloth
- Small bowl
- Fork or whisk
- Sharp knife
- Baking sheet
Instructions
- Begin by placing the flour, brown sugar, warm water, salt, olive oil, and yeast in the pan of your bread machine. Make sure to add the ingredients in the order recommended by your bread machine’s manufacturer. This is crucial for proper mixing and yeast activation.
- Select the dough cycle on your bread machine and press Start. The dough cycle usually takes around 1 hour and 30 minutes to complete, including kneading and the first rise.
- Once the dough cycle is finished, carefully punch down the dough to release any excess air. Turn the dough out onto a lightly floured surface.
- Form the dough into two loaves. Gently shape each portion into an oblong or round loaf, depending on your preference.
- Place the loaves seam side down on a cutting board that has been generously sprinkled with cornmeal. The cornmeal will prevent the loaves from sticking and add a delightful textural element to the bottom crust.
- Cover the loaves with a damp cloth and let them rise in a warm place until they have doubled in volume, approximately 40 minutes. The damp cloth prevents the surface from drying out and forming a crust, which can inhibit proper rising.
- While the loaves are rising, preheat your oven to 375 degrees F (190 degrees C). Ensuring your oven is fully preheated is essential for even baking and a beautiful golden crust.
- In a small bowl, beat together the egg and 1 tablespoon of water to create an egg wash. This wash will give the loaves a glossy sheen and enhance their color.
- Once the loaves have risen, gently brush them with the egg mixture. Be sure to cover the entire surface for even browning.
- Use a sharp knife to make a single long, quick cut down the center of each loaf. This score allows the bread to expand properly in the oven and prevents unsightly cracks.
- Gently shake the cutting board to make sure that the loaves are not sticking. If they are, use a spatula or pastry knife to loosen them carefully.
- With one quick but careful motion, slide the loaves onto a baking sheet.
- Bake in the preheated oven for 30 to 35 minutes, or until the loaves sound hollow when tapped on the bottom. The internal temperature of the bread should reach around 200-210°F.
Expert Tips & Tricks
- For an even crustier bread: Place a baking sheet filled with water on the bottom rack of the oven during baking. The steam will create a crispier crust.
- Don’t over-knead: Over-kneading can result in a tough bread. The bread machine usually handles this perfectly, but if you knead by hand, be mindful of the dough’s elasticity.
- Yeast Proofing: If you are unsure about your yeast’s viability, proof it by mixing it with the warm water and sugar before adding it to the other ingredients. If it foams up within 5-10 minutes, it’s good to use.
- Flavor Boost: For a more flavorful bread, add a tablespoon of dried herbs like rosemary or thyme to the dough. You can also use garlic-infused olive oil.
- Make Ahead: The dough can be prepared ahead of time and stored in the refrigerator for up to 24 hours. Just punch it down before shaping and baking.
Serving & Storage Suggestions
Serve your freshly baked Italian bread warm, sliced, and with a drizzle of good quality olive oil for dipping. It’s also fantastic with soups, stews, pasta dishes, and antipasto platters.
- Room Temperature: Store cooled loaves in a bread bag or airtight container at room temperature for up to 2-3 days.
- Refrigerator: For longer storage, wrap the bread tightly and refrigerate it for up to a week.
- Freezer: To freeze, wrap the bread tightly in plastic wrap and then in foil, or place it in a freezer bag. It can be frozen for up to 2-3 months. Thaw completely before slicing and serving. Reheat in a 350°F oven for 10-15 minutes to refresh the crust.
Nutritional Information
| Nutrient | Amount per Serving | % Daily Value |
|---|---|---|
| Calories | 1033.2 kcal | N/A |
| Calories from Fat | N/A | 7% |
| Total Fat | 8.6g | 13% |
| Saturated Fat | 1.7g | 8% |
| Cholesterol | 93mg | 31% |
| Sodium | 1790.5mg | 74% |
| Total Carbohydrate | 204.1g | 68% |
| Dietary Fiber | 7.6g | 30% |
| Sugars | 7.5g | N/A |
| Protein | 30.1g | 60% |
Note: Nutritional information is an estimate and may vary based on specific ingredients and portion sizes.
Variations & Substitutions
- Whole Wheat Italian Bread: Substitute up to half of the all-purpose flour with whole wheat flour for a nuttier flavor and increased fiber.
- Rosemary and Garlic Italian Bread: Add 1 tablespoon of chopped fresh rosemary and 2 cloves of minced garlic to the dough for a fragrant and flavorful twist.
- Gluten-Free Italian Bread: Use a high-quality gluten-free all-purpose flour blend designed for bread making. You may need to adjust the amount of liquid.
- Sourdough Italian Bread: Incorporate a sourdough starter into the dough for a tangy flavor and chewier texture.
FAQs (Frequently Asked Questions)
Q: Can I make this bread without a bread machine?
A: Yes, you can! Combine the ingredients in a large bowl and knead for 8-10 minutes until smooth and elastic. Let rise in a warm place for 1-1.5 hours, or until doubled, before shaping and baking.
Q: What is the best way to tell if the bread is done?
A: The best way is to check the internal temperature with a thermometer. It should reach 200-210°F. You can also tap the bottom of the loaf; it should sound hollow.
Q: Why is my bread not rising properly?
A: Ensure your yeast is fresh and active. Also, make sure the water is warm, not hot, as hot water can kill the yeast. A warm environment is essential for proper rising.
Q: Can I freeze the dough instead of baking it right away?
A: Yes, you can freeze the dough after the first rise. Punch it down, shape it into loaves, wrap tightly, and freeze. Thaw completely before letting it rise a second time and baking.
Q: My bread is browning too quickly. What should I do?
A: Tent the bread with aluminum foil during the last 10-15 minutes of baking to prevent it from browning too much.
Final Thoughts
There’s a simple joy in pulling a warm loaf of homemade Italian bread from the oven, the aroma filling your kitchen with comforting warmth. This recipe, whether you use a bread machine or knead by hand, brings that joy within reach. I encourage you to try it, experiment with the variations, and make it your own. Share a loaf with a friend, pair it with your favorite pasta dish, and savor the simple pleasure of good bread. And please, let me know how it turns out!