
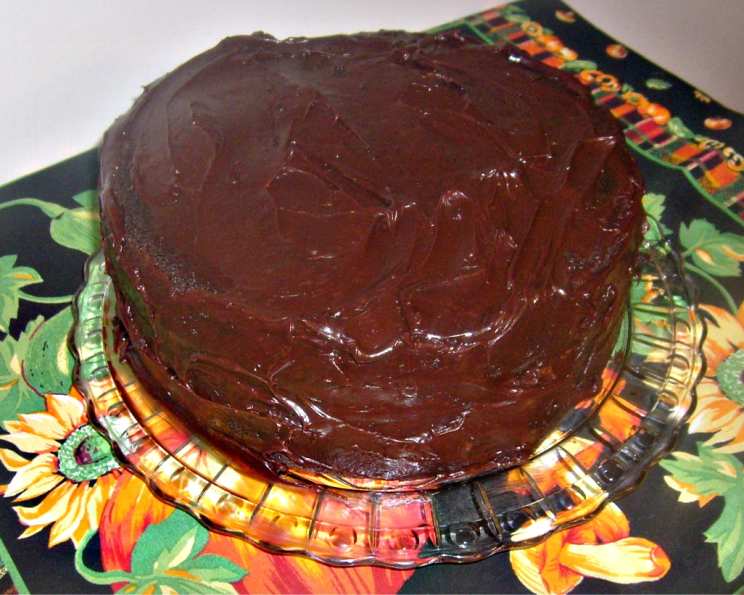
The Yankee Contender: Old-Fashioned Chocolate Layer Cake
I can still picture my grandmother, her hands dusted with flour, pulling a rich, dark chocolate cake from her ancient oven. The aroma alone was enough to transport me back to childhood, to Sunday dinners filled with laughter and the comforting weight of family. It wasn’t just a cake; it was a symbol of love, a sweet punctuation mark at the end of a perfect day. This recipe captures that essence, a timeless classic made with simple ingredients and a whole lot of heart.
Recipe Overview
- Prep Time: 1 hour
- Cook Time: 30 minutes
- Total Time: 2 hours 20 minutes
- Servings: 10-12
- Yield: One 9-inch 2-layer cake
- Dietary Type: Not specified
Ingredients
Cake:
- 12 tablespoons unsalted butter, very soft
- 1 3/4 cups all-purpose flour
- 4 ounces unsweetened chocolate
- 1/4 cup Dutch-processed cocoa powder
- 1/2 cup hot water
- 1 3/4 cups sugar
- 1 1/2 teaspoons baking soda
- 1 teaspoon salt
- 1 cup buttermilk
- 2 teaspoons vanilla extract
- 4 large eggs, plus 2 large egg yolks
Frosting:
- 16 ounces semisweet chocolate, finely chopped
- 8 tablespoons unsalted butter
- 1/3 cup sugar
- 2 tablespoons corn syrup
- 2 teaspoons vanilla extract
- 1/4 teaspoon table salt
- 1 1/4 cups heavy cream
Equipment Needed
- Two 9-inch-round by 2-inch-high cake pans
- Mixing bowls (various sizes, at least 3)
- Heatproof bowl
- Saucepan
- Rubber spatula
- Whisk
- Standing mixer with whisk and paddle attachments
- Wire rack
- Serving platter or cardboard round
- Ice bath
Instructions
-
Prepare the Oven and Pans: Adjust oven rack to middle position; heat oven to 350°F (175°C). Grease two 9-inch-round by 2-inch-high cake pans with softened butter; dust pans with flour and knock out excess. This ensures the cakes release easily after baking.
-
Melt Chocolate Mixture: Combine chocolate, cocoa powder, and hot water in a medium heatproof bowl. Set bowl over a saucepan containing 1 inch of simmering water (making sure the bowl doesn’t touch the water). Stir with a rubber spatula until the chocolate is melted and smooth, about 2 minutes.
-
Sweeten Chocolate: Add 1/2 cup sugar to the chocolate mixture and stir until thick and glossy, 1 to 2 minutes. This step intensifies the chocolate flavor and creates a lovely base for the batter. Remove bowl from heat and set aside to cool. Allowing the mixture to cool prevents the eggs from cooking when added later.
-
Whisk Dry Ingredients: Whisk flour, baking soda, and salt in a medium bowl. Whisking ensures these ingredients are evenly distributed, leading to a consistent crumb structure in the cake.
-
Combine Wet Ingredients: Combine buttermilk and vanilla in a small bowl. Buttermilk adds a subtle tang and helps to tenderize the cake.
-
Whisk Eggs and Sugar: In the bowl of a standing mixer fitted with the whisk attachment, whisk eggs and yolks on medium-low speed until combined, about 10 seconds. Add the remaining 1 1/4 cups sugar, increase speed to high, and whisk until fluffy and lightened in color, 2 to 3 minutes. This crucial step incorporates air into the batter, creating a light and airy cake.
-
Incorporate Chocolate: Replace the whisk with the paddle attachment. Add the cooled chocolate mixture to the egg/sugar mixture and mix on medium speed until thoroughly incorporated, 30 to 45 seconds, pausing to scrape down the sides of the bowl with a rubber spatula as needed.
-
Add Butter: Add softened butter one tablespoon at a time, mixing about ten seconds after each addition. This slow incorporation prevents the butter from separating and keeps the emulsion stable.
-
Alternate Dry and Wet: Add about one-third of the flour mixture followed by half of the buttermilk mixture, mixing until incorporated after each addition (about 15 seconds). Repeat using half of the remaining flour mixture and all of the remaining buttermilk mixture (the batter may appear separated). Scrape down the sides of the bowl.
-
Finish the Batter: Add the remaining flour mixture; mix at medium-low speed until the batter is thoroughly combined, about 15 seconds. Be careful not to overmix, as this can develop the gluten in the flour and result in a tough cake.
-
Final Fold: Remove bowl from mixer and fold the batter once or twice with a rubber spatula to incorporate any remaining flour.
-
Divide and Bake: Divide batter evenly between the prepared cake pans; smooth the batter to the edges of the pan with a spatula. Bake cakes until a toothpick inserted into the center comes out with a few crumbs attached, 25 to 30 minutes. The slight crumbs indicate the cake is perfectly moist.
-
Cool Cakes: Cool cakes in pans 15 minutes, then invert onto a wire rack. Cool cakes to room temperature before frosting, 45 to 60 minutes. Frosting warm cakes will cause the frosting to melt.
-
Melt Chocolate for Frosting: To make the frosting, melt chocolate in a heatproof bowl set over a saucepan containing 1 inch of barely simmering water, stirring occasionally until smooth. Remove from heat and set aside.
-
Heat Butter Mixture: Meanwhile, heat butter in a small saucepan over medium-low heat until melted. Increase heat to medium; add sugar, corn syrup, vanilla, and salt and stir with a heatproof rubber spatula until sugar is dissolved, 4 to 5 minutes.
-
Combine Frosting Ingredients: Add the melted chocolate, butter mixture, and cream to the clean bowl of a standing mixer and stir thoroughly to combine.
-
Chill and Whip Frosting: Place the mixer bowl over an ice bath and stir the mixture constantly with a rubber spatula until the frosting is thick and just beginning to harden against the sides of the bowl, 1 to 2 minutes (frosting should be 70 degrees). This is a crucial step for achieving the right consistency. Place the bowl on a standing mixer fitted with the paddle attachment and beat on medium-high speed until frosting is light and fluffy, 1 to 2 minutes. Stir with a rubber spatula until completely smooth.
-
Frost the Cake: To frost the cake, place one cake layer on a serving platter or cardboard round. Spread 1 1/2 cups of frosting evenly across the top of the cake with a spatula. Place the second cake layer on top, then spread the remaining frosting evenly over the top and sides of the cake.
-
Serve: Cut into slices and serve.
Expert Tips & Tricks
- For an extra moist cake, brush each layer with a simple syrup after cooling. You can flavor the syrup with a complementary extract like almond or coffee.
- If your frosting seems too thin, add a tablespoon of powdered sugar at a time until you reach the desired consistency.
- To get perfectly even cake layers, use a kitchen scale to measure the batter into each pan.
- For a cleaner frosting application, chill the cake layers in the freezer for about 15 minutes before frosting.
- Bloom the cocoa powder with the hot water at least 30 minutes ahead of time to enhance the chocolate flavor. This intensifies the cocoa’s richness.
Serving & Storage Suggestions
Serve this Old-Fashioned Chocolate Layer Cake slightly chilled or at room temperature. A dollop of whipped cream or a scoop of vanilla ice cream complements the rich chocolate flavor beautifully.
Store leftover cake in an airtight container at room temperature for up to 3 days, or in the refrigerator for up to a week. For longer storage, you can freeze the cake (frosted or unfrosted) for up to 2-3 months. Wrap tightly in plastic wrap, then in foil, before freezing. Thaw in the refrigerator overnight before serving.
Nutritional Information
| Nutrient | Amount per Serving | % Daily Value |
|---|---|---|
| Calories | 901.8 kcal | N/A |
| Calories from Fat | 605 g | 67% |
| Total Fat | 67.3 g | 103% |
| Saturated Fat | 41.1 g | 205% |
| Cholesterol | 229.3 mg | 76% |
| Sodium | 564.2 mg | 23% |
| Total Carbohydrate | 81.8 g | 27% |
| Dietary Fiber | 10.7 g | 42% |
| Sugars | 44.9 g | 179% |
| Protein | 14.7 g | 29% |
Variations & Substitutions
- Gluten-Free: Substitute the all-purpose flour with a gluten-free blend designed for baking. You may need to add a binder like xanthan gum.
- Dairy-Free: Use a dairy-free butter alternative and non-dairy buttermilk (made by adding lemon juice or vinegar to non-dairy milk). Substitute the heavy cream in the frosting with full-fat coconut cream.
- Mexican Chocolate: Add a pinch of cinnamon and a dash of cayenne pepper to the chocolate mixture for a warm, spicy kick.
- Mocha Cake: Add 2 tablespoons of instant espresso powder to the hot water when melting the chocolate to create a mocha-flavored cake.
- Peanut Butter Frosting: Substitute half the butter in the frosting with peanut butter for a delicious peanut butter chocolate combination.
FAQs (Frequently Asked Questions)
Q: Why is it important to cool the chocolate mixture before adding it to the eggs?
A: Adding hot chocolate directly to the eggs could cook them, resulting in a grainy texture. Cooling the chocolate ensures a smooth, emulsified batter.
Q: Can I use regular cocoa powder instead of Dutch-processed cocoa powder?
A: Yes, but the flavor will be slightly different. Dutch-processed cocoa is less acidic and has a smoother, more mellow flavor. If using regular cocoa, consider adding a pinch more baking soda to balance the acidity.
Q: My frosting is too stiff. How can I fix it?
A: If the frosting gets too cold and stiff to spread easily, wrap the mixer bowl with a towel soaked in hot water and mix on low speed until the frosting appears creamy and smooth.
Q: Can I make this cake a day ahead?
A: Absolutely! The cake layers can be baked, cooled, and wrapped tightly in plastic wrap up to 2 days in advance. Store them at room temperature. You can also make the frosting a day ahead, store it in the refrigerator, and re-whip it before using.
Q: How do I prevent the cake from sticking to the pan even after greasing and flouring?
A: Ensure you’re using fresh baking powder/soda. Also, try lining the bottom of the pan with parchment paper for extra insurance.
Final Thoughts
This Old-Fashioned Chocolate Layer Cake isn’t just a recipe; it’s an invitation to create memories. Whether you’re baking it for a special occasion or simply craving a slice of comfort, I hope this cake brings as much joy to your kitchen as it has to mine. Don’t be afraid to experiment with variations, make it your own, and most importantly, share it with the people you love. I’d love to hear about your baking adventures and any creative twists you add! Consider pairing it with a dark roast coffee or a glass of chilled milk for the ultimate indulgence. Happy Baking!