
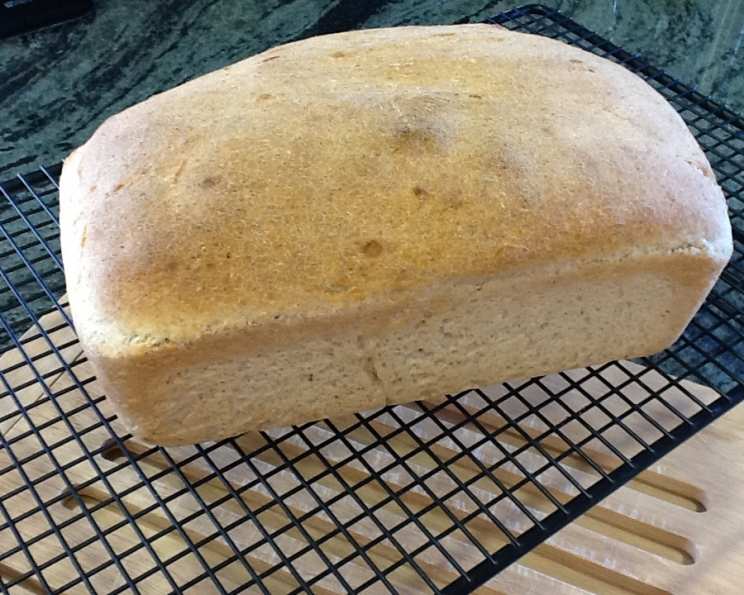
Thermomix Bread: The Everyday Loaf
The smell of freshly baked bread…it’s a sensory memory that takes me straight back to my grandmother’s kitchen. Every Sunday, without fail, she would be at her counter, a cloud of flour around her, coaxing life from simple ingredients. While she never owned a Thermomix (a tool I adore!), I often think of her hands kneading dough as I watch my own Thermomix do the work. This recipe is a modern nod to that old-world magic, a loaf that’s achievable any day of the week, filling your kitchen with that same irresistible aroma.
Recipe Overview
- Prep Time: 15 minutes
- Cook Time: 20-30 minutes
- Total Time: 1 hour 35-45 minutes (including proofing)
- Servings: 8
- Yield: 1 loaf or 8 rolls
- Dietary Type: Vegetarian
Ingredients
- 200g water
- 400g bread flour (white, or a mix of whole wheat and white)
- 1 (1/4 ounce) packet instant yeast (or 30g fresh yeast)
- 1 teaspoon salt
- 1 teaspoon sugar
- 50g olive oil
Equipment Needed
- Thermomix
- Loaf pan (lightly oiled) or baking sheet (lined with parchment paper)
- Tea towel
Instructions
- Lightly oil a loaf pan, or line a baking sheet with parchment paper. This will prevent sticking and ensure easy removal of your bread.
- Place water in the Thermomix bowl. Cook for 4 minutes/50 degrees Celsius/speed soft. This gently warms the water, activating the yeast more effectively.
- Add all remaining ingredients: bread flour, instant yeast, salt, sugar, and olive oil.
- Mix for 20 seconds/speed 3 to combine. The mixture should form a ball, and the dough will begin to clean the sides of the Thermomix bowl. Watch carefully.
- If the dough is too dry (a common problem if using heavier organic flours), add more water a teaspoon at a time, mixing for two or three seconds after each addition, until the dough comes together. Avoid adding too much water at once, which can make the dough sticky.
- Set the timer for 1 minute 30 seconds. Set to Closed Lid position. Press the Wheat button. This kneads the dough, developing the gluten and creating a smooth, elastic texture. The mixture should end up soft, pliable, and slightly tacky to the touch.
- Remove the Thermomix lid. Turn the Thermomix bowl upside down and undo the base unit. The dough will drop out, bringing the blades with it. This is normal!
- Carefully remove the blades and gather the dough into a ball. Try to handle it gently to keep the air inside.
- Press the dough lightly into the prepared loaf pan, or shape it into rolls as desired. For a rustic look, you can leave the loaf slightly uneven.
- Brush the loaf or rolls with olive oil. This adds flavor, helps with browning, and keeps the crust soft.
- Cover with a clean tea towel and set in a warm place to rise until doubled, about one hour. The rising time will vary depending on the temperature of your kitchen. A slightly warm oven (turned off!) can be a great place for proofing.
- Bake at 425 degrees Fahrenheit (220 degrees Celsius) for 20-30 minutes for a loaf, or 10-12 minutes for rolls. The cooked bread should be golden brown, and sound hollow when tapped on the bottom.
- Let the bread cool slightly before slicing and serving. Freshly baked bread is best enjoyed warm.
Expert Tips & Tricks
- Flour Power: The type of flour you use significantly impacts the outcome. Bread flour has a higher protein content than all-purpose flour, resulting in a chewier texture. Experiment with different ratios of white and whole wheat flour to find your perfect balance of flavor and texture.
- Yeast Matters: Ensure your yeast is fresh. Old yeast will result in a flat, dense loaf. You can test your yeast by mixing it with warm water and sugar; it should foam within a few minutes.
- Room Temperature Water: If using tap water, make sure it’s close to room temperature, not ice cold.
- The Windowpane Test: To check if the dough is kneaded enough, perform the windowpane test. Take a small piece of dough and gently stretch it between your fingers. If you can stretch it thin enough to see light through it without tearing, it’s ready.
- Oven Temperature Calibration: Ovens vary! The baking time given is a guideline. Use an oven thermometer to ensure your oven is accurately heated. Rotate the loaf halfway through baking to ensure even browning.
- Crust Control: For a softer crust, brush the baked loaf with melted butter immediately after removing it from the oven. For a crispier crust, leave it uncovered as it cools.
Serving & Storage Suggestions
Serve this Thermomix bread warm with your favorite toppings: butter, jam, cheese, or even a drizzle of olive oil and a sprinkle of sea salt. It’s also fantastic for sandwiches, toast, or alongside soups and salads.
To store, allow the bread to cool completely before wrapping it tightly in plastic wrap or placing it in an airtight container. It will keep at room temperature for 2-3 days. For longer storage, slice the bread and freeze it for up to 2 months. Reheat frozen slices in a toaster or oven.
Nutritional Information
| Nutrient | Amount per Serving | % Daily Value |
|---|---|---|
| Calories | 250 kcal | 13% |
| Total Fat | 8g | 10% |
| Saturated Fat | 1g | 5% |
| Cholesterol | 0mg | 0% |
| Sodium | 300mg | 13% |
| Carbohydrates | 40g | 15% |
| Fiber | 2g | 7% |
| Sugar | 1g | 2% |
| Protein | 7g | 14% |
Note: Nutritional information is an estimate and may vary based on specific ingredients and portion sizes.
Variations & Substitutions
- Whole Wheat Boost: Replace up to half of the white bread flour with whole wheat flour for a nuttier flavor and increased fiber.
- Herb Infusion: Add 1-2 tablespoons of chopped fresh herbs (rosemary, thyme, oregano) to the dough for a savory twist.
- Garlic Bread: Before baking, brush the loaf with garlic-infused olive oil for a simple garlic bread.
- Sweet Bread: Add 2 tablespoons of honey or maple syrup and a pinch of cinnamon to the dough for a slightly sweet bread perfect for breakfast.
- Seeded Sensation: Sprinkle sesame seeds, poppy seeds, or sunflower seeds on top of the loaf before baking for added texture and flavor.
FAQs (Frequently Asked Questions)
Q: Can I use active dry yeast instead of instant yeast?
A: Yes, but you’ll need to proof the active dry yeast first. Mix it with warm water and a teaspoon of sugar, and let it sit for 5-10 minutes until foamy before adding it to the Thermomix.
Q: My dough is too sticky. What should I do?
A: Add a tablespoon of flour at a time until the dough is easier to handle. Remember that a slightly sticky dough is better than a dry one, as it will result in a softer bread.
Q: Why didn’t my bread rise properly?
A: There are several reasons why bread might not rise. The yeast could be old, the water could be too hot or too cold, or the kitchen could be too cold. Ensure your yeast is fresh, use lukewarm water, and proof the dough in a warm place.
Q: Can I make this recipe without a Thermomix?
A: Absolutely! You can knead the dough by hand for 8-10 minutes, or use a stand mixer with a dough hook.
Q: How do I know when the bread is done baking?
A: The bread should be golden brown and sound hollow when tapped on the bottom. You can also use a thermometer to check the internal temperature; it should be around 200-210 degrees Fahrenheit (93-99 degrees Celsius).
Final Thoughts
This Thermomix bread recipe is more than just a set of instructions; it’s an invitation to create something wonderful with your hands (or with the help of your trusty Thermomix!). Don’t be afraid to experiment with different flours, herbs, and seeds to make it your own. I hope this recipe brings the same joy to your kitchen that my grandmother’s bread brought to ours. Happy baking! And please, share your creations and feedback – I’d love to hear how it turns out! Consider pairing this bread with a hearty soup or a simple cheese board for a complete and satisfying meal.