
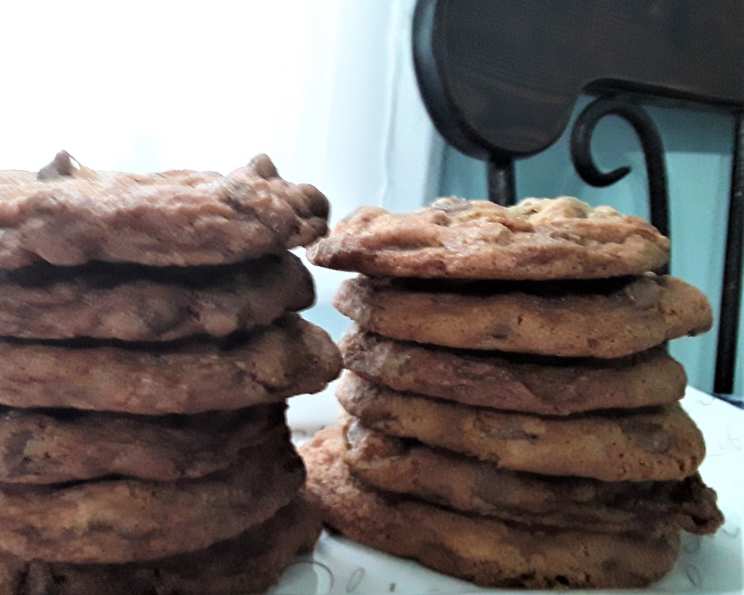
The Ultimate Thick and Chewy Chocolate Chip Cookies
The scent of warm chocolate chip cookies baking in the oven is more than just an aroma; it’s a time machine. It instantly transports me back to my grandmother’s kitchen, where she always had a batch ready for us grandkids after school. Those cookies, slightly misshapen and always a little too gooey in the center, were made with so much love that they tasted like pure happiness. Today, I strive to recreate that feeling with every batch of my own, tweaking recipes and techniques to achieve the perfect balance of thick, chewy, and utterly irresistible.
Recipe Overview
- Prep Time: 15 minutes
- Cook Time: 15-18 minutes
- Total Time: 30-33 minutes
- Yields: Approximately 18 large cookies
- Dietary Type: Not specified (Contains dairy and eggs)
Ingredients
- 2 cups plus 2 tablespoons all-purpose flour
- ½ teaspoon baking soda
- ½ teaspoon salt
- 12 tablespoons (1 ½ sticks) unsalted butter, melted and cooled to warm
- 1 cup packed light brown sugar
- ½ cup granulated sugar
- 1 large egg
- 1 large egg yolk
- 2 teaspoons vanilla extract
- 1 – 1 ½ cups semi-sweet chocolate chips
Equipment Needed
- Two cookie sheets
- Parchment paper
- Medium bowl
- Electric mixer or mixing bowl and whisk
- Measuring cups and spoons
Instructions
-
Begin by positioning your oven racks in the upper and lower middle positions. Preheat the oven to 325°F (160°C). Line two cookie sheets with parchment paper to prevent sticking and ensure even baking.
-
In a medium bowl, whisk together the flour, baking soda, and salt. This step is crucial for evenly distributing the leavening agent and salt, resulting in a consistent texture and flavor throughout the cookies. Set this dry ingredient mixture aside.
-
In a separate, large mixing bowl (or the bowl of your electric mixer), combine the melted and cooled butter, light brown sugar, and granulated sugar. Mix these ingredients together either by hand or with an electric mixer until they are thoroughly blended. The mixture should be smooth and creamy.
-
Beat in the whole egg, egg yolk, and vanilla extract until well combined. The extra egg yolk adds richness and chewiness to the cookies, so don’t skip it! Ensure the mixture is homogenous before proceeding.
-
Gradually add the dry ingredients to the wet ingredients, mixing at low speed just until combined. Be careful not to overmix, as this can develop the gluten in the flour, leading to tough cookies. Stop mixing as soon as the flour is incorporated.
-
Stir in the chocolate chips to your liking. I personally prefer to use closer to 1 ½ cups for maximum chocolatey goodness, but you can adjust the amount to suit your taste.
-
Roll a scant ¼ cup of dough into a ball. This is where the magic happens: holding the dough ball in the fingertips of both hands, pull it into two equal halves. Rotate the halves 90 degrees, and with the jagged edges facing up, join the halves together at their base, again forming a single ball. Be careful not to smooth the dough’s uneven surface. This creates craggy edges that will bake into delightfully crispy bits.
-
Place the formed dough balls onto the prepared cookie sheets, leaving approximately 2 ½ inches between each ball to allow for spreading during baking.
-
Bake the cookies, reversing the position of the cookie sheets halfway through baking, until they are light golden brown and the outer edges start to harden, but the centers are still soft and puffy – approximately 15-18 minutes. Keep a close eye on them, as oven temperatures can vary.
-
Allow the cookies to cool completely on the baking sheets. This helps them to set properly and prevents them from breaking when you try to move them.
-
Once cooled, gently peel the cookies from the parchment paper and enjoy!
Expert Tips & Tricks
- Melted Butter is Key: Using melted butter creates a chewier cookie. Don’t use hot butter. Let it cool slightly, but not solidify.
- The Egg Yolk Boost: The extra egg yolk is crucial for that signature chewy texture. Don’t skip it!
- Don’t Overmix: Overmixing develops gluten, leading to tough cookies. Mix until just combined.
- The “Rip and Stick” Method: Creating those rough edges is key to the look and texture of these cookies. Experiment with the tearing and re-joining technique to achieve the perfect jagged appearance.
- Underbaking is Better: It’s better to slightly underbake than overbake these cookies. They will continue to set as they cool on the baking sheet.
- Chill the Dough: For an even thicker cookie, chill the dough for at least 30 minutes (or even overnight) before baking.
Serving & Storage Suggestions
These cookies are best served warm, with a cold glass of milk or a scoop of vanilla ice cream. They also pair wonderfully with a cup of coffee or tea.
- Storage: Store leftover cookies in an airtight container at room temperature for up to 3 days.
- Freezing: For longer storage, freeze the baked cookies in an airtight container for up to 2 months. You can also freeze the dough balls before baking. Simply place the formed dough balls on a baking sheet and freeze until solid, then transfer them to a freezer bag. Bake from frozen, adding a few extra minutes to the baking time.
- Reheating: To reheat, warm the cookies in a preheated oven at 300°F (150°C) for a few minutes, or microwave for a few seconds until warmed through.
Nutritional Information
(Estimated values per cookie)
| Nutrient | Amount per Serving | % Daily Value |
|---|---|---|
| Calories | 241 kcal | N/A |
| Fat | 11.1 g | 17% |
| Saturated Fat | 6.7 g | 33% |
| Cholesterol | 39.8 mg | 13% |
| Sodium | 172.8 mg | 7% |
| Carbohydrate | 34.9 g | 11% |
| Fiber | 0.9 g | 3% |
| Sugars | 22.6 g | N/A |
| Protein | 2.3 g | 4% |
Note: Nutritional information is an estimate and may vary based on specific ingredients and portion sizes.
Variations & Substitutions
- Nutty Addition: Add ½ cup of chopped walnuts or pecans to the dough for added flavor and texture.
- Espresso Kick: Incorporate 1-2 teaspoons of instant espresso powder to the dry ingredients for a mocha-flavored cookie.
- Spice it Up: Add ¼ teaspoon of cinnamon or nutmeg to the dry ingredients for a warm, spiced cookie.
- Different Chocolate: Experiment with different types of chocolate chips, such as milk chocolate, dark chocolate, or white chocolate. You can even use chopped chocolate bars.
- Gluten-Free Option: Substitute the all-purpose flour with a gluten-free blend of your choice. Note that the texture may be slightly different.
FAQs (Frequently Asked Questions)
Q: Why is my butter melted and not softened?
A: This recipe specifically calls for melted butter for a chewier texture. Softened butter will result in a cakier cookie.
Q: Can I use salted butter instead of unsalted?
A: Yes, but reduce the amount of salt added in the recipe to ¼ teaspoon.
Q: My cookies spread too thin. What did I do wrong?
A: Possible causes include using too much butter, not enough flour, or not chilling the dough. Also, make sure your oven temperature is accurate.
Q: Can I make the dough ahead of time?
A: Yes! The dough can be made up to 2 days in advance and stored in the refrigerator. Let it sit at room temperature for about 30 minutes before scooping and baking.
Q: How do I keep my cookies soft?
A: Store the cooled cookies in an airtight container with a slice of bread. The bread will absorb moisture, keeping the cookies soft.
Final Thoughts
I hope this recipe inspires you to create your own batch of thick and chewy chocolate chip cookies. Don’t be afraid to experiment with different variations and find what you love best. These cookies are perfect for sharing with friends and family, or simply enjoying as a well-deserved treat. So go ahead, preheat your oven, and get ready to fill your kitchen with the irresistible aroma of homemade goodness. I’m eager to hear about your baking adventures, so please share your feedback and any delicious variations you come up with!