
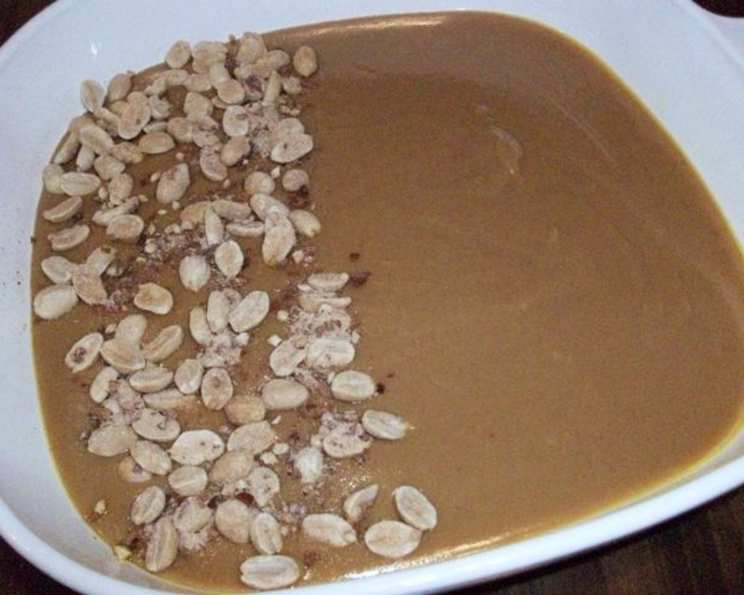
Decadent Dream: Mastering Thick Peanut Butter Fudge
The scent of peanut butter always takes me back to childhood, to rainy afternoons spent in my grandmother’s kitchen. She had a knack for whipping up simple, comforting treats, and her peanut butter fudge was legendary. It wasn’t the fancy, artisan kind you see in boutiques; it was a dense, intensely peanut-buttery square of pure happiness that instantly made the world a better place. Every bite was like a warm hug, a sweet reminder of simpler times and unconditional love. That’s what this recipe is all about: recreating that perfect, nostalgic indulgence.
Recipe Overview
- Prep Time: 10 minutes
- Cook Time: 15-20 minutes
- Total Time: 25-30 minutes + cooling time
- Servings: About 36 squares
- Yields: 1 (9×13 inch) pan
- Dietary Type: Vegetarian
Ingredients
- 3 cups sugar
- 1 cup evaporated milk
- ½ cup margarine
- 1 cup creamy peanut butter
- 1 tablespoon vanilla extract
Equipment Needed
- 9×13 inch pan or plate
- Medium saucepan
- Candy thermometer (optional)
- Electric mixer
Instructions
-
Prepare your pan: Lightly butter a 9×13 inch pan or plate. This step is crucial to prevent the fudge from sticking and ensures easy removal later. Set aside.
-
Combine ingredients: In a medium saucepan, combine the sugar, evaporated milk, and margarine.
-
Cook over medium heat: Place the saucepan over medium heat and begin to cook the mixture. It is extremely important to stir constantly during this stage to prevent scorching and ensure even cooking.
-
Reach the soft ball stage: Continue cooking and stirring until the mixture reaches the soft ball stage. This is a crucial step for achieving the correct fudge texture.
- Using a candy thermometer: Cook until the thermometer registers 235°F (113°C).
- Using the water test: Drop a small amount of the mixture into a bowl of cold water. If it forms a soft, pliable ball that you can flatten with your fingers, it has reached the soft ball stage.
-
Remove from heat: Once the mixture reaches the soft ball stage, immediately remove the saucepan from the heat.
-
Add peanut butter and vanilla: Add the creamy peanut butter and vanilla extract to the hot mixture.
-
Mix until glossy appearance fades: Using an electric mixer, mix on high speed until the candy begins to lose its glossy appearance. This step is essential for creating the perfect fudge consistency. Be careful not to overmix.
-
Pour into prepared pan: Quickly pour the mixture into the buttered pan or plate.
-
Cool completely: Allow the fudge to cool completely at room temperature before cutting into squares. This can take several hours, or you can speed up the process by placing it in the refrigerator.
-
Cut into squares: Once the fudge is firm, cut it into squares and enjoy!
Expert Tips & Tricks
- Achieving the Perfect Soft Ball Stage: The soft ball stage is critical for fudge. If you don’t have a candy thermometer, the cold water test is your best friend. Don’t rush this stage, as undercooked fudge will be too soft, and overcooked fudge will be dry and crumbly.
- Preventing Graininess: Stirring constantly while cooking is key to preventing sugar crystals from forming, which can result in grainy fudge.
- Creamy Peanut Butter is Key: Use a good quality, creamy peanut butter for the best results. Avoid using natural peanut butter, as the oil separation can affect the texture of the fudge.
- Don’t Overmix: Overmixing after adding the peanut butter can cause the fudge to become tough. Mix just until the glossy appearance fades.
- Softening Margarine: Ensure your margarine is at room temperature, softened, but not melted. This helps it incorporate evenly into the mixture.
- Troubleshooting: If your fudge is too soft, you likely didn’t cook it to the soft ball stage. If it’s too hard, you overcooked it. Unfortunately, there’s no foolproof way to fix overcooked fudge, but you can try microwaving it with a little bit of milk and stirring until smooth, then re-pouring it into a pan to set.
- Salted vs Unsalted Margarine: I recommend unsalted margarine in this recipe, but if you use salted margarine, you may want to reduce the amount of salt elsewhere.
Serving & Storage Suggestions
This thick peanut butter fudge is perfect served as an after-dinner treat, a homemade gift, or a sweet addition to a dessert platter.
- Serving: Cut the fudge into neat squares and arrange them on a platter. A sprinkle of flaky sea salt adds a sophisticated touch and enhances the peanut butter flavor.
- Storage: Store the fudge in an airtight container at room temperature for up to a week. For longer storage, keep it in the refrigerator for up to two weeks. You can also freeze the fudge for up to two months; wrap it tightly in plastic wrap and then place it in a freezer bag. Thaw in the refrigerator before serving.
- Reheating: This fudge is best served at room temperature. If it has been refrigerated, allow it to sit at room temperature for about 30 minutes before serving to soften.
Nutritional Information
Here’s an estimate of the nutritional information per serving (approx. 1 square):
| Nutrient | Amount per Serving | % Daily Value* |
|---|---|---|
| Calories | 140 kcal | 7% |
| Total Fat | 7g | 11% |
| Saturated Fat | 2g | 10% |
| Cholesterol | 2mg | 1% |
| Sodium | 70mg | 3% |
| Total Carbohydrate | 18g | 6% |
| Dietary Fiber | 0.4g | 2% |
| Sugars | 16g | – |
| Protein | 1.5g | 3% |
*Percent Daily Values are based on a 2,000 calorie diet.
Variations & Substitutions
- Chocolate Peanut Butter Fudge: Swirl in melted chocolate chips (milk, dark, or semi-sweet) after adding the peanut butter.
- Peanut Butter Swirl Fudge: Use a combination of smooth and crunchy peanut butter for added texture.
- Maple Peanut Butter Fudge: Substitute some of the sugar with maple syrup for a richer, more complex flavor. Start with ¼ cup and adjust to taste.
- Vegan Peanut Butter Fudge: Use plant-based margarine and ensure your evaporated milk alternative is unsweetened.
- Add-Ins: Get creative with add-ins! Try chopped nuts (peanuts, pecans, walnuts), mini marshmallows, pretzels, or even crumbled bacon for a sweet and savory twist.
FAQs (Frequently Asked Questions)
Q: Can I use natural peanut butter in this recipe?
A: While you can, natural peanut butter can be unpredictable due to oil separation. The fudge might not set properly or have a slightly grainy texture. Creamy, processed peanut butter is highly recommended for consistent results.
Q: How do I know when the fudge is done cooking?
A: The best way is to use a candy thermometer and cook the mixture to 235°F (113°C). If you don’t have a thermometer, use the cold water test: drop a small amount of the mixture into cold water. It should form a soft, pliable ball.
Q: My fudge is grainy. What did I do wrong?
A: Graininess is usually caused by sugar crystals forming during cooking. This can happen if you didn’t stir the mixture constantly enough, or if sugar crystals splashed onto the sides of the pan.
Q: Can I freeze peanut butter fudge?
A: Yes, you can! Wrap the fudge tightly in plastic wrap and then place it in a freezer bag. It can be frozen for up to two months. Thaw in the refrigerator before serving.
Q: How long does it take for the fudge to set?
A: It usually takes several hours for the fudge to set completely at room temperature. You can speed up the process by placing it in the refrigerator, which may take about 1-2 hours.
Final Thoughts
This thick peanut butter fudge recipe is a testament to the magic of simple ingredients and cherished memories. It’s a recipe that’s forgiving, adaptable, and always guaranteed to bring a smile to your face. Don’t be afraid to experiment with variations and make it your own! Whether you’re a seasoned baker or a kitchen novice, I encourage you to give this recipe a try and share the joy of homemade fudge with your loved ones. And if you have any secret ingredients or twists, be sure to let me know – I’m always eager to learn from fellow fudge enthusiasts!