
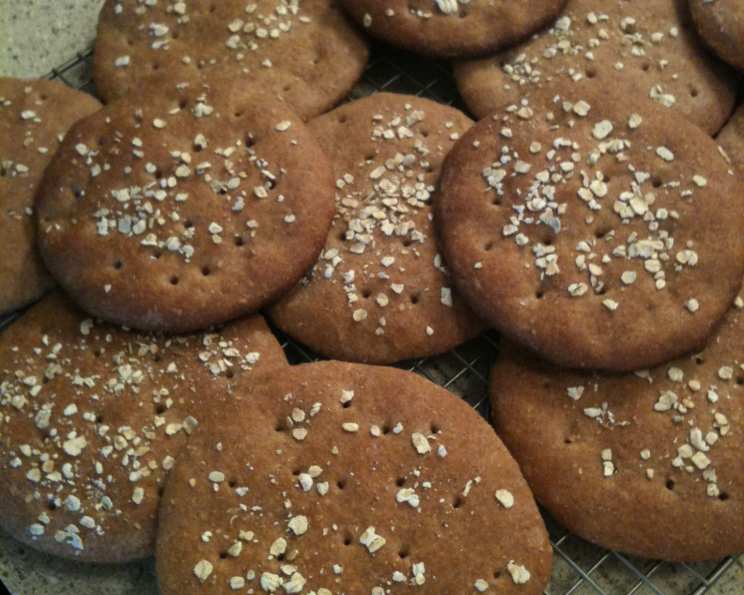
The Ultimate Guide to Homemade Thin Sandwich Buns
The smell of baking bread is a powerful memory trigger for me. My grandmother, a woman of few words but boundless love, always had a loaf of something warm and yeasty coming out of her oven. It wasn’t fancy bread, just simple, wholesome loaves and buns that formed the foundation of countless family meals. While her recipes were closely guarded secrets, the feeling of that warm kitchen, filled with the comforting aroma of baking, is something I’ve always strived to recreate. These thin sandwich buns, light yet satisfying, are my attempt to capture that essence – a healthier take on a classic, perfect for building delicious memories of your own.
Recipe Overview
- Prep Time: 1 hour
- Cook Time: 12-15 minutes
- Total Time: 1 hour 45 minutes
- Servings: 16
- Yield: 16 buns
- Dietary Type: Vegetarian
Ingredients
- 1 1/3 cups warm water
- 1/4 cup sugar
- 1 tablespoon yeast
- 1 egg
- 2 teaspoons canola oil
- 3 cups whole wheat flour
- 1/2 cup wheat bran (or 1/4 cup oat fiber)
- 2 tablespoons vital wheat gluten (optional – see notes below)
- 1 teaspoon salt
Ingredient Notes:
- If omitting the vital wheat gluten, add 2 more tablespoons of flour.
- White flour can be used in place of the whole wheat, but you may need to adjust the amount of flour to achieve the correct dough consistency. Nutritional information will also change.
- For a lighter, milder flavor, try substituting wheat bran with oat fiber (as described in the recipe notes). Be sure to use oat fiber, not oat bran.
Equipment Needed
- Large Mixing Bowl
- Measuring Cups and Spoons
- Fork or Whisk
- Cookie Sheets (2)
- Cooking Spray
- 4″ Biscuit or Cookie Cutter (optional, but recommended for consistent shape)
- Food Scale (optional, but helpful for precise portioning)
- Stand Mixer with Dough Hook (optional, but recommended for easier kneading)
- Muffin Top Pan (optional alternative to cookie sheets)
Instructions
-
In a large mixing bowl, sprinkle the sugar over the warm water, followed by the yeast. Let this mixture sit for a few minutes until the yeast begins to foam or bubble, indicating that it is active.
-
Add the egg and canola oil to the yeast mixture and combine thoroughly.
-
In a separate container, use a fork or whisk to stir together the whole wheat flour, wheat bran (or oat fiber), vital wheat gluten (if using), and salt. This ensures even distribution of the dry ingredients.
-
Add half of the flour mixture to the wet ingredients and blend well. This initial mixture, known as the “sponge,” will be fairly wet and sticky.
-
Let the sponge rise in a warm place for 30-45 minutes. This allows the yeast to work its magic and develop flavor.
-
After the sponge has risen, add the rest of the flour mixture to the bowl.
-
Knead the dough for about 5 minutes. If using a stand mixer, use the dough hook attachment on medium speed. The dough will be sticky, so don’t be tempted to add too much extra flour.
-
Spray two cookie sheets generously with cooking spray. Alternatively, use a muffin top pan sprayed with cooking spray.
-
Divide the dough into 16 equal portions. Since the dough is sticky, weighing each portion on a food scale can help ensure uniformity. Divide the total weight of the dough by 16 to determine the ideal weight for each bun. Place 8 portions on each cookie sheet, or one portion in each muffin top cup.
-
If using a cookie cutter: Take a 4″ biscuit cutter and place it over one of the dough portions. Wet the inside of the cutter and your fingers with water to prevent sticking. Gently spread the dough into a perfect circle by using your fingers to flatten it to the inside edge of the biscuit cutter. Remove the cutter, re-wet the inside, and repeat with the remaining 15 buns.
-
Preheat the oven to 350 degrees F (175 degrees C).
-
Let the buns rise until they have approximately doubled in bulk, about 30-45 minutes.
-
Bake in the preheated oven for 12-15 minutes, or until the buns are golden brown. Watch them carefully to prevent overbaking.
-
Cool the buns completely on a wire rack.
-
If using cookie sheet: Once cooled, cut the buns in half horizontally to create the top and bottom for your sandwiches.
Expert Tips & Tricks
- Proofing the Yeast: Always check the expiration date on your yeast. To ensure it’s active, proof it by adding it to warm water with a bit of sugar. If it doesn’t foam within 5-10 minutes, the yeast is likely dead and you’ll need to use fresh yeast.
- Sticky Dough Management: This dough is intentionally sticky, which contributes to the soft texture of the buns. Resist the urge to add excessive amounts of flour, as this will result in dry, dense buns. Instead, use wet hands or a dough scraper to handle the dough.
- Uniformity is Key: For consistently sized buns, use a food scale to weigh each portion. This ensures even baking and calorie distribution.
- Don’t Overbake: Overbaking will result in dry, hard buns. Keep a close eye on them during the last few minutes of baking and remove them from the oven as soon as they are golden brown.
- Oat Fiber Substitution: If using oat fiber, remember that it absorbs more liquid than wheat bran. You might need to add a tablespoon or two of extra water to the dough to achieve the desired consistency.
- Muffin Top Pan Hack: Using a muffin top pan eliminates the need for a cookie cutter and creates perfectly round buns.
Serving & Storage Suggestions
Serve these thin sandwich buns with your favorite fillings. They are excellent for burgers, deli sandwiches, or even as a base for mini pizzas.
Storage:
- Room Temperature: Store cooled buns in an airtight container at room temperature for up to 2 days.
- Refrigerator: For longer storage, keep the buns in an airtight container in the refrigerator for up to 5 days.
- Freezer: These buns freeze well. Wrap them individually in plastic wrap and place them in a freezer-safe bag or container. They can be stored in the freezer for up to 2 months. To thaw, simply leave them at room temperature for a few hours or microwave them briefly.
Reheating:
- To reheat, wrap the bun in a slightly damp paper towel and microwave for 10-20 seconds, or until warmed through. You can also toast them lightly for a crispier texture.
Nutritional Information
(Approximate values per bun, based on 16 servings, using wheat bran):
| Nutrient | Amount per Serving |
|---|---|
| Calories | 108 kcal |
| Fat | 1g |
| Protein | 5g |
| Carbohydrate | 20g |
| Dietary Fiber | 4g |
| Cholesterol | 13mg |
| Sodium | 124mg |
Variations & Substitutions
- Gluten-Free: While this recipe contains wheat gluten, it can be adapted using a gluten-free flour blend and a gluten-free binder like xanthan gum. Note: The texture and flavor will differ.
- Sweet Buns: Add a touch more sugar (1-2 tablespoons) and a pinch of cinnamon to the dough for slightly sweet buns, perfect for breakfast sandwiches or French toast.
- Herb-Infused: Mix in some dried herbs like rosemary, thyme, or oregano for a savory twist.
- Seed Topping: Sprinkle the unbaked buns with sesame seeds, poppy seeds, or everything bagel seasoning for added flavor and texture.
FAQs (Frequently Asked Questions)
Q: Why is my dough so sticky?
A: This recipe is designed to be a bit sticky, as it contributes to a softer bun. Avoid adding too much extra flour; instead, use wet hands or a dough scraper when handling the dough.
Q: Can I use all-purpose flour instead of whole wheat flour?
A: Yes, you can substitute all-purpose flour for the whole wheat flour. However, you may need to adjust the amount of flour to achieve the desired dough consistency, as all-purpose flour absorbs less liquid. The nutritional profile will also change.
Q: What is vital wheat gluten and why is it used?
A: Vital wheat gluten is the natural protein found in wheat. It adds elasticity and chewiness to the dough, improving the texture and rise of the buns.
Q: Can I make the dough ahead of time?
A: Yes, you can make the dough ahead of time and store it in the refrigerator. After the initial kneading, place the dough in a lightly oiled bowl, cover it tightly, and refrigerate for up to 24 hours. Let it come to room temperature before proceeding with the shaping and baking.
Q: My buns are browning too quickly. What should I do?
A: If the buns are browning too quickly, tent a piece of aluminum foil loosely over them during the last few minutes of baking. This will help to prevent them from burning.
Final Thoughts
I hope this recipe inspires you to experience the joy of homemade bread. These thin sandwich buns are a versatile and delicious addition to any meal, and the process of baking them is a rewarding experience in itself. Don’t be afraid to experiment with variations and substitutions to create your own signature version. And, most importantly, share your creations with family and friends – the best part of cooking is bringing people together around the table!