
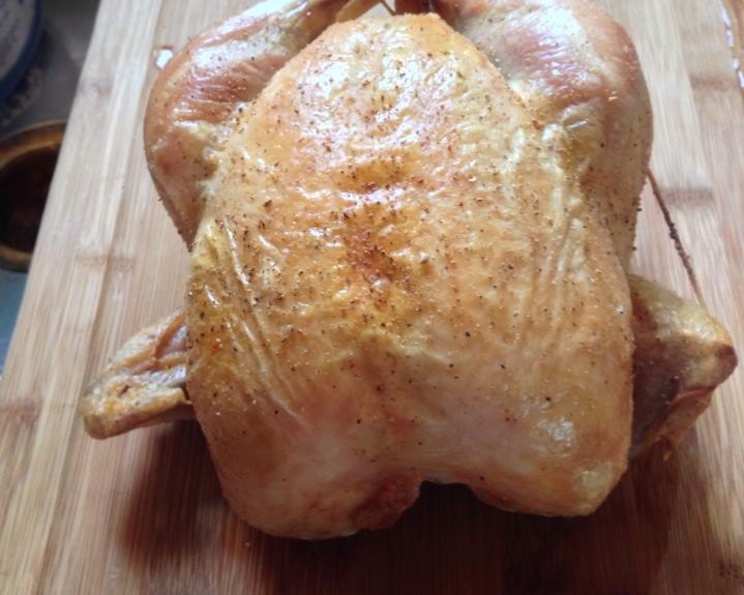
Thomas Keller’s Simple Roast Chicken: A Culinary Revelation
I remember the first time I tasted truly exceptional roast chicken. It wasn’t at a fancy restaurant, but at a small, family-run bistro tucked away in the French countryside. The skin, a deep, mahogany brown, crackled with each bite, revealing succulent, perfectly cooked meat beneath. That chicken, seasoned simply with salt, pepper, and herbs, reset my standards. It was a culinary epiphany, and ever since, I’ve been on a quest to recreate that magic. Thomas Keller’s roast chicken recipe, with its emphasis on high heat and meticulous technique, comes remarkably close to capturing that unforgettable experience. It’s a testament to the idea that simple ingredients, when treated with respect and precision, can yield extraordinary results.
Recipe Overview
- Prep Time: 15 minutes
- Cook Time: 50-60 minutes
- Total Time: 1 hour 5-15 minutes
- Servings: 4
- Yield: 1 roast chicken
- Dietary Type: Gluten-Free, Dairy-Free (if butter is omitted)
Ingredients
- 2-3 lb free-range chicken
- Kosher salt
- Freshly ground black pepper
- 2 teaspoons minced thyme
- Unsalted butter
- Dijon mustard
Equipment Needed
- Sauté pan or roasting pan
- Kitchen twine
- Meat thermometer
- Cutting board
Instructions
-
Begin by preheating your oven to a high temperature of 450 degrees Fahrenheit (232 degrees Celsius). This high heat is crucial for achieving that coveted crispy skin.
-
Prepare the chicken. Rinse the chicken thoroughly under cold water. This removes any lingering impurities. The next step is absolutely vital: dry the chicken meticulously, both inside and out, using paper towels. The drier the skin, the better it will crisp up in the oven. This step can’t be emphasized enough – dry, dry, dry!
-
Season the cavity generously with kosher salt and freshly ground black pepper. Don’t be shy; this is your opportunity to infuse the chicken with flavor from the inside out.
-
Truss the chicken with kitchen twine. This step helps the chicken cook evenly and maintain a compact shape. To truss, place the chicken on a tray with the legs facing you. Tuck the wing tips under the bird. Cut a piece of kitchen twine about 3 feet long and center it on top of the neck end of the breast. Lift the neck end of the bird and pull the twine down around the wings and under the chicken. Bring the ends up over the breast toward you and knot the twine, pulling it tight to plump the breasts. Bring the ends of the twine around the ends of the drumsticks and straight up. Tie as before to pull the drumsticks together and form a compact bird. Tie again to secure the knot.
-
Now comes the most important seasoning step for the outside of the chicken. Salt the chicken liberally. The key, as Chef Keller says, is to “rain salt” over the bird to ensure a uniform coating. Aim for about 1 tablespoon of kosher salt for the entire bird. The goal is to create a crisp, salty, and flavorful skin, so don’t be afraid to be generous. When the chicken is cooked, you should still be able to see the salt baked onto the skin.
-
Season the outside of the chicken to taste with freshly ground black pepper.
-
Place the chicken in a sauté pan or roasting pan. Ensure the pan is oven-safe.
-
Once the oven has reached the desired temperature, carefully place the pan with the chicken into the oven.
-
Roast the chicken, undisturbed, until it is cooked through. This usually takes between 50 to 60 minutes. The chicken is done when a meat thermometer inserted into the thickest part of the thigh registers 165 degrees Fahrenheit (74 degrees Celsius). Resist the urge to baste the chicken during cooking. Basting can introduce steam, which hinders the crisping of the skin. If you’re concerned about dryness, you can add butter, but Keller believes it’s unnecessary and can create unwanted steam.
-
Remove the roasted chicken from the oven. Add the minced thyme to the pan. Baste the chicken with the pan juices and thyme. This infuses the chicken with a fragrant herbal aroma.
-
Allow the chicken to rest for 15 minutes on a cutting board before carving. This resting period is essential, as it allows the juices to redistribute throughout the meat, resulting in a more tender and flavorful bird.
-
Remove the twine. Discard the wing tips. Separate the middle wing joint – this is considered a cook’s treat and is best enjoyed immediately. Remove the legs and thighs.
-
Carve the chicken. Remove the backbone and locate the “oysters” – the two succulent morsels of meat embedded there. These are another cook’s reward!
-
Cut the breast down the middle and serve it on the bone, with one wing joint still attached to each serving. Remember, this preparation isn’t about super elegance; it’s about rustic flavor.
-
Slather the meat with unsalted butter. Serve with Dijon mustard on the side for dipping. A simple green salad complements the richness of the chicken beautifully.
Expert Tips & Tricks
-
Drying is Key: As mentioned before, drying the chicken thoroughly is paramount. For even better results, you can “air-dry” the chicken in the refrigerator for several hours (or even overnight) before roasting. Place the chicken on a wire rack set over a baking sheet and leave it uncovered in the fridge. This allows the skin to dry out even further, resulting in an incredibly crispy finish.
-
Don’t overcrowd the pan: Make sure there’s enough space around the chicken in the pan. Overcrowding can also lead to steaming rather than roasting.
-
Trust your thermometer: A reliable meat thermometer is your best friend when roasting chicken. Don’t rely solely on time; use the thermometer to ensure the chicken is cooked to a safe and delicious 165 degrees Fahrenheit.
-
Check the temperature in multiple spots: Thighs can vary in thickness, so check temp in a couple of spots.
Serving & Storage Suggestions
Serve the roast chicken immediately after carving for the best flavor and texture. Garnish with fresh herbs, such as thyme or parsley, for a pop of color.
Leftover roast chicken can be stored in an airtight container in the refrigerator for up to 3-4 days. To reheat, preheat the oven to 350 degrees Fahrenheit (175 degrees Celsius). Place the chicken on a baking sheet and add a splash of chicken broth or water to the pan to prevent it from drying out. Cover the chicken with foil and reheat for about 15-20 minutes, or until heated through. Leftover chicken can also be shredded and used in salads, sandwiches, soups, or casseroles.
Nutritional Information
| Nutrient | Amount per Serving | % Daily Value |
|---|---|---|
| Calories | 488 kcal | N/A |
| Total Fat | 34.2g | 52% |
| Saturated Fat | 9.8g | 48% |
| Cholesterol | 170.2mg | 56% |
| Sodium | 158.9mg | 6% |
| Total Carbohydrate | 0.1g | 0% |
| Dietary Fiber | 0g | 0% |
| Sugars | 0g | 0% |
| Protein | 42.2g | 84% |
Note: Nutritional information is an estimate and may vary based on specific ingredients and cooking methods.
Variations & Substitutions
-
Herb Variations: Experiment with different herbs, such as rosemary, sage, or oregano, in place of or in addition to the thyme.
-
Citrus Infusion: Before roasting, stuff the chicken cavity with lemon or orange wedges for a bright, citrusy flavor.
-
Spiced Rub: Create a flavorful spice rub using paprika, garlic powder, onion powder, and other spices to coat the chicken before roasting.
-
Butter Alternatives: If you’re dairy-free, you can use olive oil or another plant-based oil in place of butter for basting.
FAQs (Frequently Asked Questions)
Q: Why is it important to dry the chicken so thoroughly?
A: Drying the chicken removes surface moisture, allowing the skin to crisp up and brown beautifully in the high heat of the oven, instead of steaming.
Q: Can I use a smaller or larger chicken with this recipe?
A: Yes, but you’ll need to adjust the cooking time accordingly. Use a meat thermometer to ensure the chicken reaches an internal temperature of 165 degrees Fahrenheit.
Q: Is trussing the chicken necessary?
A: Trussing helps the chicken cook more evenly and maintain a compact shape, but it’s not strictly required. If you skip trussing, the legs might cook faster than the breast.
Q: What can I do if the skin starts to brown too quickly?
A: If the skin is browning too rapidly, loosely tent the chicken with foil for the remainder of the cooking time.
Q: Can I add vegetables to the roasting pan with the chicken?
A: Absolutely! Root vegetables like potatoes, carrots, and onions roast beautifully alongside the chicken, absorbing the flavorful juices. Add them to the pan about halfway through the cooking time to prevent them from burning.
Final Thoughts
Thomas Keller’s simple roast chicken is a testament to the power of proper technique and high-quality ingredients. While the recipe may seem straightforward, the details – drying the chicken, generous salting, high-heat roasting – are what elevate it to something truly special. I urge you to try this recipe and experience the joy of perfectly roasted chicken. Don’t be afraid to experiment with different herbs and seasonings to create your own signature variation. And please, share your feedback and experiences – I’d love to hear how it turns out! Pair this magnificent bird with a crisp, dry white wine or a light-bodied red for an unforgettable meal.