
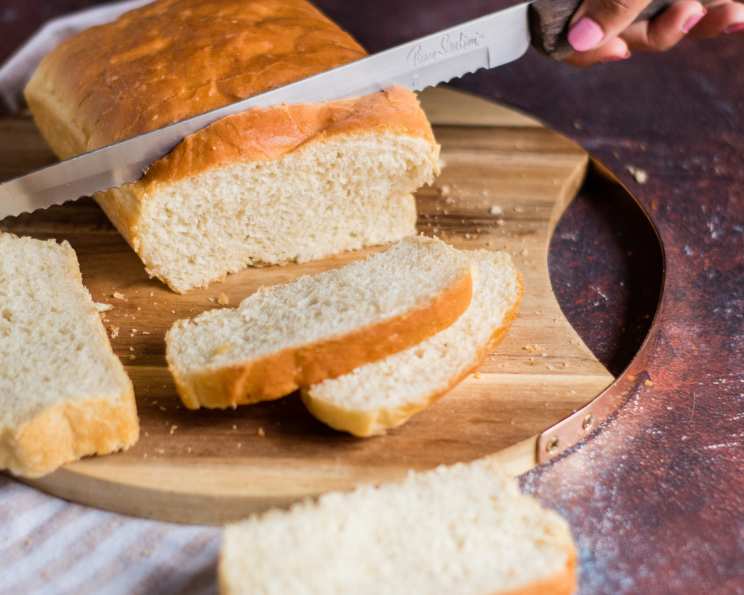
Throw Away the Bread Machine Instructions!…. White Bread
The smell of freshly baked bread has always been a portal to my childhood. I remember my grandmother, her hands dusted with flour, pulling a warm, golden loaf from her oven. The entire house would fill with an aroma so comforting, so profoundly home, that it seemed to hug you from the inside out. This white bread recipe, though simpler than my grandmother’s treasured sourdough, captures that same essence of warmth and simple, honest goodness. It’s a blank canvas, ready to be slathered with butter, transformed into sandwiches, or simply enjoyed in its pure, unadulterated form.
Recipe Overview
- Prep Time: 15 minutes
- Cook Time: 30 minutes
- Total Time: 45 minutes (plus rising time)
- Servings: 12
- Yield: 1 loaf
- Dietary Type: Vegetarian
Ingredients
- 1 cup warm water (110 degrees F/45 degrees C)
- 2 tablespoons white sugar
- 1 (1/4 ounce) package bread machine yeast (2-1/4 teaspoons)
- 2 tablespoons melted butter
- 2 tablespoons oil (can use 4 tablespoons of oil or melted butter)
- 3 cups white bread flour
- 1 teaspoon salt
Equipment Needed
- Bread pan
- Measuring cups and spoons
- Mixing bowl (optional, if not using a bread machine)
- Oven
- Cooling rack
Instructions
-
Prepare the Yeast: In the bread pan, pour in the warm water. Ensure the water is between 110 degrees F and 115 degrees F. Too hot, and you’ll kill the yeast; too cold, and it won’t activate properly.
-
Activate the Yeast: Sprinkle the sugar over the water, followed by the bread machine yeast. Let this mixture sit undisturbed for 10 minutes. You should see the yeast begin to foam and bubble, indicating that it’s alive and ready to work its magic.
-
Combine Wet and Dry Ingredients: Add the melted butter, oil, white bread flour, and salt to the bread pan. If you prefer a richer flavor, feel free to use a total of 4 tablespoons of either oil or melted butter instead of splitting it.
-
Knead the Dough (Bread Machine Method): Select the BASIC or WHITE BREAD setting on your bread machine. Press start. The bread machine will handle the kneading, rising, and baking processes automatically.
-
Knead the Dough (Traditional Method): If you don’t have a bread machine, combine all ingredients in a large bowl. Turn the dough out onto a lightly floured surface and knead for 8-10 minutes until smooth and elastic. Place the dough in a greased bowl, turning to coat. Cover and let rise in a warm place for about 1 hour, or until doubled in size. Punch down the dough and shape it into a loaf. Place the loaf in a greased bread pan. Let rise again for about 30 minutes. Preheat your oven to 375°F (190°C) and bake for 30-35 minutes, or until golden brown.
-
Cool the Bread: Once the baking cycle is complete (or the loaf is golden brown), remove the bread from the pan and place it on a wire cooling rack. Allow it to cool completely before slicing. This is crucial to prevent a gummy texture.
Expert Tips & Tricks
- Temperature Matters: The water temperature is critical for activating the yeast. Use a thermometer to ensure it’s within the recommended range (110-115 degrees F).
- Flour Power: Bread flour has a higher protein content than all-purpose flour, which helps develop the gluten structure needed for a good rise and chewy texture. While you can use all-purpose flour in a pinch, the results won’t be quite as optimal.
- Fat Content: The butter and oil contribute to the bread’s tenderness and flavor. Don’t skimp on these ingredients!
- Salt Control: Salt regulates the yeast’s activity and enhances the flavor of the bread. Be sure to use the correct amount; too little and the bread will be bland, too much and it will inhibit the yeast’s rise.
- Shiny Crust: For a glossy crust, brush the top of the loaf with melted butter or an egg wash (1 egg beaten with 1 tablespoon of water) before baking.
- Doneness Test: To check if the bread is done, insert a wooden skewer or toothpick into the center. If it comes out clean, the bread is ready. You can also tap the bottom of the loaf; it should sound hollow.
Serving & Storage Suggestions
This white bread is incredibly versatile. Serve it warm with butter, jam, or honey. It’s perfect for sandwiches, toast, or even grilled cheese. Leftover bread can be stored in an airtight container at room temperature for up to 3 days. For longer storage, wrap the bread tightly in plastic wrap and freeze it for up to 2 months. To reheat frozen bread, thaw it at room temperature and then toast it or warm it in the oven.
Nutritional Information
(Estimated values per slice, based on 12 servings)
| Nutrient | Amount per Serving | % Daily Value |
|---|---|---|
| Calories | 161 kcal | 8% |
| Total Fat | 4.5g | 6% |
| Saturated Fat | 1.6g | 8% |
| Cholesterol | 5.1mg | 2% |
| Sodium | 212.2mg | 9% |
| Total Carbohydrate | 26.2g | 10% |
| Dietary Fiber | 1g | 4% |
| Sugars | 2.2g | N/A |
| Protein | 3.5g | 7% |
Variations & Substitutions
- Whole Wheat Bread: Substitute up to half of the white bread flour with whole wheat flour for a nuttier flavor and added fiber.
- Sweet Bread: Increase the sugar to 1/4 cup for a slightly sweeter loaf. You could also add a teaspoon of vanilla extract.
- Herb Bread: Mix in 1-2 tablespoons of chopped fresh herbs, such as rosemary, thyme, or oregano, into the dough.
- Cheese Bread: Add 1/2 cup of shredded cheese, such as cheddar or Parmesan, to the dough.
- Garlic Bread: Brush the baked loaf with garlic butter (melted butter mixed with minced garlic) while it’s still warm.
- Dairy-Free: Replace the melted butter with a plant-based butter alternative or use all oil.
FAQs (Frequently Asked Questions)
Q: Why is my bread dense and not rising properly?
A: The most common reason for dense bread is inactive yeast. Make sure your yeast is fresh and properly activated. Also, ensure the water is not too hot, as this can kill the yeast.
Q: Can I use all-purpose flour instead of bread flour?
A: While you can use all-purpose flour, bread flour is preferred because it has a higher protein content, which helps develop the gluten structure needed for a good rise and chewy texture.
Q: How do I prevent the bread from sticking to the pan?
A: Grease the bread pan thoroughly with butter, oil, or cooking spray. You can also line the bottom of the pan with parchment paper.
Q: My bread is browning too quickly on top. What can I do?
A: Tent the bread with foil during the last 10-15 minutes of baking to prevent it from browning too much.
Q: Can I add seeds or nuts to this recipe?
A: Yes, you can add up to 1/2 cup of seeds or nuts (such as sunflower seeds, pumpkin seeds, or chopped walnuts) to the dough. Add them after the initial kneading process.
Final Thoughts
Don’t let the simplicity of this recipe fool you; the magic lies in the details. From the precise water temperature to the gentle art of kneading, each step contributes to the final masterpiece – a loaf of warm, comforting white bread. So, throw away those bread machine instructions (just kidding, keep them!), and embark on this rewarding culinary adventure. I encourage you to try this recipe, share your creations, and maybe even pair it with a hearty soup or a simple green salad. Happy baking!