
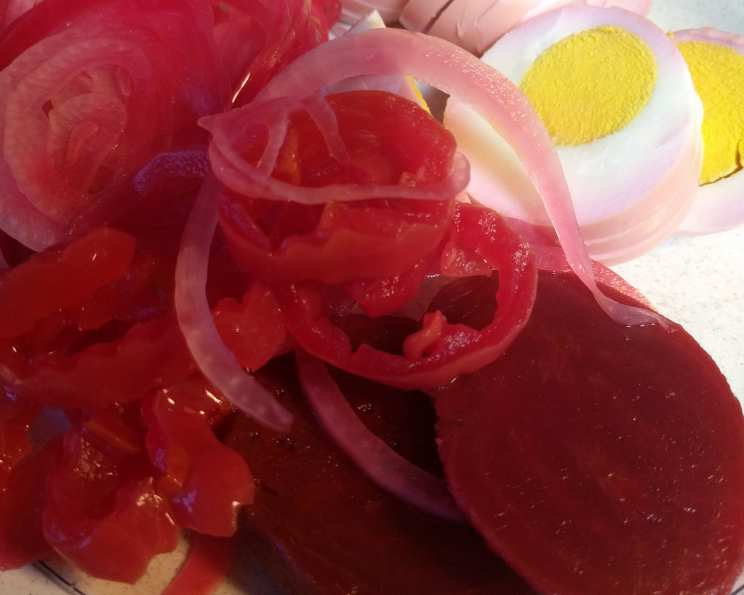
Tickled Pink Pickled Eggs: A Spicy Nostalgia
Pickled eggs were a staple at every family gathering when I was growing up. My Aunt Millie, with her mischievous grin and even spicier personality, always brought a jar of the most vibrant, rosy-hued eggs you could imagine. They weren’t just pickled eggs; they were Tickled Pink pickled eggs, a name that perfectly captured their surprising kick. One bite, and you’d be greeted with that familiar tang of vinegar, followed by a slow burn that crept up on you – a delightful and memorable experience that always left us reaching for a glass of milk, laughing all the while. Now, I carry on that tradition and bring these treats to my family gatherings.
Recipe Overview
- Prep Time: 30 minutes
- Cook Time: 20 minutes (for boiling eggs)
- Total Time: 5-7 days (pickling time)
- Servings: 24
- Yields: 24 pickled eggs plus beets and onions
- Dietary Type: Gluten-Free, Dairy-Free (check vinegar for gluten if needed)
Ingredients
- 2 dozen hard-boiled eggs, shelled
- 2 (15 ounce) cans whole baby beets, undrained (use a good quality canned beet for the best color and can size is approximate.)
- 1 (8 ounce) jar hot chili peppers (these are small hot yellow peppers and jar size is approximate)
- 1 large onion, sliced into rings
- Apple cider vinegar
Equipment Needed
- Large pot (for boiling eggs)
- Gallon jar or container with a tight-fitting lid
- Knife
- Cutting board
Instructions
- Begin by preparing your eggs. If you haven’t already, place the eggs in a large pot and cover them with cold water. Bring the water to a rolling boil over high heat. Once boiling, remove the pot from the heat, cover, and let the eggs sit for 20 minutes.
- After 20 minutes, drain the hot water and immediately run cold water over the eggs until they are cool enough to handle. This helps prevent a green ring from forming around the yolk.
- Carefully peel the eggs and set them aside.
- In a gallon jar (or a large container with a tight-fitting lid), begin layering your ingredients. First, dump in the entire contents of the jar of yellow chili peppers, including the juice.
- Next, pour in the two cans of undrained whole baby beets over the peppers. This includes both the beets and their juice. The beet juice is crucial for that beautiful pink hue!
- Place the sliced onion rings on top of the beets.
- Now, gently place the shelled, whole eggs on top of the onion rings. Try to arrange them so they are evenly distributed.
- Pour apple cider vinegar over everything in the jar. Ensure that all the ingredients – the eggs, beets, onions, and peppers – are completely immersed in the vinegar, beet juice, and chili juice. You may need to gently press down on the ingredients to release any trapped air and ensure everything is submerged.
- Put the lid on the jar tightly, or cover it securely with plastic wrap if you don’t have a lid.
- Refrigerate the jar for 5 to 7 days. This allows the flavors to meld and the eggs to fully absorb the vibrant color and spicy kick. The longer they sit, the more intense the flavor will become.
- After the pickling period, your Tickled Pink Pickled Eggs are ready to enjoy!
Expert Tips & Tricks
- Egg Freshness: Use eggs that are at least a week old for easier peeling. Fresh eggs tend to stick to the shell.
- Consistent Color: To ensure even coloring, gently rotate the jar every day during the pickling process. This will help distribute the beet juice evenly.
- Heat Level Adjustment: If you prefer a milder flavor, you can reduce the number of chili peppers or opt for a milder variety. For an extra kick, add a few sliced jalapeños.
- Vinegar Choice: While apple cider vinegar is traditional, you can experiment with other vinegars like white vinegar or red wine vinegar. Keep in mind that this will slightly alter the flavor profile.
- Prevent Floating: To prevent ingredients from floating above the vinegar and potentially spoiling, use a clean, food-safe weight to keep everything submerged. A small ziplock bag filled with brine works well.
- Use caution: These eggs can take on a spicy kick depending on the heat of the peppers, handle with care!
Serving & Storage Suggestions
These Tickled Pink Pickled Eggs are incredibly versatile. They are a stunning addition to a charcuterie board, adding a pop of color and a burst of flavor. Sliced, they make a beautiful and zesty topping for salads. They’re also fantastic enjoyed on their own as a snack or appetizer.
Store the pickled eggs in the refrigerator, submerged in the brine, for up to a month. Ensure the lid is tightly sealed to prevent spoilage. Do not freeze pickled eggs, as this will drastically alter their texture. The pickled beets and onions are also delicious and can be served alongside the eggs. While the chili peppers are edible, be warned – they are intensely spicy!
Nutritional Information
(Estimated per egg, values may vary)
| Nutrient | Amount per Serving | % Daily Value |
|---|---|---|
| Calories | 99 kcal | N/A |
| Calories from Fat | 48 kcal | N/A |
| Total Fat | 5.4g | 8% |
| Saturated Fat | 1.6g | 8% |
| Cholesterol | 186.5mg | 62% |
| Sodium | 90.6mg | 3% |
| Total Carbohydrate | 5.4g | 1% |
| Dietary Fiber | 1.2g | 4% |
| Sugars | 3.7g | N/A |
| Protein | 7.1g | 14% |
Variations & Substitutions
- Sweet and Spicy: Add a tablespoon of sugar or honey to the brine for a touch of sweetness to balance the spice.
- Herbed Pickled Eggs: Incorporate fresh herbs like dill, thyme, or rosemary into the brine for added flavor.
- Spicy Pickled Quail Eggs: Substitute the chicken eggs with quail eggs for a smaller, more delicate version.
- Pickled Jalapeno Eggs: Use sliced Jalapenos instead of the hot yellow peppers.
- No-Heat Pickled Eggs: Omit the chili peppers for a tangy treat without the kick.
- Pickled Red Onion Eggs: Use red onion instead of white for a sweeter onion flavor.
FAQs (Frequently Asked Questions)
Q: How long do the eggs need to pickle before they are ready to eat?
A: For the best flavor and color, allow the eggs to pickle in the refrigerator for at least 5 to 7 days.
Q: Can I use hard-boiled eggs that I bought from the store?
A: Yes, you can use pre-cooked hard-boiled eggs to save time, but make sure they are fresh and haven’t been sitting for too long.
Q: What if my eggs don’t turn pink?
A: Make sure you are using good-quality canned beets with plenty of juice, and that all the ingredients are fully submerged in the brine.
Q: How can I make the eggs less spicy?
A: Reduce the number of chili peppers or remove the seeds before adding them to the jar.
Q: Are the pickled beets and onions edible?
A: Yes, the pickled beets and onions are delicious and can be enjoyed alongside the eggs!
Final Thoughts
These Tickled Pink Pickled Eggs are more than just a recipe; they’re a culinary adventure steeped in nostalgia and a playful hint of spice. Whether you’re looking to impress guests with a unique appetizer, add a zesty kick to your salads, or simply relive a cherished memory, this recipe is sure to delight. Don’t be afraid to experiment with the variations and make it your own. Now, gather your ingredients, embrace the pickling process, and prepare to be tickled pink! Enjoy, and please share your feedback and creations!