
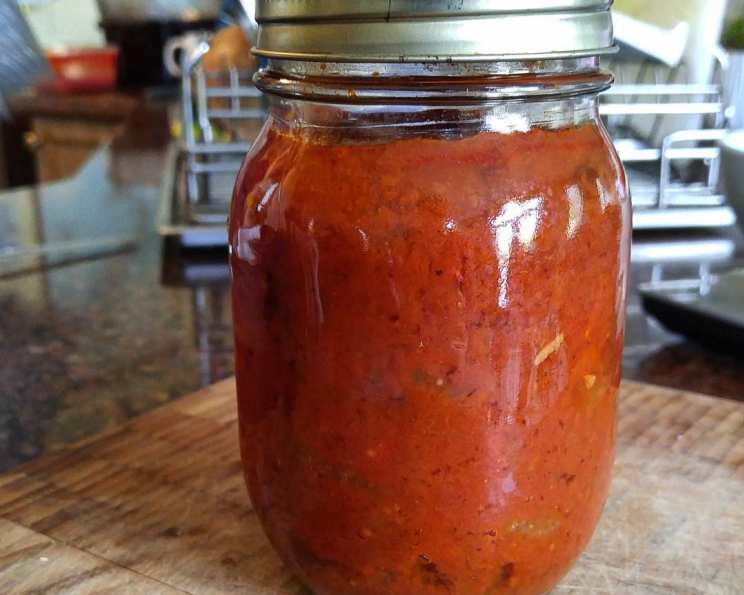
The Fiery Heart of Indian Cuisine: Homemade Tikka Masala Sauce
I still remember the first time I tasted authentic Tikka Masala. It wasn’t in a restaurant, but in a tiny, fragrant kitchen in London, during a rainy backpacking trip. The air, thick with spices, the warmth of the stove, and the burst of flavor from that creamy, tomato-rich sauce forever etched themselves into my memory. It was a revelation – a culinary hug that I’ve been trying to recreate ever since, tweaking and perfecting until I could bottle that very feeling. This recipe, born from those fond memories, allows you to bring that same warm embrace to your own table.
Recipe Overview
- Prep Time: 20 minutes
- Cook Time: 25 minutes
- Total Time: 45 minutes
- Yields: 1 quart
- Serves: 16
- Dietary Type: Vegetarian, Gluten-Free (naturally)
Ingredients
- 1 tablespoon coconut oil
- 1 large onion, minced
- 4 garlic cloves, minced
- ½ teaspoon kosher salt
- 1 tablespoon garam masala
- ½ tablespoon fresh grated ginger
- 1 pencil hot pepper or 1 jalapeno pepper, seeded and minced
- 4 Thai red chili peppers, minced
- 4 cups roasted crushed tomatoes (preferably homemade)
Equipment Needed
- Large pot
- Measuring spoons and cups
- Knife and cutting board
- Pressure canner (optional, for long-term storage)
Instructions
- Begin by preparing your aromatics. Mince the onion and garlic. Grate the ginger and mince the chili peppers, taking care to seed the jalapeno if you’re using it instead of the pencil hot pepper. Remember to wash your hands thoroughly after handling chili peppers.
- In a large pot, melt the coconut oil over medium heat. This oil adds a subtle sweetness that complements the spices beautifully, but you can substitute with another neutral oil if preferred.
- Add the minced onion to the pot and sauté until it becomes translucent and just begins to turn golden brown. This should take approximately 10 minutes. Don’t rush this step; allowing the onions to caramelize slightly deepens the flavor of the sauce. Stir occasionally to prevent burning.
- Next, add the minced garlic, kosher salt, garam masala, and grated ginger to the pot. Cook for about 2 minutes, stirring constantly, until the mixture becomes fragrant. This step is crucial for blooming the spices and releasing their essential oils. The aroma should be intoxicating!
- Stir in the minced chili peppers (both pencil hot or jalapeno, and Thai red chili peppers). Cook for another 3 minutes, allowing the heat from the chilies to infuse the oil and spices. Be mindful of the fumes – ensure your kitchen is well-ventilated. If you prefer a milder sauce, reduce the number of chili peppers or remove the seeds and membranes from the Thai chilies.
- Pour in the roasted crushed tomatoes. If using homemade tomatoes, ensure they have been properly roasted and pureed for a smooth consistency. Canned crushed tomatoes can also be used, but roasting your own tomatoes beforehand will enhance the flavor significantly.
- Bring the mixture to a simmer over medium heat. Once simmering, reduce the heat to low and cook, stirring frequently, for 10 minutes, or until the sauce has thickened slightly. Stirring frequently prevents the sauce from sticking to the bottom of the pot and burning.
- At this point, the sauce is ready to be used immediately. If you are looking for long-term storage, you can pressure can the sauce for 30 minutes at 10 PSI. Always follow proper canning procedures to ensure food safety.
Expert Tips & Tricks
- Roasting the Tomatoes: Roasting the tomatoes before crushing them intensifies their sweetness and adds a smoky depth of flavor to the sauce. Toss them with olive oil, salt, and pepper, and roast at 400°F (200°C) until softened and slightly caramelized.
- Spice Level Adjustment: The amount of chili peppers used in this recipe can be adjusted to suit your personal preference. Start with less and add more to taste. Remember that the heat will intensify as the sauce simmers.
- Blending for Smoothness: For an ultra-smooth sauce, use an immersion blender to puree the sauce after simmering. Be careful when blending hot liquids!
- Make Ahead: This Tikka Masala sauce can be made ahead of time and stored in the refrigerator for up to 5 days or frozen for up to 3 months.
Serving & Storage Suggestions
This Tikka Masala sauce is incredibly versatile. It’s traditionally served with cooked chicken (Chicken Tikka Masala), but it also pairs beautifully with paneer (Indian cheese), vegetables, tofu, or chickpeas.
- Serving: Serve the sauce warm, spooned over your protein or vegetables of choice. Garnish with fresh cilantro, a dollop of yogurt or cream, and a sprinkle of garam masala for an extra touch of flavor. Serve with basmati rice or naan bread for dipping.
- Storage: Store leftover sauce in an airtight container in the refrigerator for up to 5 days. For longer storage, freeze the sauce in freezer-safe containers for up to 3 months. Thaw overnight in the refrigerator before reheating.
- Reheating: Reheat the sauce gently over low heat, stirring occasionally, until heated through. Avoid boiling the sauce, as this can cause it to separate.
Nutritional Information
(Estimated, per serving)
| Nutrient | Amount per Serving | % Daily Value |
|---|---|---|
| Calories | 18 kcal | 1% |
| Total Fat | 0.9 g | 1% |
| Saturated Fat | 0.8 g | 3% |
| Cholesterol | 0 mg | 0% |
| Sodium | 74.4 mg | 3% |
| Total Carbohydrate | 2.5 g | 0% |
| Dietary Fiber | 0.4 g | 1% |
| Sugars | 1.1 g | 4% |
| Protein | 0.4 g | 0% |
Variations & Substitutions
- Vegan Tikka Masala: Ensure you are using coconut oil and pair the sauce with plant-based proteins like tofu or chickpeas.
- Creamy Tikka Masala: Stir in a splash of coconut milk or heavy cream at the end of cooking for a richer, creamier sauce. Adjust the amount to your preference.
- Spicy Tikka Masala: Add more chili peppers or a pinch of cayenne pepper for an extra kick of heat.
- Tomato Paste: For a deeper tomato flavor, add a tablespoon of tomato paste along with the crushed tomatoes.
- Coconut Sugar: If you want to add a touch of sweetness, use coconut sugar instead of regular sugar for a deeper caramel flavour.
FAQs (Frequently Asked Questions)
Q: Can I use canned tomatoes instead of roasted tomatoes?
A: Yes, you can substitute canned crushed tomatoes. However, roasting the tomatoes beforehand will significantly enhance the flavor of the sauce.
Q: How do I adjust the spice level?
A: The amount of chili peppers used in this recipe can be adjusted to suit your personal preference. Start with less and add more to taste. You can also remove the seeds and membranes from the Thai chilies to reduce the heat.
Q: Can I make this sauce ahead of time?
A: Absolutely! This Tikka Masala sauce can be made ahead of time and stored in the refrigerator for up to 5 days or frozen for up to 3 months.
Q: What’s the best way to serve Tikka Masala sauce?
A: Tikka Masala sauce is incredibly versatile. It’s traditionally served with cooked chicken, but it also pairs beautifully with paneer, vegetables, tofu, or chickpeas. Serve with basmati rice or naan bread for dipping.
Q: Can I can this recipe for long-term storage?
A: Yes, you can pressure can the sauce for 30 minutes at 10 PSI. Always follow proper canning procedures to ensure food safety.
Final Thoughts
I encourage you to try this recipe and experience the magic of homemade Tikka Masala sauce. The aroma that fills your kitchen as the spices bloom is simply intoxicating, and the flavor is a true delight. Don’t be afraid to experiment with the spice level and customize it to your liking. Once you’ve made your own Tikka Masala sauce, you’ll never go back to store-bought versions. Enjoy the process, share your creations with loved ones, and let me know what you think! This vibrant sauce pairs perfectly with a crisp Indian pale ale or a refreshing mango lassi. Happy cooking!