
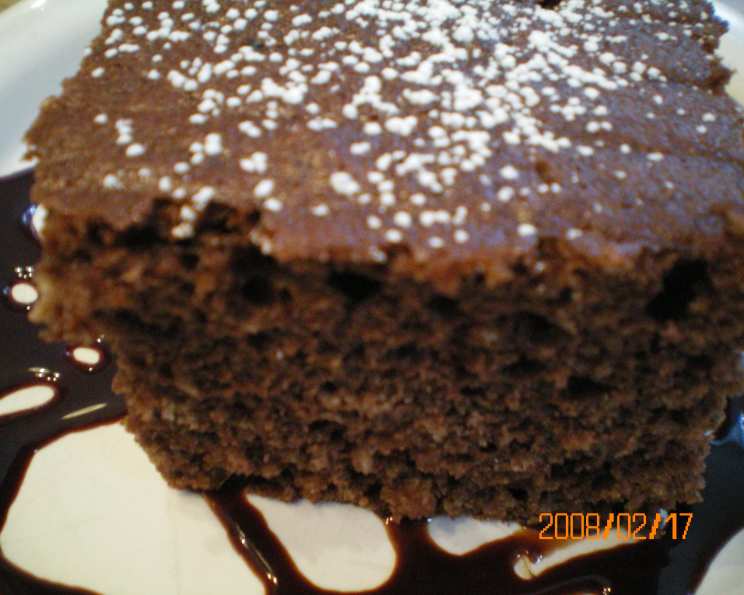
Tim and Tracy’s Chocolate Cake (Boiled): A Recipe for Love and Deliciousness
I’ll never forget the day my daughter came home from school, eyes wide with excitement, babbling about a “boiling cake” her friend’s grandmother made. Intrigued, I pressed for details, envisioning some elaborate, multi-step confection. What she described was far simpler, yet utterly captivating: a chocolate cake where the initial ingredients are boiled together. I was skeptical, a chef’s inherent caution kicking in, but the memory of that childhood wonder stuck with me until I finally tracked down a similar recipe. The first bite transported me back to that kitchen, the comforting aroma of chocolate filling the air, and I understood exactly what captivated her. This cake isn’t just dessert; it’s a memory, a warm hug, a testament to the magic of simple ingredients transformed.
Recipe Overview
- Prep Time: 20 minutes (includes cooling time for chocolate mixture)
- Cook Time: 45 minutes
- Total Time: 1 hour 5 minutes
- Servings: 12
- Yield: One 8-inch cake
- Dietary Type: Not specified
Ingredients
- 125g butter
- 1 1/2 cups sugar
- 1 cup water
- 2 tablespoons cocoa
- 1/2 teaspoon bicarbonate of soda (baking soda)
- 2 eggs
- 1 1/2 cups self-raising flour (or 1 1/2 cups plain flour with 1 heaped teaspoon of baking powder)
For the Icing (Optional):
- 375g icing sugar
- 1 1/2 tablespoons cocoa
- 185g butter
- 1 1/2 tablespoons water (hot)
- 5 drops vanilla
Equipment Needed
- 20cm (8-inch) cake tin
- Baking paper
- Saucepan
- Large bowl
- Electric mixer (optional, for icing)
- Wire rack
Instructions
-
Preheat your oven to 170°C / 340°F (Gas Mark 3). Proper oven temperature is crucial for even baking.
-
Prepare your cake tin. Generously butter a 20cm (8-inch) cake tin. Then, line the base with baking paper. This prevents the cake from sticking and makes it easier to remove after baking. A perfectly prepared tin is your first step to a perfect cake!
-
In a medium-sized saucepan, combine the butter, sugar, water, cocoa, and bicarbonate of soda (baking soda).
-
Place the saucepan over medium heat and bring the mixture to a boil, stirring constantly. It’s vital to stir continuously to prevent scorching, especially with the sugar content.
-
Be attentive! The mixture will rise up quite dramatically once it reaches a boil (almost like a volcanic eruption!). Be ready to immediately remove the saucepan from the heat to prevent it from boiling over. This step is where the “boiled” moniker originates.
-
Set the chocolate mixture aside to cool. It’s crucial that the mixture is relatively cool before adding the eggs. This prevents the eggs from cooking and curdling, which would negatively impact the cake’s texture.
-
In a large bowl, beat the eggs lightly. This helps to incorporate air and create a lighter cake.
-
Now, for the flour incorporation. Gradually sift a small amount of the self-raising flour into the bowl with the beaten eggs. Gently mix it in. Then, add a portion of the cooled chocolate mixture and combine.
-
Repeat step 8, alternating between sifting in more flour and adding more chocolate mixture, until all the flour and chocolate are fully incorporated. This gradual incorporation method is key to avoiding overmixing, which can lead to a tough cake. Overmixing develops the gluten in the flour, resulting in a less tender crumb.
-
Pour the cake batter into the prepared cake tin, spreading it evenly.
-
Bake in the preheated oven for approximately 45 minutes.
-
To check for doneness, insert a skewer or toothpick into the center of the cake. If it comes out clean (or with just a few moist crumbs clinging to it), the cake is ready. If not, continue baking for a few more minutes and check again. Every oven is different; baking times may vary.
-
Once baked, remove the cake from the oven and let it cool in the tin for about 10 minutes. This allows it to firm up slightly before you attempt to remove it.
-
After the initial cooling period, carefully invert the cake onto a wire rack to cool completely. This prevents condensation from forming underneath the cake, which can make it soggy.
-
Ice the cake with your favorite icing, or leave it un-iced for a more rustic presentation.
To Make the Icing (Optional):
-
Cream together the butter and half of the icing sugar using an electric mixer or a sturdy spoon.
-
Add the hot water and mix until smooth. The hot water helps to dissolve the icing sugar and creates a smoother, glossier icing.
-
In a separate bowl, sift together the remaining icing sugar and cocoa. This prevents lumps in the finished icing.
-
Gradually add the sifted icing sugar and cocoa mixture to the butter mixture, along with the vanilla extract.
-
Beat until smooth and creamy. Adjust the consistency with a little more hot water if needed.
Expert Tips & Tricks
- For a richer chocolate flavor, use Dutch-processed cocoa. It has a smoother, less acidic taste.
- If you don’t have self-raising flour, you can easily make your own by adding 1 heaped teaspoon of baking powder to 1 1/2 cups of plain flour. Sift the flour and baking powder together several times to ensure even distribution.
- To prevent the cake from sticking to the sides of the tin, you can also dust the buttered and lined tin with cocoa powder. This adds an extra layer of chocolate flavor and ensures a clean release.
- If the cake starts to brown too quickly, tent it loosely with aluminum foil. This will prevent the top from burning while the inside continues to bake.
- For a leveled cake top, use cake strips. These are fabric strips that you soak in water and wrap around the cake tin. They help to insulate the sides of the tin, preventing the edges from baking faster than the center.
Serving & Storage Suggestions
This cake is delicious served at room temperature, either plain or with a generous dollop of whipped cream or a scoop of vanilla ice cream. It also pairs beautifully with fresh berries.
To store, wrap the cake tightly in plastic wrap or place it in an airtight container. It will keep at room temperature for up to 3 days, in the refrigerator for up to 5 days, or in the freezer for up to 2 months. If freezing, thaw the cake completely before serving.
Nutritional Information
Please note that these values are approximate and may vary depending on specific ingredients and portion sizes.
| Nutrient | Amount per Serving | % Daily Value |
|---|---|---|
| Calories | 320 kcal | 16% |
| Total Fat | 14g | 22% |
| Saturated Fat | 8g | 40% |
| Cholesterol | 35mg | 12% |
| Sodium | 250mg | 11% |
| Total Carbohydrate | 45g | 15% |
| Dietary Fiber | 1g | 4% |
| Sugars | 28g | – |
| Protein | 3g | 6% |
Variations & Substitutions
- Dairy-Free: Substitute the butter with a plant-based butter alternative and ensure your chosen icing is also dairy-free.
- Gluten-Free: Use a gluten-free self-raising flour blend. You may need to add a binding agent like xanthan gum to improve the texture.
- Mocha Cake: Add 1-2 teaspoons of instant coffee granules to the boiling mixture for a subtle coffee flavor.
- Spiced Chocolate Cake: Add a pinch of cinnamon, nutmeg, or cardamom to the flour mixture for a warm, spiced flavor.
FAQs (Frequently Asked Questions)
Q: Why boil the initial ingredients?
A: Boiling the butter, sugar, water, cocoa, and bicarbonate of soda together helps to create a deeply moist and fudgy cake texture. It also allows the flavors to meld together more effectively.
Q: Can I use unsalted butter instead of salted butter?
A: Yes, you can. If using unsalted butter, add a pinch of salt to the dry ingredients to enhance the flavor.
Q: Can I reduce the amount of sugar in the recipe?
A: While you can reduce the sugar slightly, keep in mind that it contributes to the cake’s moisture and texture. Reducing it too much may result in a drier cake.
Q: My cake sank in the middle. What did I do wrong?
A: This can happen if the oven temperature is too low, if the cake is underbaked, or if the batter was overmixed. Make sure your oven is properly preheated, check for doneness with a skewer, and avoid overmixing the batter.
Q: Can I make this cake in a different size tin?
A: Yes, but you’ll need to adjust the baking time accordingly. A smaller tin will require a longer baking time, while a larger tin will require a shorter baking time. Keep a close eye on the cake and check for doneness frequently.
Final Thoughts
This Tim and Tracy’s Chocolate Cake (Boiled) is more than just a recipe; it’s a slice of history, a testament to enduring love, and a celebration of simple pleasures. Don’t be intimidated by the “boiled” element – it’s surprisingly easy to execute, and the results are truly rewarding. I urge you to try this recipe, share it with loved ones, and create your own memories around this delightful treat. I can’t wait to hear about your experiences and any personal touches you add to make it your own. Bon appétit!