
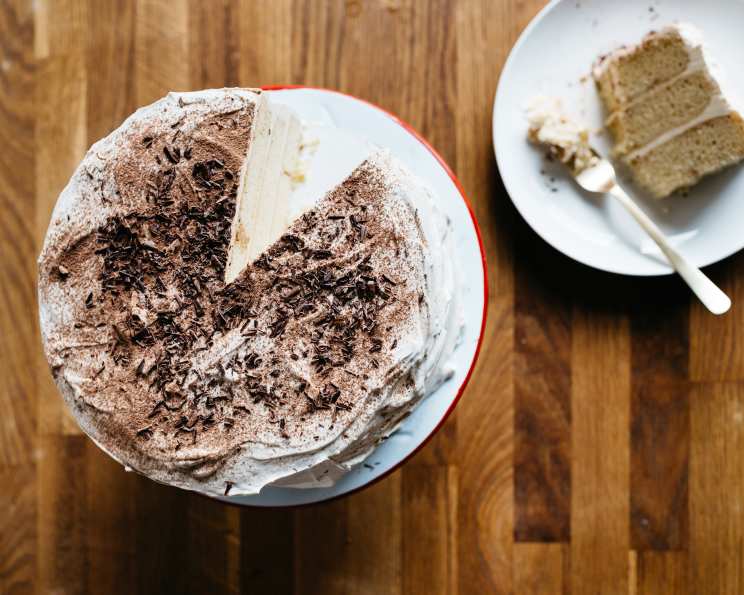
Tiramisu Layer Cake: An Italian Classic Reimagined
I’ll never forget the first time I tasted tiramisu. It was in a small trattoria in Rome, tucked away on a cobblestone street. The creamy, coffee-soaked dessert arrived looking deceptively simple, but one bite transported me. The intense coffee flavor, the rich mascarpone, and the dusting of cocoa powder – it was pure magic. That experience sparked a lifelong love affair with tiramisu, and this Tiramisu Layer Cake is my way of paying homage to that unforgettable first encounter, elevating a simple Italian favorite into a show-stopping dessert.
Recipe Overview
- Prep Time: 45 minutes
- Cook Time: 20-25 minutes
- Total Time: 1 hour 45 minutes (plus chilling time)
- Servings: 12
- Yield: 1 layer cake
- Dietary Type: Not specified (contains dairy and eggs)
Ingredients
CAKE
- 1 (18 1/4 ounce) package white cake mix
- 3 egg whites (or as called for by your cake mix)
- 1/3 cup oil (or as called for by your cake mix)
- 1 1/3 cups water (or as called for by your cake mix)
- 2 teaspoons instant coffee powder
- 1/2 cup coffee
- 3 tablespoons Kahlua
FILLING
- 1 (8 ounce) container mascarpone cheese
- 1/2 cup powdered sugar
- 2 tablespoons Kahlua
FROSTING
- 2 cups heavy cream
- 1/4 cup confectioners’ sugar
- 2 tablespoons Kahlua
GARNISH
- 2 tablespoons unsweetened cocoa powder
- 1 (1 ounce) square semisweet chocolate
Equipment Needed
- 3 (9-inch) round cake pans
- Electric mixer
- Wire rack
- Thin skewer
- Measuring cups and spoons
- Small bowl
- Medium bowl
- Plastic wrap
- Sieve
- Vegetable peeler
Instructions
-
Preheat your oven to 350°F (175°C). Thoroughly grease and flour three 9-inch round cake pans to prevent sticking.
-
Prepare the white cake mix according to the package directions. Follow the ingredient quantities specified on the box (egg whites, oil, and water).
-
Divide two-thirds of the prepared batter evenly between two of the prepared cake pans.
-
In a separate bowl, stir the instant coffee powder into the remaining one-third of the batter until fully dissolved. This will create your coffee-flavored layer. Pour this coffee-infused batter into the third prepared cake pan.
-
Bake in the preheated oven for 20-25 minutes, or until a toothpick inserted into the center of each cake layer comes out clean. Begin checking for doneness at 20 minutes to avoid overbaking.
-
Let the cakes cool in the pans for 10 minutes. This allows them to set slightly and prevents them from breaking when inverted. After 10 minutes, carefully turn the cakes out onto a wire rack to cool completely. Ensure the wire rack is clean to avoid any residue sticking to the cakes.
-
While the cakes are cooling, prepare the coffee mixture. In a measuring cup, combine the brewed coffee and 3 tablespoons of Kahlua. Set this mixture aside; it will be used to soak the cake layers later.
-
To make the mascarpone filling, use an electric mixer set on low speed to combine the mascarpone cheese, 1/2 cup of powdered sugar, and 2 tablespoons of Kahlua in a small bowl. Beat the mixture just until it is smooth and creamy. Avoid over-mixing, which can cause the mascarpone to become grainy.
-
Cover the bowl with plastic wrap, pressing the plastic directly onto the surface of the filling to prevent a skin from forming. Refrigerate the filling until ready to assemble the cake.
-
For the Kahlua frosting, in a medium bowl, using an electric mixer set on medium-high speed, beat the heavy cream, 1/4 cup of confectioners’ sugar, and 2 tablespoons of Kahlua until stiff peaks form. Be careful not to overwhip the cream, or it will turn into butter.
-
Gently fold 1/2 cup of the whipped cream mixture into the mascarpone filling. This will lighten the filling and make it easier to spread.
-
To assemble the cake, place one of the plain (white) cake layers on a serving plate or cake stand.
-
Using a thin skewer, poke holes in the cake layer about 1 inch apart. This allows the coffee mixture to soak into the cake evenly.
-
Spoon one-third of the reserved coffee mixture over the cake layer, ensuring even distribution.
-
Spread half of the mascarpone filling mixture evenly over the soaked cake layer.
-
Top with the coffee-flavored cake layer. Again, using a thin skewer, poke holes in the coffee-flavored cake layer.
-
Spoon another third of the coffee mixture over the coffee-flavored layer and spread with the remaining mascarpone filling.
-
Top with the remaining plain (white) cake layer. Poke holes in the top cake layer.
-
Spoon the remaining coffee mixture over the top cake layer.
-
Spread the sides and top of the entire cake with the remaining whipped cream frosting.
-
Place cocoa powder in a sieve and lightly dust the top of the cake with an even layer.
-
Garnish with chocolate curls. To make the chocolate curls, use a vegetable peeler and run it down the edge of the semisweet chocolate square.
-
Refrigerate the assembled cake for at least 30 minutes before serving to allow the flavors to meld and the cake to set. Longer chilling (several hours or overnight) is even better!
Expert Tips & Tricks
- Coffee Strength: Adjust the amount of instant coffee powder to your taste. If you prefer a bolder coffee flavor, you can add an extra teaspoon.
- Kahlua Substitute: If you don’t have Kahlua, you can substitute it with another coffee liqueur or even a strong coffee extract.
- Cake Leveling: If your cake layers are uneven, use a serrated knife to level them before assembling the cake. This will ensure a more stable and visually appealing final product.
- Whipped Cream Stability: To stabilize the whipped cream frosting, consider adding a teaspoon of cornstarch or gelatin powder (bloomed in cold water) before whipping. This will help it hold its shape for longer.
- Soaking Time: Don’t over-soak the cake layers, as they can become soggy. Just enough to moisten them is perfect.
Serving & Storage Suggestions
Serve the Tiramisu Layer Cake chilled. It is best enjoyed within 2-3 days of making it. Store leftover cake in an airtight container in the refrigerator. The cake is not recommended for freezing as the texture of the mascarpone and whipped cream may change. For an extra touch, serve each slice with a dollop of fresh whipped cream or a sprinkle of cocoa powder. The cake pairs beautifully with a cup of espresso or a glass of dessert wine, such as Vin Santo.
Nutritional Information
| Nutrient | Amount per Serving | % Daily Value |
|---|---|---|
| Calories | 457 kcal | 23% |
| Total Fat | 27g | 41% |
| Saturated Fat | 12g | 60% |
| Cholesterol | 54mg | 18% |
| Sodium | 320mg | 13% |
| Total Carbohydrate | 49g | 16% |
| Dietary Fiber | 1g | 4% |
| Sugars | 36g | N/A |
| Protein | 4g | 8% |
Note: Nutritional information is an estimate and may vary based on specific ingredients and preparation methods.
Variations & Substitutions
- Gluten-Free: Use a gluten-free white cake mix to make this cake gluten-free. Ensure all other ingredients are also gluten-free.
- Dairy-Free: While more challenging, you could experiment with dairy-free mascarpone and whipped cream alternatives. Be aware that the taste and texture will be different. Coconut cream, when chilled and whipped, can be a reasonable (though distinct) substitute for whipped cream.
- Booze-Free: Omit the Kahlua and replace it with strong coffee extract or espresso for a non-alcoholic version.
- Espresso Infusion: Replace some of the water in the cake mix with strong espresso for a more intense coffee flavor.
- Seasonal Twist: Add a layer of fresh berries (strawberries, raspberries) between the cake layers for a summery variation.
FAQs (Frequently Asked Questions)
Q: Can I make this cake ahead of time?
A: Absolutely! In fact, it’s better to make it a day in advance to allow the flavors to meld together. Just be sure to store it in the refrigerator.
Q: Can I freeze this cake?
A: Freezing is not recommended as it can affect the texture of the mascarpone and whipped cream.
Q: What if I don’t have cake pans?
A: You can bake the cake in a 9×13 inch baking dish and adjust the baking time accordingly. You’ll need to cut the cake into layers instead of having round layers.
Q: How do I prevent the cake from sticking to the pan?
A: Generously grease and flour the cake pans, or use parchment paper to line the bottoms.
Q: Can I use a different type of liqueur instead of Kahlua?
A: Yes, you can experiment with other coffee liqueurs, amaretto, or even a splash of rum.
Final Thoughts
This Tiramisu Layer Cake is more than just a dessert; it’s an experience. The combination of coffee-soaked cake, creamy mascarpone filling, and delicate cocoa dusting is a symphony of flavors and textures that will transport you to a cozy Italian café. Don’t be intimidated by the multiple steps; this cake is surprisingly easy to make and is sure to impress your friends and family. So, gather your ingredients, preheat your oven, and get ready to create a little bit of magic in your kitchen. I can’t wait to hear about your experience! Share your photos and feedback – and maybe even pair it with a strong cup of espresso for the ultimate indulgence. Buon appetito!