
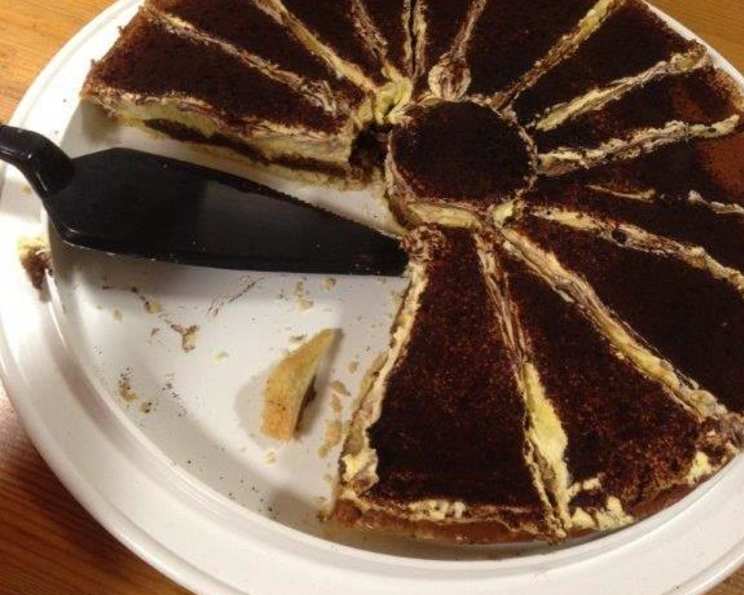
Tiramisu Tart: An Italian Classic Reimagined
I’ll never forget the first time I had tiramisu. It was in a tiny trattoria tucked away on a cobblestone street in Rome. The aroma of espresso hung in the air, mingling with the sweet scent of cream and cocoa. One bite of that creamy, coffee-soaked dessert, and I was transported. This Tiramisu Tart captures that same magic, transforming the classic into an elegant and surprisingly easy-to-make treat. The crisp, buttery crust gives way to a luscious filling, creating a symphony of textures and flavors that will have everyone asking for seconds.
Recipe Overview
- Prep Time: 45 minutes
- Cook Time: 25 minutes
- Total Time: 6 hours 10 minutes (including chilling)
- Servings: 10
- Yield: 1 tart
- Dietary Type: Not suitable for vegans, vegetarians should be cautious due to gelatin in some mascarpone/cream cheese.
Ingredients
For the Crust:
- 1 lb flour
- 250 g sugar
- 200 g butter, cold and cubed
- ½ teaspoon baking soda
- 1 egg
- 1 teaspoon grated lemon peel
- 1 pinch salt
- 30 g water
- 1 teaspoon honey
For the Filling:
- 3 tablespoons Nutella
- 20 ladyfingers (called Savoiardi)
- 1 cup coffee, strong and unsweetened
- 4 egg yolks
- 250 g cream cheese or 250 g mascarpone (see note below)
- 250 ml whipped cream
- 100 g sugar
- Marsala wine (optional)
- 2 tablespoons unsweetened cocoa powder
Ingredient Notes:
- Cream Cheese vs. Mascarpone: While mascarpone is traditional, cream cheese provides a tangy counterpoint. Either works beautifully, depending on your preference. Make sure either the mascarpone or cream cheese used are vegetarian friendly.
Equipment Needed
- Large mixing bowl or stand mixer
- Rolling pin
- 9-inch tart pan with removable bottom
- Baking paper
- Dry beans or pie weights
- Fork
- Small bowl for coffee
- Electric mixer or whisk
- Spatula
Instructions
-
Prepare the Crust: In a large mixing bowl or the bowl of a stand mixer, combine the butter, sugar, salt, egg, lemon zest, honey, baking soda, and water. Mix until a soft cream forms.
-
Form the Dough: Add the flour to the cream mixture and quickly mix until just combined. Do not overmix. The dough should be soft and pliable.
-
Chill the Dough: Wrap the dough in plastic wrap and refrigerate for 30 minutes. This chilling period is crucial for preventing the crust from shrinking during baking.
-
Prepare the Coffee: Brew a cup of strong coffee and let it cool completely. Do not add any sugar. If desired, stir in a splash of Marsala wine once the coffee is cool.
-
Preheat the Oven: Preheat your oven to 350°F (175°C).
-
Roll Out the Dough: After the dough has chilled, lightly flour a work surface. Roll the dough out into a circle large enough to fit your tart pan.
-
Line the Tart Pan: Carefully transfer the dough to the tart pan and gently press it into the bottom and up the sides. Trim any excess dough from the edges.
-
Pre-Bake the Crust: Prick the bottom of the crust with a fork to prevent it from puffing up during baking. Line the crust with baking paper and fill with dry beans or pie weights.
-
Bake the Crust (First Bake): Bake the crust for 15 minutes at 350°F (175°C).
-
Remove Beans and Bake Again: Carefully remove the baking paper and beans or pie weights. Bake for another 10 minutes, or until the crust is lightly golden brown.
-
Cool the Crust: Let the crust cool completely in the tart pan.
-
Prepare the Cream: In a clean bowl, combine the egg yolks and sugar. Beat with an electric mixer until the mixture is pale and fluffy.
-
Add Cheese: Add the cream cheese or mascarpone to the egg yolk mixture and mix until smooth.
-
Fold in Whipped Cream: Gently fold in the whipped cream until just combined. Be careful not to overmix, as this can deflate the cream.
-
Assemble the Tart: Spread the Nutella evenly over the bottom of the cooled crust.
-
Soak the Ladyfingers: Quickly dip each ladyfinger into the cooled coffee, ensuring they are soaked but not soggy.
-
Create the Biscuit Layer: Arrange the soaked ladyfingers over the Nutella layer, covering the entire surface of the crust. You may need to break some ladyfingers to fit.
-
Add the Cream Filling: Pour the egg cream filling over the ladyfinger layer and spread evenly to create a smooth surface.
-
Chill the Tart: Cover the tart with plastic wrap and refrigerate for at least 6 hours, or preferably overnight. This allows the flavors to meld and the filling to set.
-
Garnish and Serve: Just before serving, dust the surface of the tart generously with unsweetened cocoa powder.
Expert Tips & Tricks
- Prevent a Soggy Crust: Pre-baking the crust and spreading a layer of Nutella helps prevent the coffee-soaked ladyfingers from making the crust soggy.
- Coffee Strength: Use a strong coffee for the best flavor. Espresso works particularly well.
- Ladyfinger Soak Time: Dip the ladyfingers quickly to avoid them becoming too soggy. A quick dunk is all they need.
- Chilling is Key: Don’t skip the chilling time! It’s essential for the filling to set properly and for the flavors to meld.
- Make Ahead: The crust can be made a day or two in advance and stored in an airtight container at room temperature. The filling can also be prepared a day in advance and stored in the refrigerator. Assemble the tart just before serving for the best results.
Serving & Storage Suggestions
Serve the Tiramisu Tart chilled, garnished with a generous dusting of cocoa powder. For an extra touch, you can add a few chocolate shavings or coffee beans on top.
Leftovers should be stored in an airtight container in the refrigerator. The tart will keep for up to 3 days. The texture may soften slightly over time. Freezing is not recommended, as it can affect the texture of the filling.
Nutritional Information
| Nutrient | Amount per Serving | % Daily Value |
|---|---|---|
| Calories | 686 kcal | N/A |
| Fat | 32g | 49% |
| Saturated Fat | 19g | 95% |
| Cholesterol | 209mg | 69% |
| Sodium | 355mg | 14% |
| Carbohydrates | 90g | 29% |
| Fiber | 2g | 8% |
| Sugar | 46g | N/A |
| Protein | 11g | 22% |
Note: Nutritional information is an estimate and may vary based on specific ingredients and portion sizes.
Variations & Substitutions
- Gluten-Free: Use a gluten-free flour blend to make the crust. Ensure that the ladyfingers are also gluten-free.
- Lighter Version: Use a lower-fat cream cheese or mascarpone.
- Alcohol-Free: Omit the Marsala wine from the coffee. You can substitute it with a teaspoon of vanilla extract.
- Chocolate Lover’s Dream: Add chocolate shavings to the filling and garnish with chocolate curls.
- Citrus Infusion: Add the zest of an orange or lemon to the cream filling for a bright, citrusy twist.
FAQs (Frequently Asked Questions)
Q: Can I use a pre-made pie crust?
A: While a homemade crust is recommended for the best flavor and texture, you can use a pre-made pie crust if you’re short on time. Be sure to pre-bake it according to the package directions.
Q: How do I prevent the crust from shrinking during baking?
A: Chilling the dough before rolling it out and using pie weights or dry beans during pre-baking will help prevent the crust from shrinking.
Q: Can I make this tart without the Marsala wine?
A: Yes, you can omit the Marsala wine from the coffee. The tart will still be delicious. You can substitute it with a teaspoon of vanilla extract for added flavor.
Q: How long will the tart last in the refrigerator?
A: The Tiramisu Tart will keep for up to 3 days in the refrigerator.
Q: Can I freeze the Tiramisu Tart?
A: Freezing is not recommended, as it can affect the texture of the filling. The cream may become icy and separate when thawed.
Final Thoughts
This Tiramisu Tart is more than just a dessert; it’s an experience. The combination of textures and flavors, from the crisp crust to the creamy filling and coffee-soaked ladyfingers, is simply divine. I encourage you to try this recipe and bring a little taste of Italy to your own kitchen. Don’t be afraid to experiment with variations and make it your own. Share your creations and feedback, and let’s celebrate the joy of baking together. Pair it with a glass of Vin Santo for the full Italian experience!