
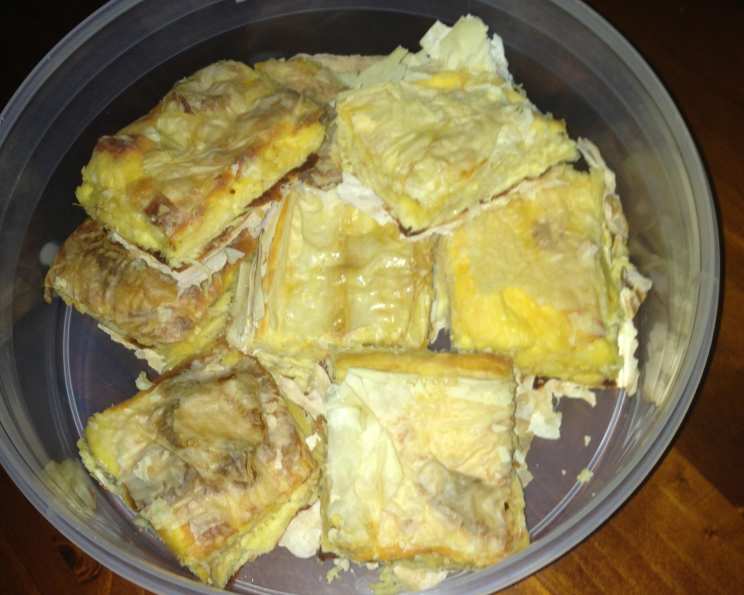
Tiropita: A Slice of Greek Sunshine
The scent alone transports me back to sun-drenched afternoons on the island of Crete, the air thick with the salty tang of the Aegean Sea and the warm, comforting aroma of baking cheese. My Yiayia (grandmother) Eleni would always have a fresh tiropita ready, its flaky crust a testament to her patience and skill. Each bite was a perfect balance of salty feta, creamy ricotta, and the satisfying crunch of perfectly layered phyllo – a taste of pure Greek love. Now, I bring that same love to my own kitchen, recreating this classic pie for family and friends.
Recipe Overview
- Prep Time: 30 minutes
- Cook Time: 45-60 minutes
- Total Time: 1 hour 15-30 minutes
- Servings: 12-15
- Yield: 1 large pie
- Dietary Type: Vegetarian
Ingredients
- 1 package (1 lb) frozen phyllo dough, thawed completely
- 6 tablespoons butter
- 1/2 cup flour
- 1/3 cup milk
- 6 eggs
- 3/4 lb feta cheese, crumbled
- 1 cup kefalograviera cheese (or 1 cup regato cheese)
- 2 cups ricotta cheese (or anthotiro or cottage cheese)
- 8 ounces (1 cup) butter, melted
Equipment Needed
- Large saucepan
- Whisk
- 13 x 9 inch Pyrex baking dish (or larger)
- Wax paper
- Dampened towel
- Sharp knife
Instructions
- Ensure the phyllo dough is completely thawed. This is crucial for preventing tearing and achieving that delicate, flaky texture. A slow thaw in the refrigerator overnight is ideal.
- In a large saucepan, melt 6 tablespoons of butter over medium heat.
- Whisk in the 1/2 cup of flour and cook for 1-2 minutes, stirring constantly. This step is vital for eliminating the raw flour taste and creating a smooth base for the sauce.
- Slowly whisk in the 1/3 cup of milk, ensuring there are no lumps.
- Continue cooking over medium heat, whisking constantly, until the sauce thickens. This should take a few minutes. The consistency should be similar to a béchamel.
- Remove the saucepan from the heat and let the sauce cool for about 10 minutes. This prevents the eggs from cooking prematurely.
- Quickly whisk the 6 eggs into the sauce one at a time, incorporating each egg fully before adding the next. This ensures a smooth and even distribution of the eggs throughout the mixture.
- Stir in the 3/4 lb of crumbled feta cheese, 1 cup of kefalograviera or regato cheese, and 2 cups of ricotta cheese (or anthotiro or cottage cheese). Mix well until all cheeses are evenly distributed. The cheese filling is now ready.
- Preheat your oven to 375°F (190°C).
- Generously butter a 13 x 9 inch Pyrex baking dish (or a larger baking pan; the tiropita will simply be thinner). This prevents sticking and ensures a golden-brown crust.
- Flatten the thawed phyllo dough and cover it with a sheet of wax paper and a lightly dampened towel. This prevents the delicate phyllo sheets from drying out and becoming brittle.
- Take one sheet of phyllo dough at a time and place it in the buttered baking dish.
- Brush the phyllo sheet generously with melted butter. Don’t be shy with the butter; it’s what creates the flaky layers.
- Repeat steps 12 and 13 with about 6 sheets of phyllo dough.
- Spread half of the cheese filling evenly over the layered phyllo.
- Layer 3 more sheets of phyllo dough over the cheese filling, brushing each sheet with melted butter as you go.
- Top with the remaining cheese filling, spreading it evenly.
- Finally, layer 6 sheets of phyllo dough over the top, brushing each sheet with melted butter.
- Fold in the edges of the phyllo to create a neat and tidy border for the tiropita. This not only looks nice but also helps to seal in the filling.
- Brush the top generously with the remaining melted butter. This will give the tiropita a beautiful golden-brown color and a crispy top.
- Using the point of a sharp knife, carefully score the top of the phyllo into the size of pieces you will want to serve. Cut only through the top layers of pastry; do not cut all the way down to the bottom layer. This allows steam to escape and prevents the top from puffing up unevenly.
- Bake for about 45 minutes to one hour, or until the tiropita is golden brown and the filling is set.
- Check that the bottom crust is nicely browned. If it isn’t, place the baking dish directly on the floor of the oven for about 10 minutes to brown faster. You don’t want a soggy, uncooked bottom pastry.
- Let the tiropita cool slightly before serving.
Expert Tips & Tricks
- Don’t rush the thawing process: Thawing phyllo dough in the refrigerator overnight is the best method to prevent sticking and tearing.
- Butter is your friend: Generous brushing of butter between each phyllo layer is essential for achieving the signature flaky texture.
- Work quickly: Phyllo dough dries out quickly, so work swiftly and keep the stack covered with a damp towel.
- Adjust the cheese: Feel free to experiment with different cheese combinations to suit your taste. A little graviera adds a nutty depth, while manouri offers a milder flavor.
- Add herbs: Fresh herbs like dill, mint, or parsley can add a lovely aroma and flavor to the cheese filling.
Serving & Storage Suggestions
Tiropita is delicious served warm or at room temperature. It makes a fantastic appetizer, light lunch, or snack. Serve it alongside a Greek salad or a dollop of Greek yogurt.
Leftovers can be stored in the refrigerator for up to 3 days. Reheat in the oven at 350°F (175°C) for about 10-15 minutes, or until warmed through. You can also reheat individual slices in a microwave, but the crust will lose some of its crispness.
For longer storage, you can freeze the tiropita. Wrap it tightly in plastic wrap and then in aluminum foil. It can be frozen for up to 2 months. Thaw in the refrigerator overnight before reheating.
Nutritional Information
| Nutrient | Amount per Serving | % Daily Value |
|---|---|---|
| Calories | 541.2 kcal | N/A |
| Calories from Fat | 358 g | 66% |
| Total Fat | 39.8 g | 61% |
| Saturated Fat | 24 g | 119% |
| Cholesterol | 203.4 mg | 67% |
| Sodium | 887.3 mg | 36% |
| Total Carbohydrate | 27.1 g | 9% |
| Dietary Fiber | 0.9 g | 3% |
| Sugars | 1.5 g | 6% |
| Protein | 18.7 g | 37% |
Variations & Substitutions
- Gluten-Free: While traditional tiropita relies on phyllo dough made from wheat flour, you can experiment with gluten-free phyllo alternatives, although the texture may be slightly different.
- Spicy Tiropita: Add a pinch of red pepper flakes to the cheese filling for a touch of heat.
- Vegetable Additions: Sautéed spinach, zucchini, or onions can be added to the cheese filling for extra flavor and nutrients.
- Ham or Bacon: For a non-vegetarian version, add cooked and crumbled ham or bacon to the cheese filling. Approximately 8 ounces of chopped, smoked ham is a popular addition.
- Different Cheeses: Explore different combinations of Greek cheeses like kasseri or halloumi for unique flavor profiles.
FAQs (Frequently Asked Questions)
Q: My phyllo dough keeps tearing. What am I doing wrong?
A: Phyllo dough tears easily when it’s dry or not fully thawed. Make sure it’s completely thawed in the refrigerator overnight, and keep it covered with a damp towel while you’re working with it.
Q: Can I make tiropita ahead of time?
A: Yes, you can assemble the tiropita a day ahead of time, cover it tightly with plastic wrap, and store it in the refrigerator. Bake it as directed when you’re ready to serve it.
Q: My bottom crust is soggy. How can I prevent this?
A: Make sure your oven is properly preheated, and if the bottom crust is still not browning, place the baking dish directly on the floor of the oven for the last 10 minutes of baking.
Q: Can I use different types of cheese in the filling?
A: Absolutely! Experiment with different Greek cheeses to create your own unique flavor combination. Kasseri, graviera, and manouri are all great options.
Q: How can I prevent the top of the tiropita from puffing up too much?
A: Scoring the top layers of phyllo before baking allows steam to escape, preventing the top from puffing up unevenly. Just be careful not to cut all the way through to the bottom layer.
Final Thoughts
Making tiropita is more than just following a recipe; it’s about connecting with a culinary tradition that spans generations. Don’t be intimidated by the phyllo dough – with a little patience and butter, you’ll be rewarded with a truly delicious and impressive dish. I encourage you to try this recipe and share it with your loved ones. Pair it with a crisp Greek white wine and a simple salad for a taste of the Mediterranean in your own home. Kali Orexi! (Bon appétit!)