
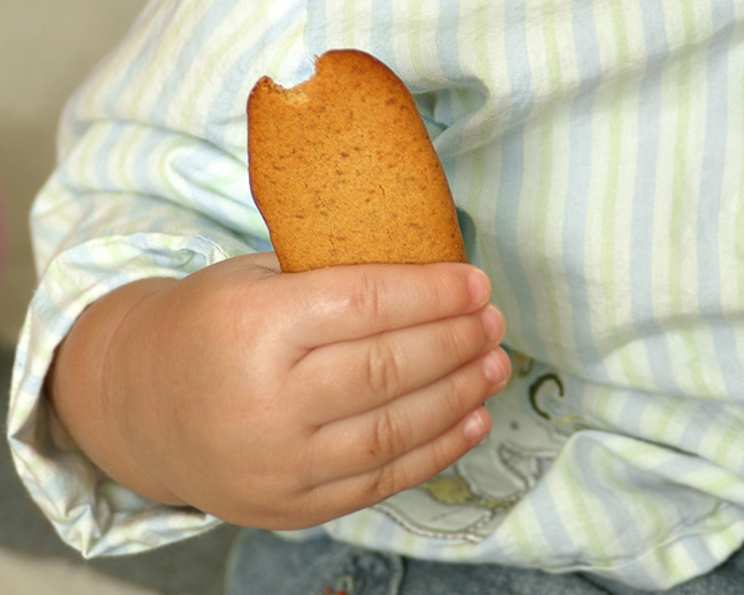
Grandma’s Soothing Teething Cookies: A Recipe from the Heart
I can almost smell the comforting aroma right now, a phantom scent of molasses and warm vanilla. It takes me back to my own early days of motherhood, pacing the floor with a fussy, teething baby. The desperation! The constant drool! Nothing seemed to help… until my own grandmother slipped me a well-worn recipe card. These weren’t just any cookies; they were magical little teething biscuits that seemed to soothe sore gums and bring a glimmer of relief to my little one’s face. Now, I’m thrilled to share this time-honored secret with you.
Recipe Overview
- Prep Time: 10 minutes
- Cook Time: 15-20 minutes
- Total Time: 25-30 minutes
- Yields: Approximately 24 cookies
- Dietary Type: Can be adapted to be dairy-free
Ingredients
- 2 tablespoons shortening
- 2 tablespoons brown sugar
- 2 tablespoons molasses
- 1 teaspoon vanilla
- 1 egg yolk
- 1 cup flour, less 2 tablespoons
- ¼ teaspoon salt
- 1 ½ teaspoons baking powder
Equipment Needed
- Mixing Bowl
- Measuring spoons and cups
- Rolling pin
- Cookie cutter or knife
- Baking sheet
- Parchment paper (optional)
Instructions
- Preheat your oven to 350 degrees Fahrenheit (175 degrees Celsius).
- In a mixing bowl, cream together the shortening and brown sugar until the mixture is light and fluffy. This is best done with an electric mixer, but a sturdy spoon and some elbow grease will also work.
- Add the molasses, vanilla, and egg yolk to the creamed mixture. Mix well until everything is thoroughly combined and the batter looks smooth.
- In a separate bowl, whisk together the flour (remember to remove those 2 tablespoons!), salt, and baking powder. This ensures the dry ingredients are evenly distributed.
- Gradually add the dry ingredients to the wet ingredients, stirring until just combined. Be careful not to overmix, as this can result in tough cookies. The dough should be firm but pliable.
- Lightly flour a clean surface. Roll out the dough to approximately ¼ inch thickness. Use a cookie cutter to cut out shapes (small stars or circles are ideal) or use a knife to cut the dough into 1-inch by ½-inch strips. These smaller shapes are perfect for little hands.
- Place the cut-out cookies onto an ungreased baking sheet, or a baking sheet lined with parchment paper. The parchment paper will prevent sticking and make cleanup easier.
- Bake in the preheated oven for 15-20 minutes, or until the edges of the cookies are lightly golden brown. Keep a close eye on them; they can burn easily. The baking time may vary slightly depending on your oven.
- Remove the baking sheet from the oven and let the cookies cool on the baking sheet for a few minutes before transferring them to a wire rack to cool completely. This prevents them from breaking.
Expert Tips & Tricks
- For a slightly softer cookie, you can replace a tablespoon of the flour with cornstarch.
- If the dough is too sticky to roll out, wrap it in plastic wrap and chill it in the refrigerator for 30 minutes before rolling.
- Make sure the shortening is at room temperature before creaming it with the sugar. This will make it easier to achieve a light and fluffy texture.
- Don’t skip the step of whisking the dry ingredients together. This ensures even distribution of the baking powder and salt, which is crucial for proper leavening and flavor.
- These cookies are intentionally not very sweet, as they are designed for teething babies. If you prefer a sweeter cookie, you can add an extra tablespoon of brown sugar.
- For dairy-free cookies, substitute the shortening with a vegan butter alternative.
- You can add a pinch of spices like cinnamon or nutmeg for extra flavour but use with caution for very young babies who may have allergies.
Serving & Storage Suggestions
These teething cookies are best served at room temperature. Always supervise your child while they are eating the cookies to prevent choking. Store the cooled cookies in an airtight container at room temperature for up to one week, or in the freezer for up to three months. If freezing, wrap the cookies tightly in plastic wrap before placing them in a freezer-safe container. Thaw them completely before serving.
Nutritional Information
Note: Nutritional information is an estimate and may vary based on specific ingredients used.
| Nutrient | Amount per Serving (Approximate) |
|---|---|
| Calories | 40 kcal |
| Total Fat | 1.3 g |
| Saturated Fat | 0.3 g |
| Cholesterol | 7 mg |
| Sodium | 48 mg |
| Total Carbohydrate | 6.5 g |
| Dietary Fiber | 0.1 g |
| Sugars | 2.1 g |
| Protein | 0.6 g |
Variations & Substitutions
- Gluten-Free: Substitute the all-purpose flour with a gluten-free all-purpose flour blend. Be sure to check the label to ensure the blend contains xanthan gum or another binder, as this will help to hold the cookies together.
- Spice It Up: Add a pinch of cinnamon, nutmeg, or ginger to the dough for a warming flavor.
- Sweet Potato Version: Incorporate 2 tablespoons of mashed sweet potato into the wet ingredients for added nutrients and a subtle sweetness. Reduce the molasses by 1/2 tablespoon to compensate for the sweetness of the sweet potato.
- Dairy-Free: As mentioned above, use a dairy-free shortening or vegan butter alternative.
FAQs (Frequently Asked Questions)
Q: Are these cookies safe for my baby who has allergies?
A: Always check the ingredients list carefully, especially if your baby has known allergies. This recipe contains egg, flour, and potentially dairy (depending on the shortening used). You can substitute the shortening with a vegan alternative, and be cautious about the wheat. Consult with your pediatrician if you have concerns.
Q: How do I know when the cookies are done baking?
A: The cookies are done when the edges are lightly golden brown and the centers are set. They should feel firm to the touch.
Q: Can I make these cookies ahead of time?
A: Yes, you can make the dough ahead of time and store it in the refrigerator for up to 24 hours. Just wrap it tightly in plastic wrap to prevent it from drying out.
Q: My cookies are too hard. What did I do wrong?
A: Overbaking is the most common cause of hard cookies. Be sure to bake them for the recommended time and check them frequently. Overmixing the dough can also contribute to a tough texture.
Q: Can I add anything to help with teething pain?
A: Chamomile is known for its soothing properties. You can steep a chamomile tea bag in a little hot water, let it cool completely, and then use that liquid to moisten the cookie slightly before giving it to your baby (ensure the tea is extremely weak and cooled). Always consult with your pediatrician before introducing any new ingredients or remedies to your baby.
Final Thoughts
More than just a recipe, this is a little piece of family history that has been passed down through generations. I hope these simple teething cookies bring as much comfort to your little one as they did to mine. Remember, every baby is different, so adjust the size and consistency to suit your child’s needs and developmental stage. Bake a batch, share the love, and let me know how they turn out! Happy baking!