
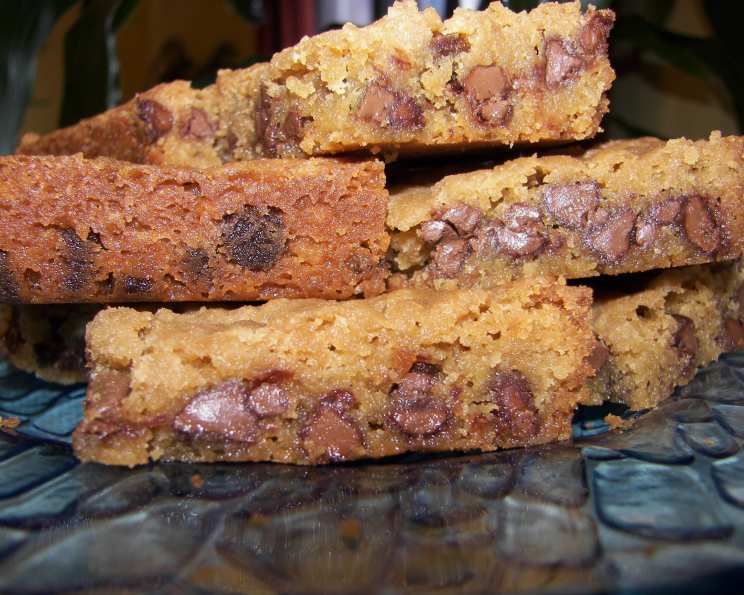
The Irresistible Charm of Old-Fashioned Toffee Bars
There’s something magical about the smell of toffee baking in the oven. It instantly transports me back to my childhood, specifically to my grandmother’s sun-drenched kitchen. I remember standing on a stool, mesmerized as she’d pull out her well-worn cookbook, the pages stained with memories of countless baking adventures. The scent of butter and sugar mingling in the air, the anticipation of that first crunchy, chocolatey bite—those are the moments that truly shaped my love for baking. These toffee bars, pulled straight from her recipe box, are a slice of that nostalgia.
Recipe Overview
- Prep Time: 10 minutes
- Cook Time: 25 minutes
- Total Time: 35 minutes
- Servings: 48 (small bars) or 9 (large squares)
- Yield: Approximately 4-5 dozen small bars or 9 large squares
- Dietary Type: Not specified (contains dairy, gluten)
Ingredients
- 1 cup butter or margarine
- 1 cup brown sugar
- 1 teaspoon vanilla extract (imitation is acceptable)
- 2 cups sifted all-purpose flour
- 1 cup semi-sweet chocolate chips (or one 6-ounce package)
- 1 cup chopped California walnuts (optional)
Equipment Needed
- 15 1/2 x 10 1/2 x 1-inch jelly-roll pan (or square brownie pan)
- Mixing bowl
- Measuring cups and spoons
- Electric mixer (optional, but recommended)
- Sifter (for the flour)
- Oven
Instructions
-
Preheat your oven to 350°F (175°C). Make sure the oven rack is in the center position.
-
In a large mixing bowl, thoroughly cream together the butter (or margarine), brown sugar, and vanilla extract. This is where an electric mixer comes in handy, but you can also do it by hand with a little elbow grease. The mixture should be light and fluffy.
-
Sift the flour before measuring, then add it to the creamed mixture. Mix well until a dough forms. It will be a slightly crumbly dough, but it should hold together when pressed.
-
Stir in the semi-sweet chocolate chips and chopped walnuts (if using). Distribute them evenly throughout the dough.
-
Press the mixture evenly into an ungreased 15 1/2 x 10 1/2 x 1-inch jelly-roll pan. If you’re using a square brownie pan, that’s perfectly fine too! The baking time will remain the same, but you’ll end up with square toffee “cookies” instead of bars.
-
Bake in the preheated oven for 25 minutes, or until the edges are nicely browned. The center might still seem a little soft, but it will firm up as it cools.
-
While the toffee is still warm, use a sharp knife to cut it into bars or squares. This is important because it will be much harder to cut neatly once it has fully cooled.
-
Cool completely in the pan before removing. This allows the toffee to set properly and makes it easier to handle.
Expert Tips & Tricks
- Sifting the Flour: Sifting the flour is essential to prevent dense, heavy bars. It incorporates air and ensures a lighter, more tender texture.
- Browning is Key: Don’t be afraid to let the edges get nicely browned. This is where the toffee flavor really develops.
- Imitation Vanilla Extract: While high-quality vanilla extract is always preferred, in this recipe, the imitation version works surprisingly well and doesn’t drastically impact the final flavor.
- Salted Butter: If you’re using salted butter, you might want to reduce the amount of salt in the recipe slightly (though there isn’t any specified in the original recipe), or it may add an interesting flavor element.
- Preventing Crumbling: If your dough seems too crumbly, try adding a tablespoon of melted butter at a time until it comes together. Be careful not to add too much, or the bars will be greasy.
- Even Baking: To ensure even baking, rotate the pan halfway through the baking time.
Serving & Storage Suggestions
These toffee bars are delicious served at room temperature. They pair perfectly with a cup of coffee, tea, or a glass of cold milk.
- Storage: Store the cooled bars in an airtight container at room temperature for up to 5 days.
- Freezing: For longer storage, you can freeze the bars in an airtight container for up to 2 months. Thaw them at room temperature before serving.
- Serving Suggestion: Drizzle with melted chocolate or sprinkle with sea salt for an extra touch of elegance. You can also crumble them over ice cream for a decadent dessert topping.
Nutritional Information
| Nutrient | Amount per Serving (estimated) | % Daily Value (estimated) |
|---|---|---|
| Calories | 250 kcal | 13% |
| Total Fat | 15g | 23% |
| Saturated Fat | 9g | 45% |
| Cholesterol | 30mg | 10% |
| Sodium | 50mg | 2% |
| Total Carbohydrate | 25g | 8% |
| Dietary Fiber | 1g | 4% |
| Sugars | 15g | – |
| Protein | 3g | 6% |
Note: Nutritional information is an estimate and may vary based on specific ingredients and serving sizes.
Variations & Substitutions
- Gluten-Free: Substitute the all-purpose flour with a gluten-free all-purpose blend. Ensure it contains xanthan gum for binding.
- Nut-Free: Omit the walnuts entirely or replace them with sunflower seeds or chopped pretzels for a salty-sweet crunch.
- Different Chocolate: Experiment with different types of chocolate chips, such as dark chocolate, milk chocolate, or even white chocolate.
- Espresso Toffee Bars: Add a teaspoon of instant espresso powder to the flour for a coffee-flavored twist.
- Seasonal Spices: During the holidays, add a pinch of cinnamon, nutmeg, or ginger to the dough for a festive flavor.
- Salted Caramel Toffee: Drizzle salted caramel over the bars after they’ve cooled for an extra-decadent treat.
FAQs (Frequently Asked Questions)
Q: Can I use granulated sugar instead of brown sugar?
A: Brown sugar contributes to the chewy texture and caramel-like flavor of the toffee bars. Granulated sugar can be used in a pinch, but the texture and flavor will be slightly different.
Q: Do I have to use a jelly-roll pan?
A: No, a square brownie pan works just as well! The baking time remains the same, but the shape of the bars will be different.
Q: My toffee bars are too hard. What did I do wrong?
A: Overbaking can lead to hard toffee bars. Be sure to check for doneness at 25 minutes and remove them from the oven as soon as the edges are nicely browned.
Q: Can I add more chocolate chips?
A: Absolutely! Feel free to add more chocolate chips to your liking. Just be mindful that it might make the bars a bit sweeter.
Q: The chocolate chips melted all over the pan. How do I prevent this?
A: Make sure the oven temperature is accurate. If the oven is too hot, the chocolate chips will melt too quickly. You can also try using chocolate chunks instead of chips, as they tend to hold their shape better.
Final Thoughts
These toffee bars are more than just a recipe; they’re a reminder of simpler times, of family traditions, and of the joy of baking. Whether you’re a seasoned baker or just starting out, I encourage you to give this recipe a try. Share them with loved ones, and let the irresistible charm of these old-fashioned toffee bars bring a little bit of sweetness into your day. And if you tweak the recipe or discover a new variation, please share your feedback – I’m always eager to learn from fellow baking enthusiasts!