
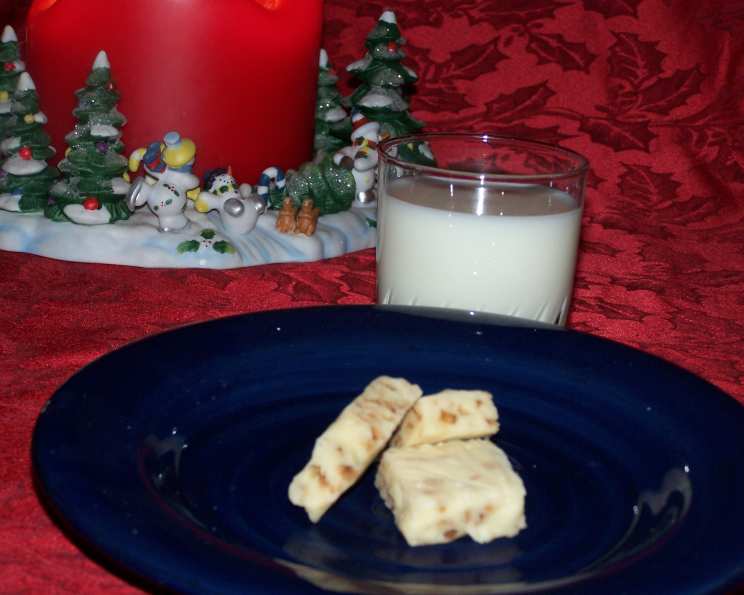
Decadent Toffee Fudge: A Sweet Symphony of Flavors
The memory of my grandmother’s candy dish overflowing with homemade treats is one of my fondest childhood recollections. It wasn’t just the sugary rush that captivated me, but the sheer love and effort she poured into each confection. One particular treat stands out: a creamy, melt-in-your-mouth fudge studded with crunchy toffee bits. The combination of smooth sweetness and buttery toffee was irresistible. Now, I’ve adapted a Taste of Home recipe to recapture that magic, sharing this simple yet unforgettable dessert.
Recipe Overview
- Prep Time: 15 minutes
- Cook Time: 5 minutes
- Total Time: 2 hours 20 minutes (includes chilling)
- Servings: Approximately 25 squares
- Yield: One 10-inch square pan of fudge
- Dietary Type: Not specified (contains dairy)
Ingredients
- 12 ounces sweetened condensed milk
- 2 cups white chocolate chips
- 2 tablespoons butter
- 1 teaspoon salt
- 1 cup toffee bits
Equipment Needed
- 10-inch square baking pan
- Aluminum foil
- Saucepan (medium-large)
- Measuring cups and spoons
- Heat-resistant spatula or spoon
Instructions
- Begin by preparing your 10-inch square baking pan. Line it with aluminum foil, ensuring the foil overhangs the sides; this will make removing the fudge easier later. Then, lightly grease the foil to prevent sticking. Set the prepared pan aside.
- In a medium-large saucepan, combine the 12 ounces of sweetened condensed milk and the 2 cups of white chocolate chips.
- Place the saucepan over medium heat on your stovetop.
- Continuously stir the mixture, ensuring it doesn’t burn or stick to the bottom of the pan.
- After approximately 5 minutes, the white chocolate chips should be completely melted and the mixture smooth. If the chocolate is taking longer to melt, reduce the heat slightly and continue stirring patiently.
- Once the chocolate is fully melted and the mixture is smooth, add the 2 tablespoons of butter and 1 teaspoon of salt.
- Continue to stir until the butter is fully incorporated and the mixture is glossy and homogenous.
- Remove the saucepan from the heat.
- Add the 1 cup of toffee bits to the mixture.
- Gently stir the toffee bits into the fudge base, ensuring they are evenly distributed throughout. Be careful not to overmix, as this can cause the white chocolate to seize up.
- Pour the toffee fudge mixture into the prepared 10-inch square pan.
- Use a spatula to spread the fudge evenly across the bottom of the pan, ensuring it reaches all corners.
- Cover the pan with plastic wrap or another sheet of foil to prevent a skin from forming on the surface of the fudge during chilling.
- Place the pan in the refrigerator and chill for at least 2 hours, or until the fudge is firm.
- Once the fudge is firm, use the foil overhang to carefully lift the fudge from the pan.
- Gently peel away the foil from the sides and bottom of the fudge.
- Place the fudge on a cutting board and use a sharp knife to cut it into desired-sized squares. For neat squares, wipe the knife clean between each cut.
- Serve immediately or store for later enjoyment.
- For longer storage, you may refreeze this treat.
Expert Tips & Tricks
- White Chocolate Quality: The quality of your white chocolate significantly impacts the fudge’s flavor and texture. Opt for a high-quality brand for the best results. Cheaper white chocolate may not melt as smoothly and can result in a grainy texture.
- Preventing Scorching: White chocolate is particularly prone to scorching. Constant stirring over medium-low heat is essential to prevent burning and ensure smooth melting. If you’re concerned about scorching, you can melt the chocolate in a double boiler or in the microwave in 30-second intervals, stirring in between.
- Salt Enhancement: Don’t skip the salt! A teaspoon of salt balances the sweetness of the fudge and enhances the toffee flavor.
- Even Toffee Distribution: To ensure an even distribution of toffee bits, reserve a small amount to sprinkle on top of the fudge after pouring it into the pan. This adds a visually appealing touch and ensures every bite has a satisfying crunch.
- Freezing for Easy Cutting: For extra clean cuts, freeze the fudge for about 30 minutes before cutting. This will firm it up even further and prevent it from crumbling.
Serving & Storage Suggestions
Serve the toffee fudge chilled or at room temperature, depending on your preference. It’s a delightful treat on its own, or you can enhance the experience by serving it alongside a scoop of vanilla ice cream or a cup of hot coffee.
Store leftover fudge in an airtight container in the refrigerator for up to a week. For longer storage, freeze the fudge for up to 2 months. Thaw in the refrigerator before serving. Note that freezing may slightly alter the texture of the fudge, making it a bit more crumbly.
Nutritional Information
(Note: Values are approximate and may vary based on specific ingredients used.)
| Nutrient | Amount per Serving | % Daily Value |
|---|---|---|
| Calories | 312.8 kcal | N/A |
| Calories from Fat | 145 g | 47% |
| Total Fat | 16.2 g | 24% |
| Saturated Fat | 9.9 g | 49% |
| Cholesterol | 22.4 mg | 7% |
| Sodium | 322.7 mg | 13% |
| Total Carbohydrate | 38.6 g | 12% |
| Dietary Fiber | 0 g | 0% |
| Sugars | 38.6 g | 154% |
| Protein | 4.7 g | 9% |
Variations & Substitutions
- Dark Chocolate Toffee Fudge: Substitute dark chocolate chips for white chocolate chips for a richer, less sweet flavor profile.
- Nutty Toffee Fudge: Add 1/2 cup of chopped nuts (such as pecans, walnuts, or almonds) along with the toffee bits for extra crunch and flavor.
- Espresso Toffee Fudge: Stir in 1 tablespoon of instant espresso powder with the melted chocolate for a coffee-infused twist.
- Sea Salt Toffee Fudge: Sprinkle a pinch of sea salt flakes on top of the fudge after pouring it into the pan for a contrasting salty-sweet flavor.
- Peppermint Toffee Fudge: Add 1/4 teaspoon of peppermint extract with the butter and salt, and sprinkle crushed peppermint candies on top for a festive holiday treat.
FAQs (Frequently Asked Questions)
Q: Can I use a different size pan?
A: While a 10-inch square pan is recommended for the specified thickness, you can use a different size. Keep in mind that a smaller pan will result in thicker fudge, and a larger pan will yield thinner fudge. Adjust the chilling time accordingly.
Q: My white chocolate seized up while melting. What can I do?
A: Seizing can happen if even a small amount of water gets into the melting chocolate. Try adding a tablespoon of vegetable oil or shortening and stirring vigorously. This can sometimes help to loosen the chocolate and restore its smooth texture.
Q: How do I know when the fudge is set enough to cut?
A: The fudge should be firm to the touch and easily liftable from the pan using the foil overhang. If it’s still too soft, return it to the refrigerator for a longer chilling period.
Q: Can I make this fudge without toffee bits?
A: Yes, you can omit the toffee bits, but it will no longer be toffee fudge. Consider adding other mix-ins like chopped nuts, dried cranberries, or mini chocolate chips.
Q: Is it necessary to line the pan with foil?
A: Lining the pan with foil (and greasing it) is highly recommended. It makes removing the fudge from the pan much easier and prevents it from sticking, resulting in cleaner cuts.
Final Thoughts
This Toffee Fudge is more than just a simple dessert; it’s a trip down memory lane, a sweet indulgence perfect for sharing with loved ones or savoring on your own. The creamy white chocolate base, studded with crunchy toffee bits, creates a symphony of flavors and textures that’s simply irresistible. So, gather your ingredients, put on your apron, and get ready to create a batch of this delightful fudge. I hope it brings as much joy to you as it does to me! Don’t hesitate to experiment with variations and make it your own signature treat. And please, share your creations and feedback – I’d love to hear how it turns out for you!